If you are reading this post, chances are that you have some of the early versions of the Headplay HD FPV goggles and have noticed that when your FPV video signal gets low, the screen will switch over to a blue screen (which is the way TV’s work as its nicer to see a blue screen that static). But for FPV we dont want this, as any video signal that gets through the static can still be used to help us fly and prevent us from crashing. This guide will show you how to update the firmware to your goggles work properly for FPV.
If you ordered your headplay HD units from us after August 2015, then you already have the new firmware that fixes the blue screen issue.

Jason Cole over at RCgroups has posted a great guide on how to flash new firmware onto your headplay HD goggles, but please be aware that you should only try to do this if you know what you are doing as you could always damage your goggles and doing things like this are not covered under warranty.
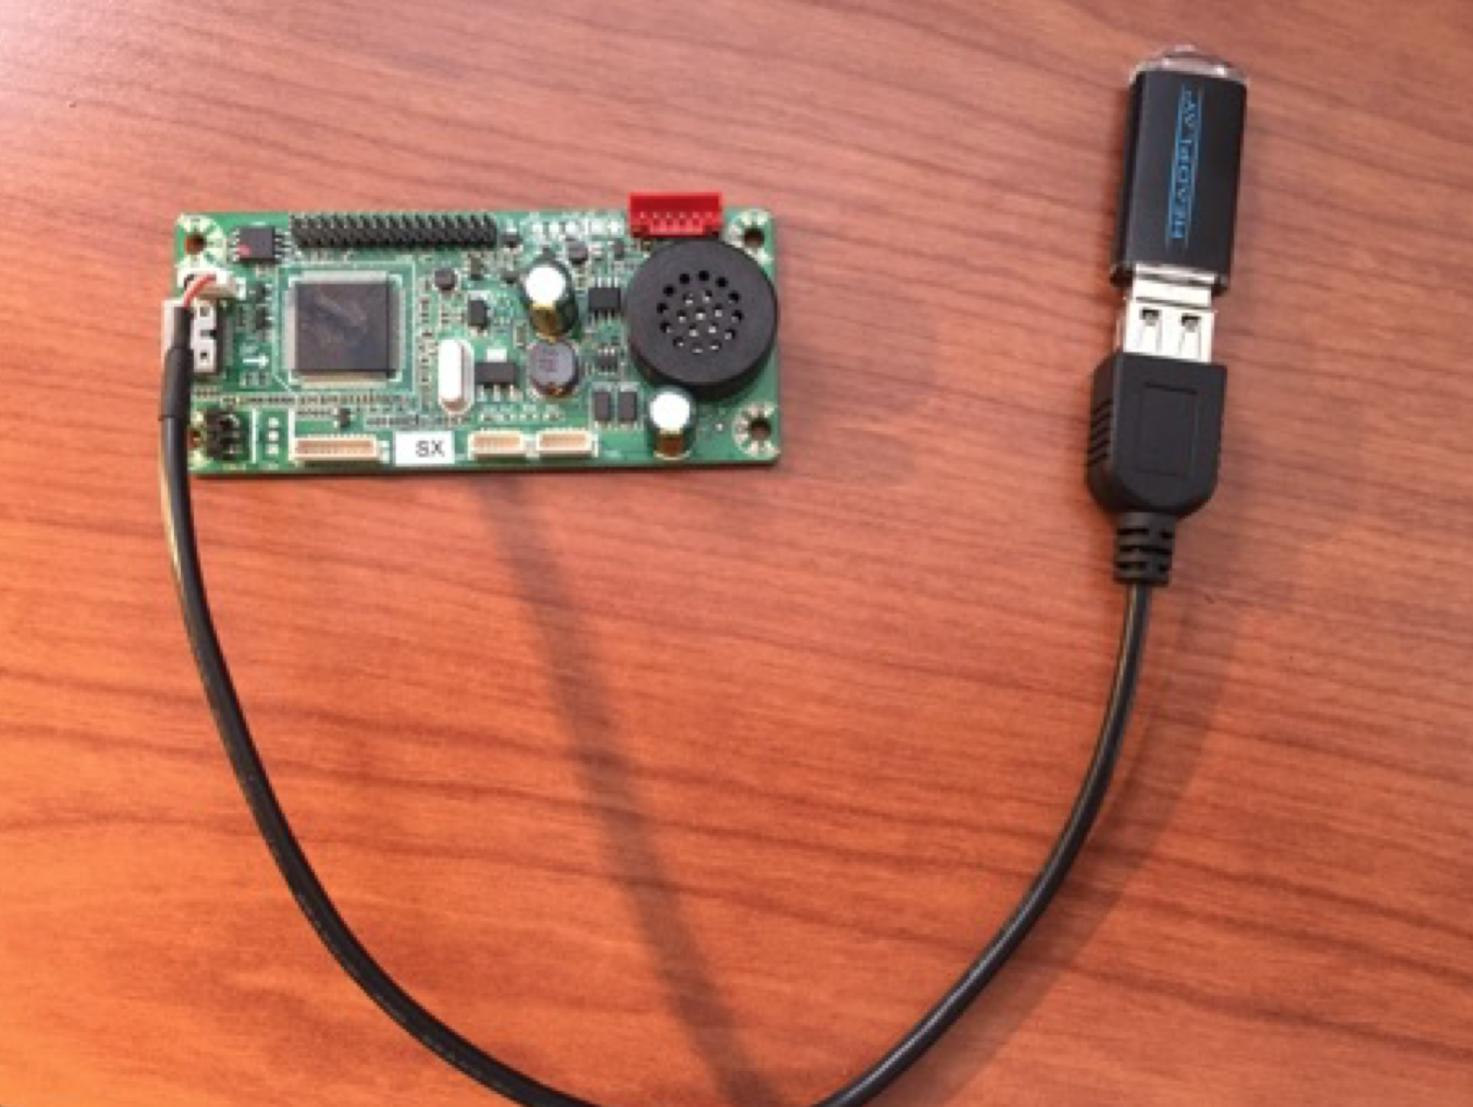
Make a USB cable
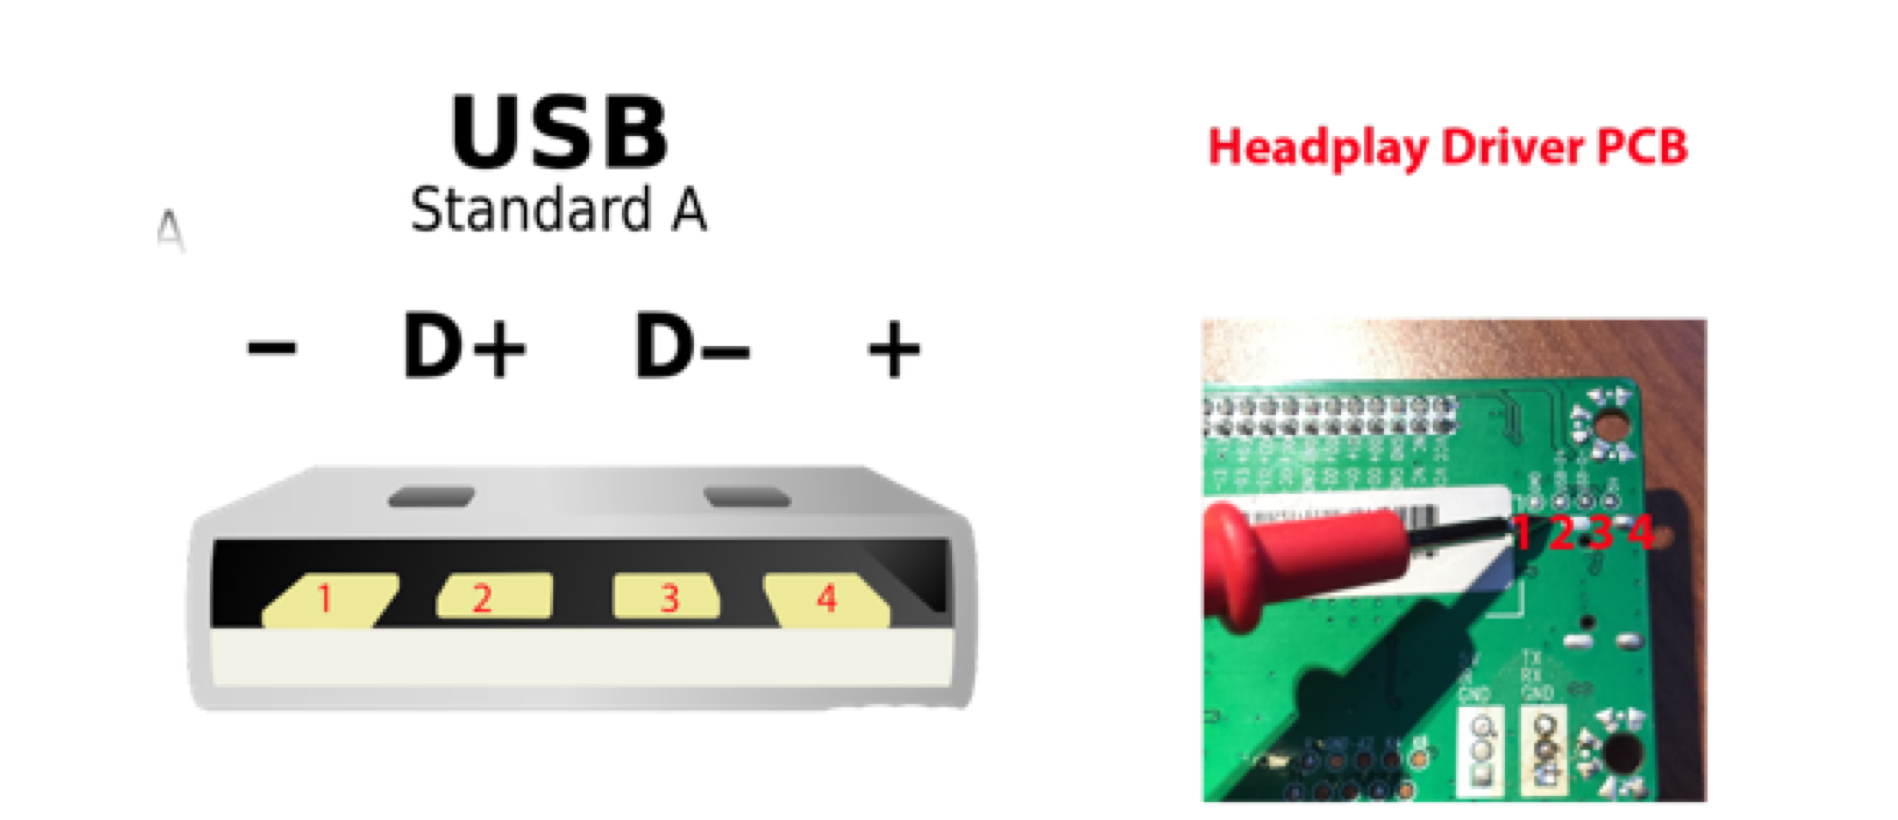
In order to connect to the headplay main board, you will need to make a female USB cable harness that you can connect a USB flash drive to.
The pinouts for the USB connector are shown, you will need to make sure that the pins 1-4 map to the appropriate pins 1-4 on the headplay HD main board as shown below:
Download the firmware
Once the cable is complete you will need to download the firmware which can be found here (thanks to jason cole)
Flash the new firmware
You will need to make sure that your USB flash drive is formatted to fat32, and clear all contents on the drive. You will then need to copy the .bin file onto the drive.
You will then connect the USB drive to the custom made USB cable, to your headplay HD main board. Once everything is connected you will need to plug in the battery to your headplay HD goggles while pressing all of the buttons on the side of the goggles. In order to do this its much easier to dismantle the button board so you can use something like a credit card or ruler to press them all down at once.
Once powered with the buttons pressed down the USB drive will start to flash, indicating that the headplay is reading the firmware. You can now release the buttons, and after around 2 minutes the LED on your flash drive will stop flashing, indicating that the firmware flash is complete.
Once complete you will not longer have the FPV blue screen issue anymore and your goggles should work as in the video below:

A small side note, is that when you first turn on your headplay goggles, you will see a black screen until it picks up the video signal for the first time.