This is part 2 of the Emax Nighthawk X5 Build Guide. Part 1 of the guide can be found here. In this part, we mainly focus on the configuration of the SP Racing F3 Evo flight controller and we also includes such details as how to bind the receiver to the radio.
Binding the R6DS Receiver to the AT9S Radio
So we might as well start with an easy setup - binding the receiver to the radio. We have in fact created a short video on this process which you can see here:

Configuration of the SP F3 Evo Flight Controller
What we’re going to go through
So, there are just a few simple steps to take you through an initial configuration of the F3 Evo flight controller.
We don’t need to worry about:
- GPS
- OSD
- Telemetry etc
We only need to concentrate on:
- The receiver
- The motors and ESCs
- The ideal PIDs
- And a few extra such as the LEDs and the voltage and current monitor
Initial Configuration
The first step is to plug your F3 Evo into your computer and open CleanFlight (you can install CleanFlight by simply searching for it on Google). The board should connect automatically and you will see a virtual quadcopter appear.
Setup Tab
- In this tab, it is always good practice to first perform an accelerometer and magnetometer calibration. Just follow the instructions on screen to do this.

- Remember to press Save and Reboot
Configuration Tab
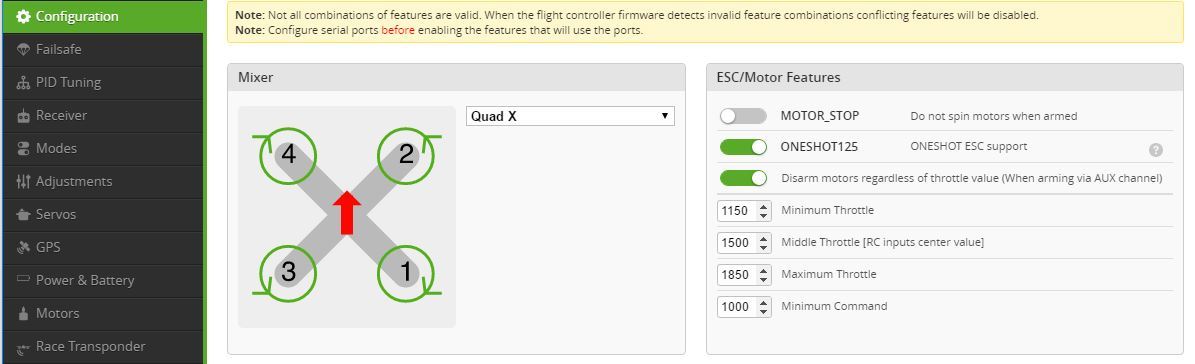
- We start with selecting what type of aircraft we are using. Here, we are using the classic Quad X aircraft and you need to make sure this is selected.
- To the side of this are the ESC/Motor Features. Here, we’ve selected to not have the motors spin when it is armed (personal preference) and you need to ensure that OneShot125 is enabled. Find out more on OneShot by reading our guide.
It’s also a good idea to enable active braking on your quad. Find out how to do this here.
- So we move down the Configuration tab and we see the receiver mode options. Here, we are using a PPM receiver, so we make sure this is selected.
- We then press Save and Reboot
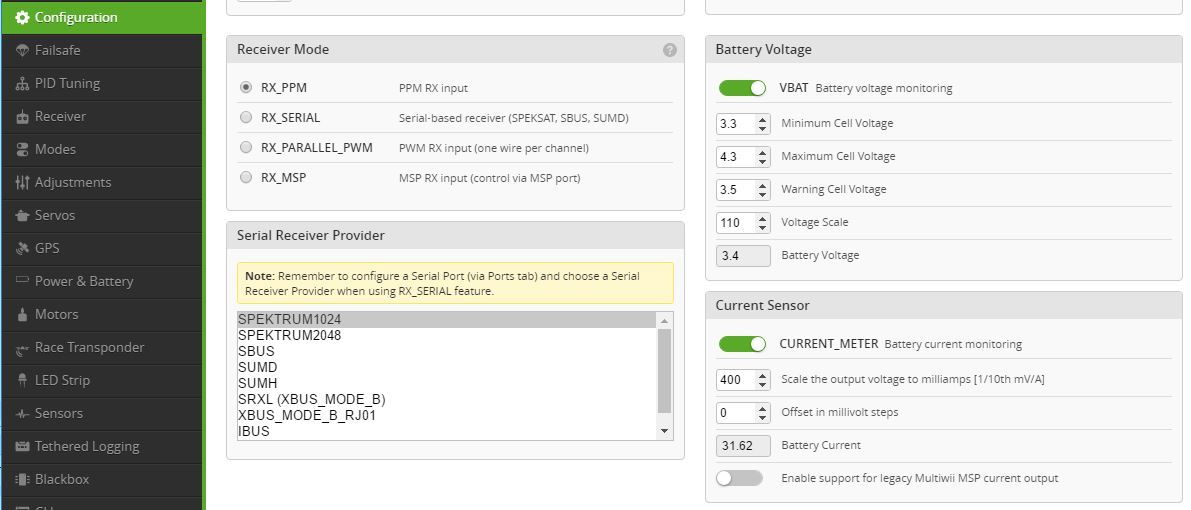
- We also see on the right options to enable the battery voltage monitor and the current meter. We can enable these to have these functions.
- We can then further calibrate the battery voltage. This is the process by which we check that CleanFlight is measuring the correct voltage output from your battery.
- We can also setup a failsafe procedure using the ‘Minimum Cell Voltage’ option and we can setup when we want a battery voltage warning with the ‘Warning Cell Voltage’ option (so you know to land pretty sharpish).
- We have a short video going through this process below.

Receiver Tab
- We’ll skip the Failsafe and the PID tab for now but we will return to these later.
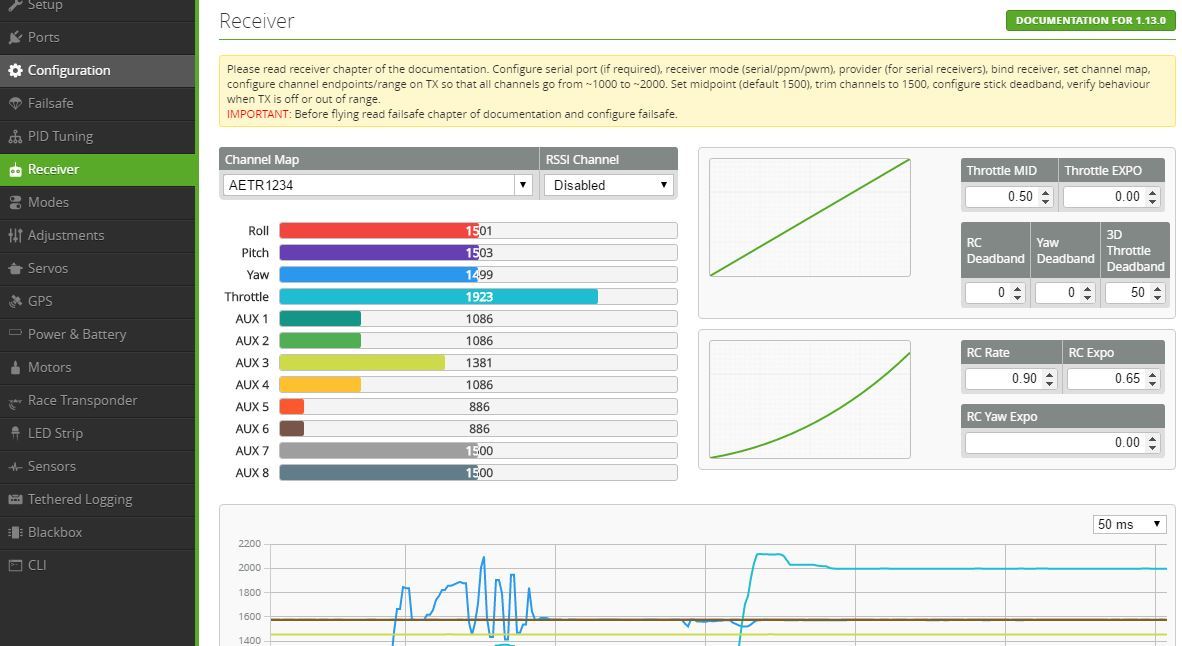
- In the Receiver tab, we just need to make sure our channels are mapped correctly with the radio.
- For this, you need to turn on your radio (making sure that the receiver is bound to the radio that you’re using - see the video above) and we can see what’s going on.
- Simply make sure that as you put your throttle up, the throttle bar on the screen also goes up and vice versa. Repeat for all channels. You may need to change the channel map at the top of the page.
- We have a short video explaining what to do if you do find that your channels are mapped incorrectly.
- Once you have it right, click save.
ESC Calibration
- For the ESC calibration, it is best to do the calibrating through the BLHeli Suite. We have a comprehensive BLHeli guide about this process.
- Here, you can set up the active breaking, set the maximum and minimum throttle level and change the spin direction on your motor if necessary.
Modes Tab
- So we can now move onto the modes tab. If you skip this tab and don’t setup any modes for yourself, the quad will automatically be in Rate/Acro mode (which isn’t a good idea if you are a beginner).
- The two most important modes for a beginner to use are Angle and Horizon mode as they limit your movement in some way.
Rate/Acro Mode: this is the mode you are aiming to progress to in order to perform impressive flips and stunts. In this mode, the pilot is in manual control of the quad at all times and you control the velocity of rotation of the quad. This means that when you increase the pitch stick for example, the quad will pitch forward at a constant rate (until it flips over if you leave it there). If you let go of the pitch stick, the quad will NOT return to neutral automatically and will retain its current attitude unless you decrease the stick by the same amount.
Angle Mode: this prevents the pilot from doing flips and stunts. For example, when you put the pitch stick to its maximum, the quad will head off into the distance but it won’t continue to flip 360 degrees around its axis. It will pitch to a certain degree (that you can setup yourself) and then stay there. If you lower the pitch stick to, say, 50% then the quad will pitch 50% of the max angle you have chosen. When you let go of the stick, the quad return to neutral. This is ideal for beginners.
Horizon Mode: this is a mixture between Angle mode and Rate/Acro mode. When the sticks are near the centre position the quad acts in Angle mode, but when the stick are at their maximum, the mode reverts to Rate/Acro so you can do flips and stunts.
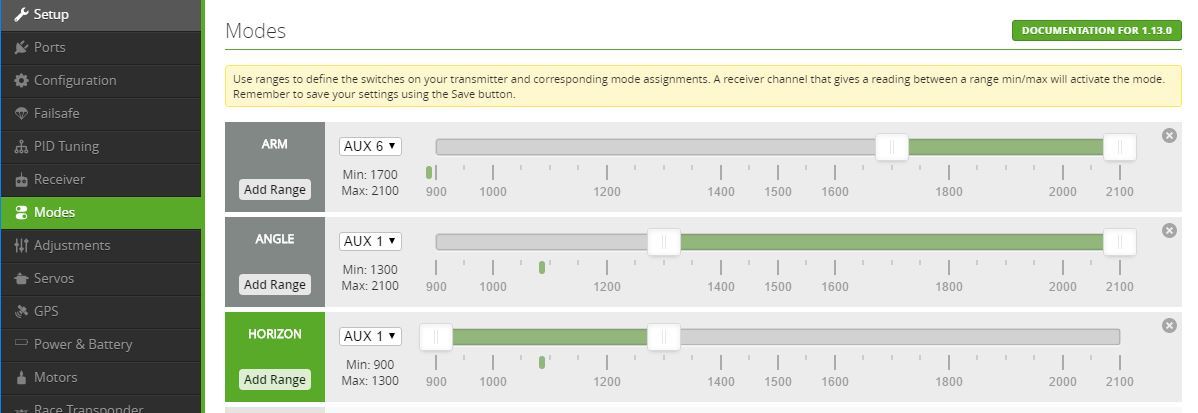
- In the above pictures, you can see that we have set up our flight modes in this way. We have set up the two modes (Angle and Horizon) on AUX 1 of our radio - you can chose whichever channel suits you best.
- When we are in flight, we can flip our AUX 1 to change between Angle mode and Horizon mode.
- You can also see that we have set up an arming mode. We have chosen a simple 2-position switch on our radio (AUX 6) and so we need to flip this on to arm the quad.
LED Strip Tab
- This is an optional extra but since there are some LED already installed on the Nighthawk X5 PDB (and we’ve connected them in the build), we might as well configure them.
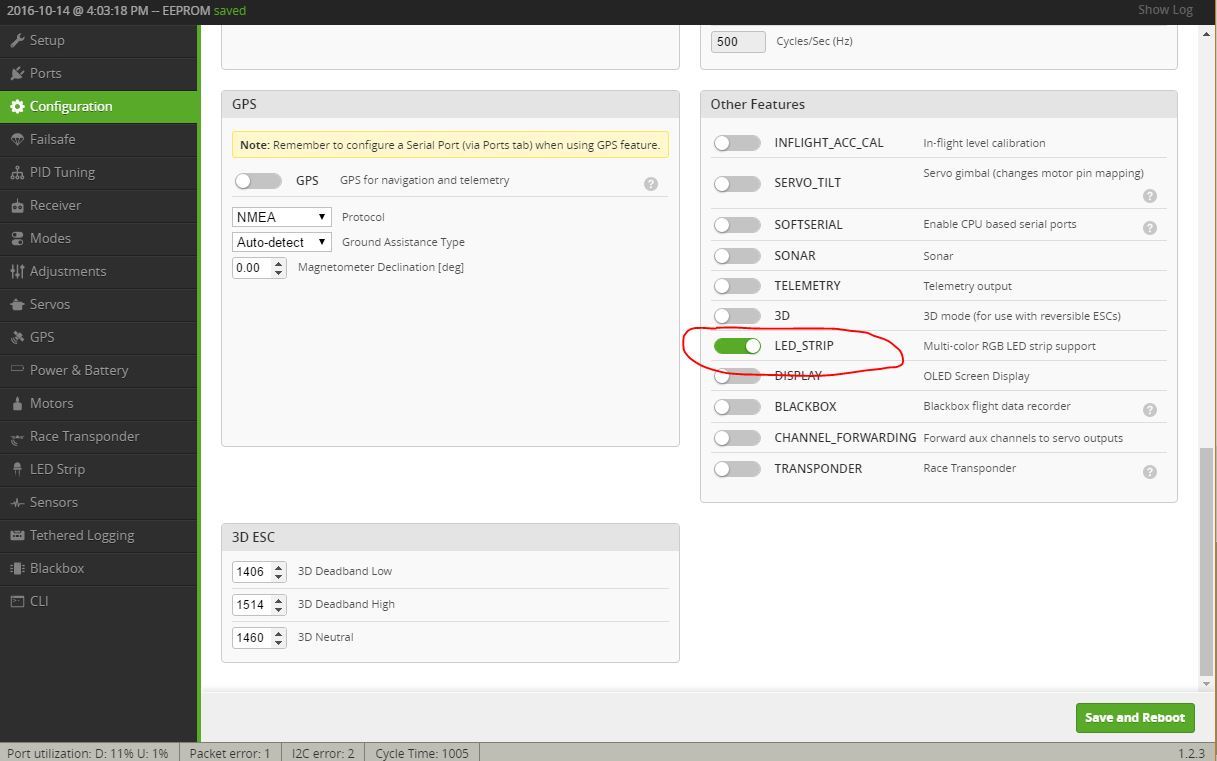
- So we first have to go to the Configuration Tab and slide the LED_STRIP option to the right, and click Save and Reboot. Check that this option is still selected after you have rebooted the board.
- Then we can go to the LED Strip Tab.
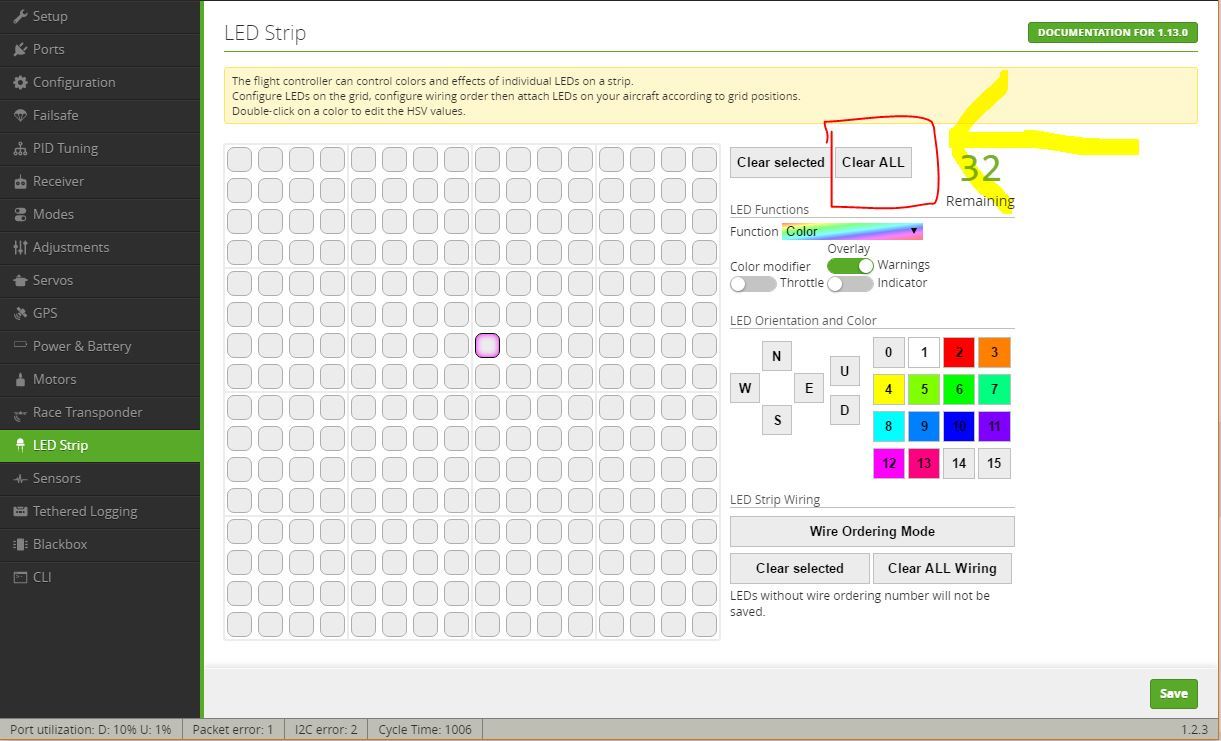
- There are only three LEDs at the back and the configuration is pretty simple. I am just going to take you through a simple setup where all the LEDs are one solid colour (so we can easily see the orientation when flying) but I’m going to set them up so they warn us when the battery voltage is low.
- So first of all, we need to clear any pattern that may be on the grid already.
- We then enter Wire Ordering Mode…
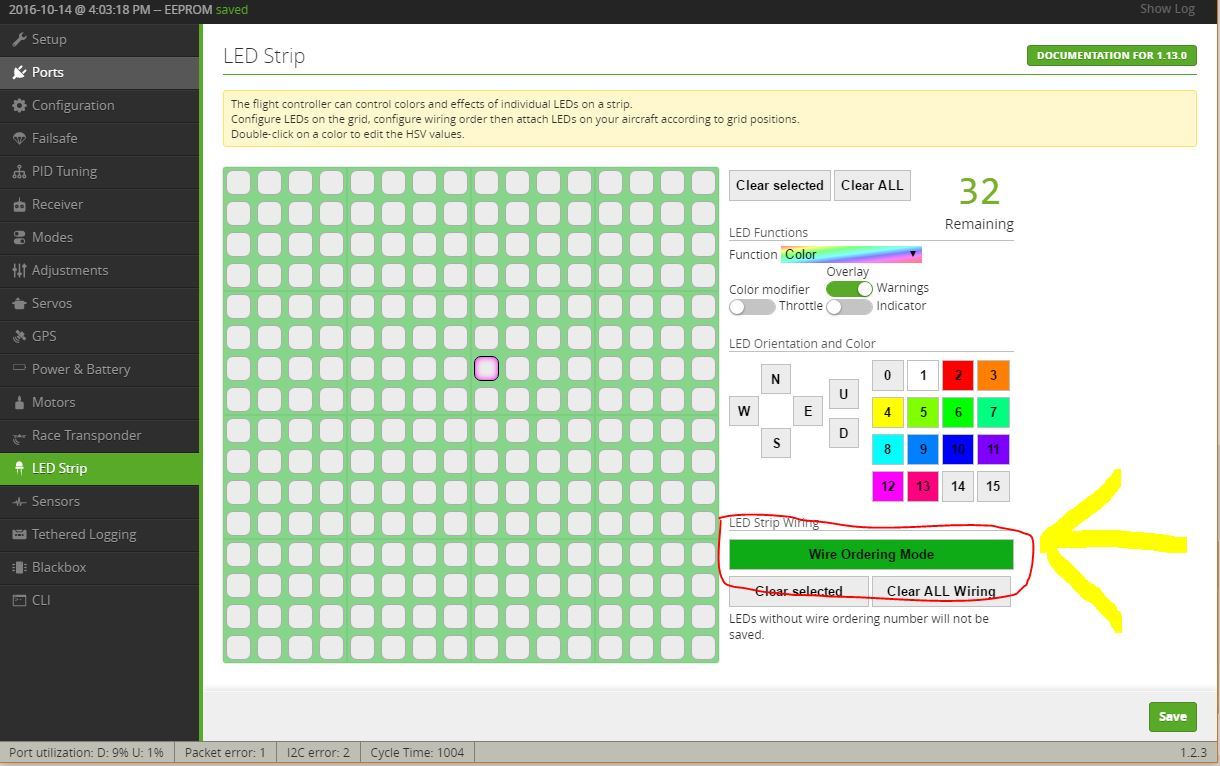
- And we select the LEDs in the pattern in which they are laid out on the quad i.e just three in a row.
- We then exit Wiring Ordering Mode
- We can now edit the LEDs individually. As I said above, I’m just going to have them all one colour (I’m going to choose blue) but and I’m also going to program them so that they flash red when the battery is low.
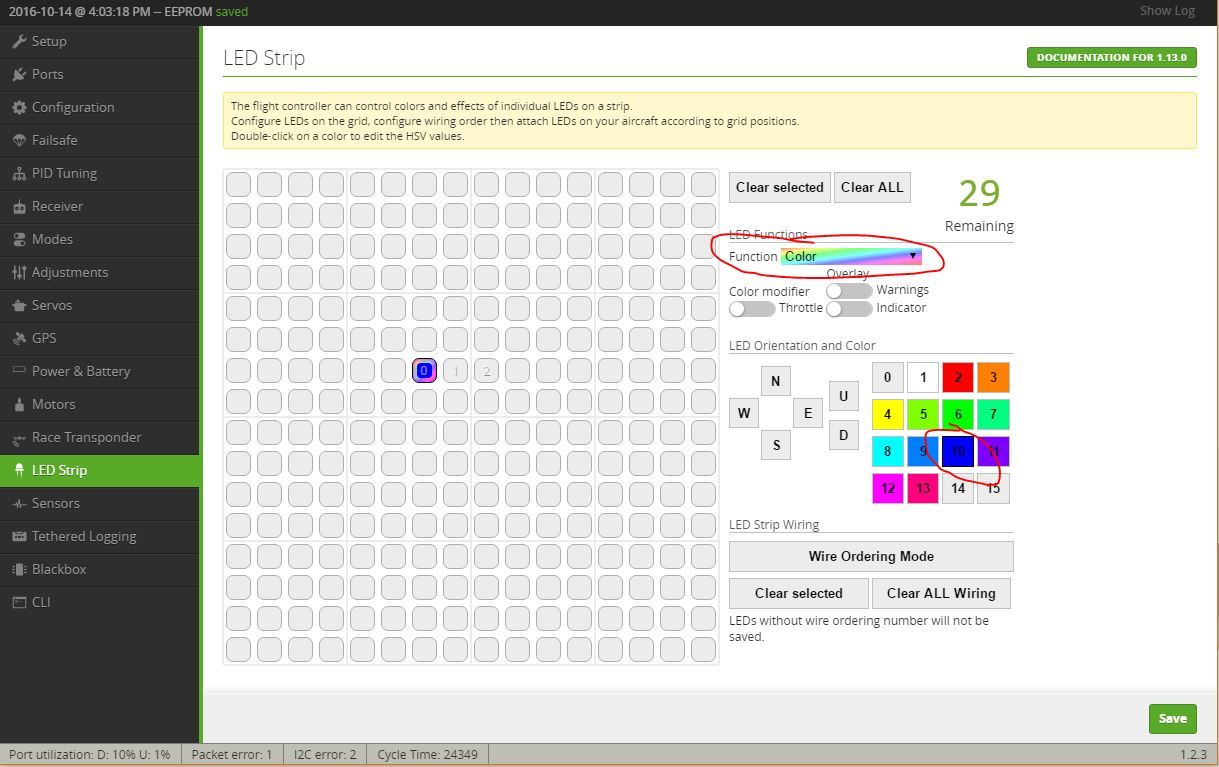
- So, to get them a solid colour, I select the Color function at the top, and then press the colour I want it to be i.e. blue.
- I repeat this for all three LEDs.
- To then enable them to flash when the battery is low, I select the individual LEDs and slide the Warning option to the right. You will see a small red dot appear on the left of the LED square.
- Repeat for all three LEDs.
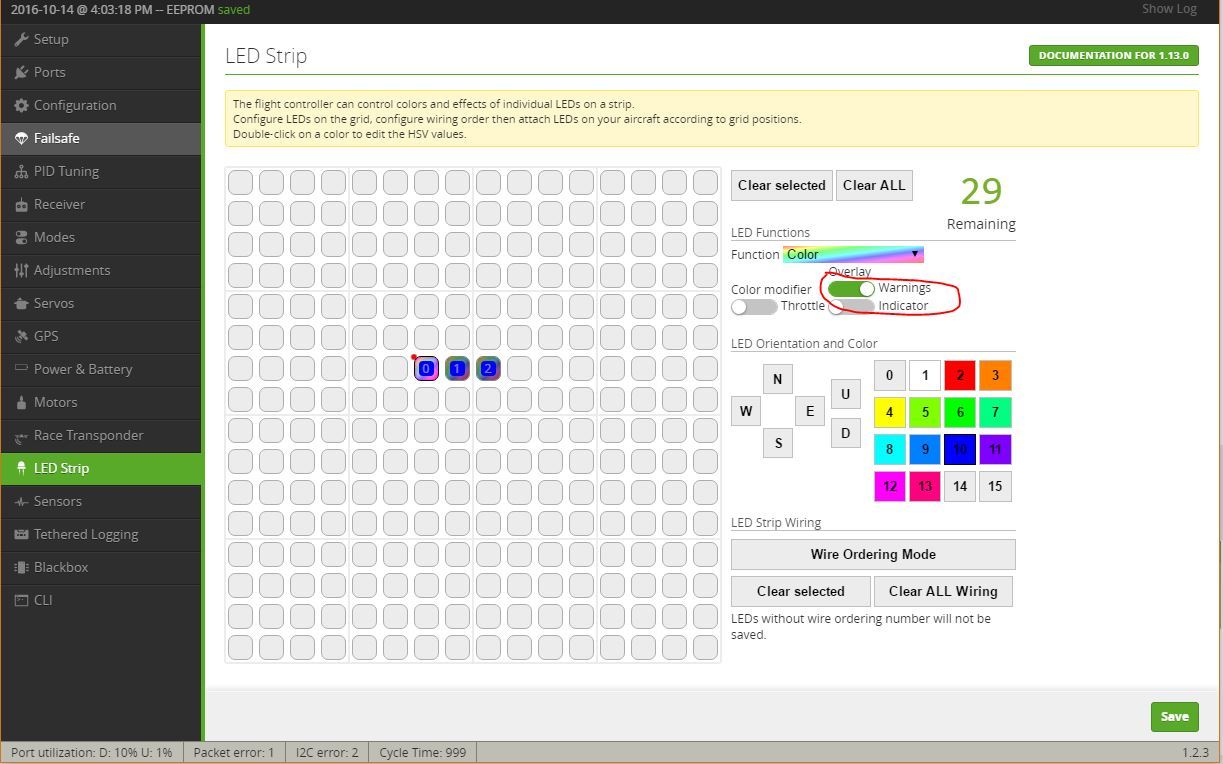
- And then we just need to click save and we’re done. If you fancy programming your LED in a more interesting way, have a look at this video:

PID Tuning Tab
- We’re nearly there. This is the most advanced configuration of the SP F3 Evo board as understanding PIDs will take some time.
- We will not attempt to explain them here (as this is a whole article in itself) and if you want to read up on them, have a look at this article.
- In principle, these are values that you ‘tune’ so that your multirotor flies smoothly and exactly how you want it to. You don’t need to adjust these but the quad won’t fly nicely without a little tuning.
- For ease, we have already done this for a 3S battery and you can see our tuning below. Just copy these values and the quad should fly soundly (with a 3S battery)
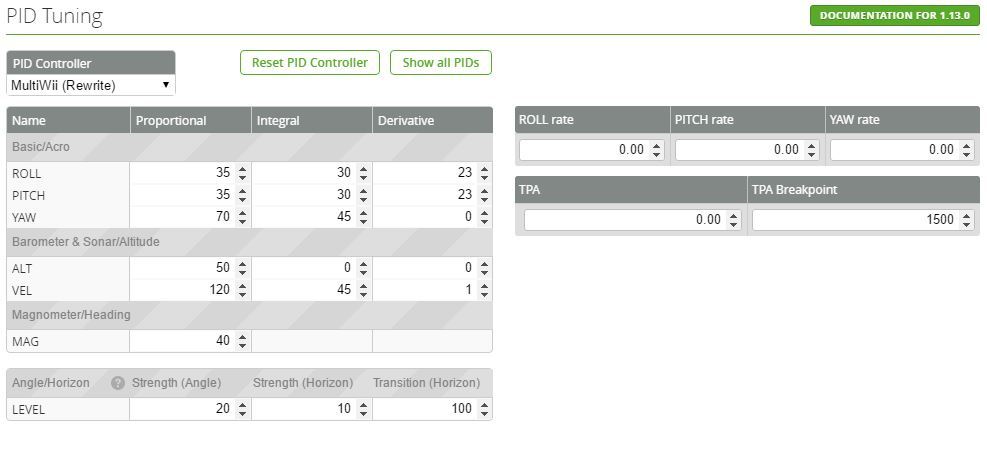
- We will soon be releasing the PID tuning for a 4S battery so keep an eye out for this.
End of Part 2
- So that is the end of Part 2 of the Nighthawk X5 Build Guide and you should be able to get up and flying perfectly now! As always, if you have any questions or comments, please post them below.