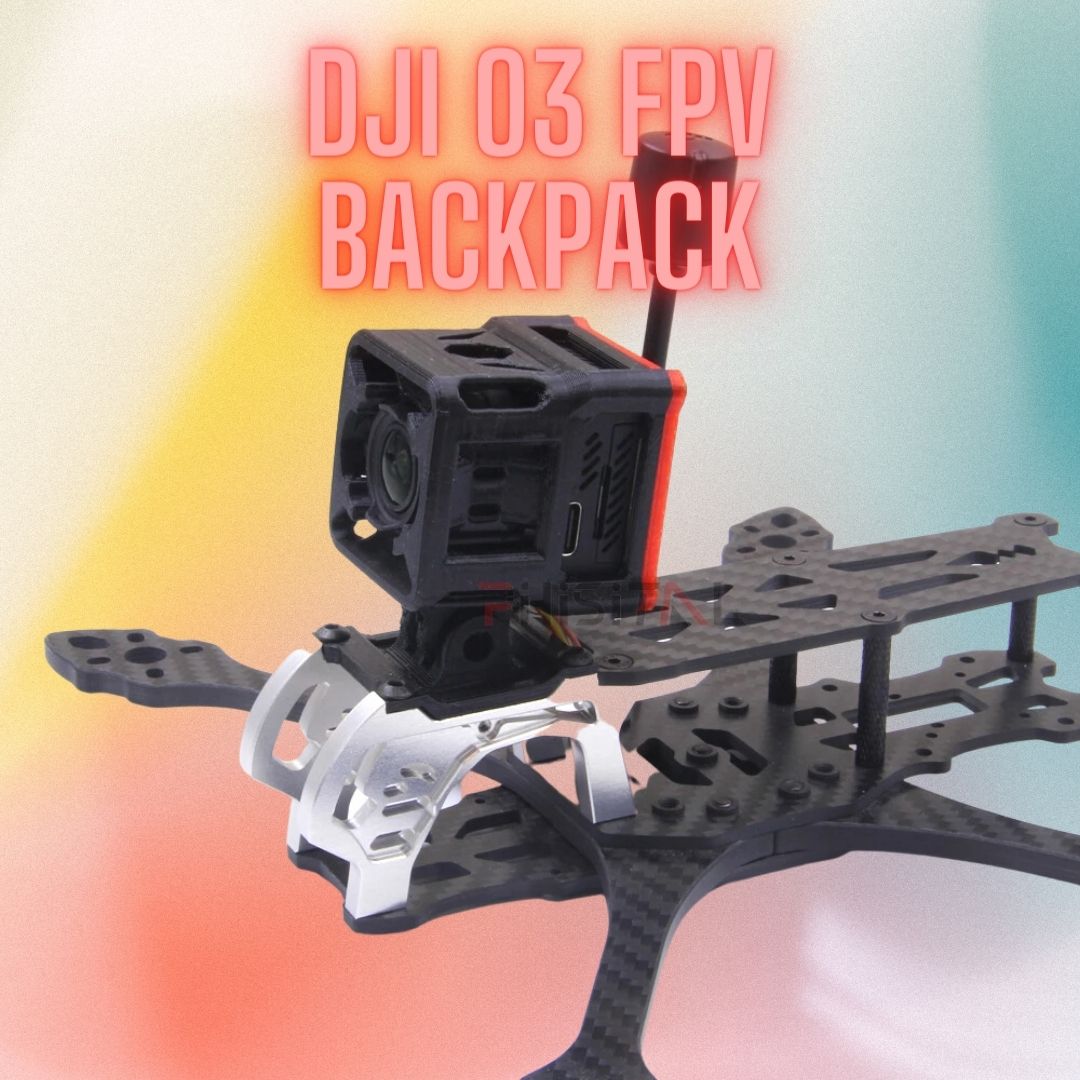
TL;DR: In this blog post, we’ll reveal a cost-effective hack to use a single O3 air unit across all your quads. By using a 3D printed TPU mount, you can easily swap your O3 air unit between your FPV drones, saving money without compromising on quality. Read on to discover the step-by-step process to make this hack work for you!

The Magic of the 3D Printed TPU Mount
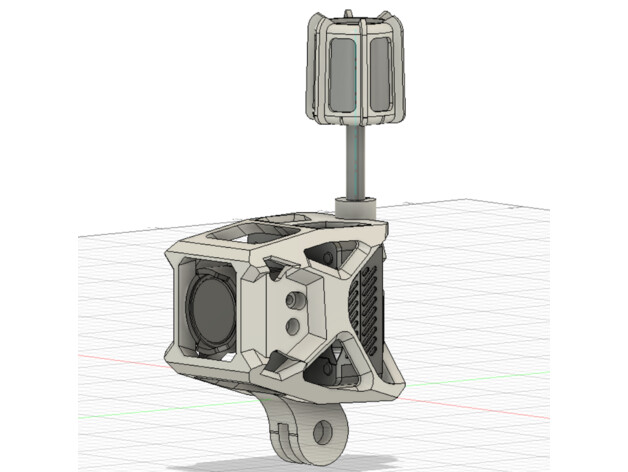
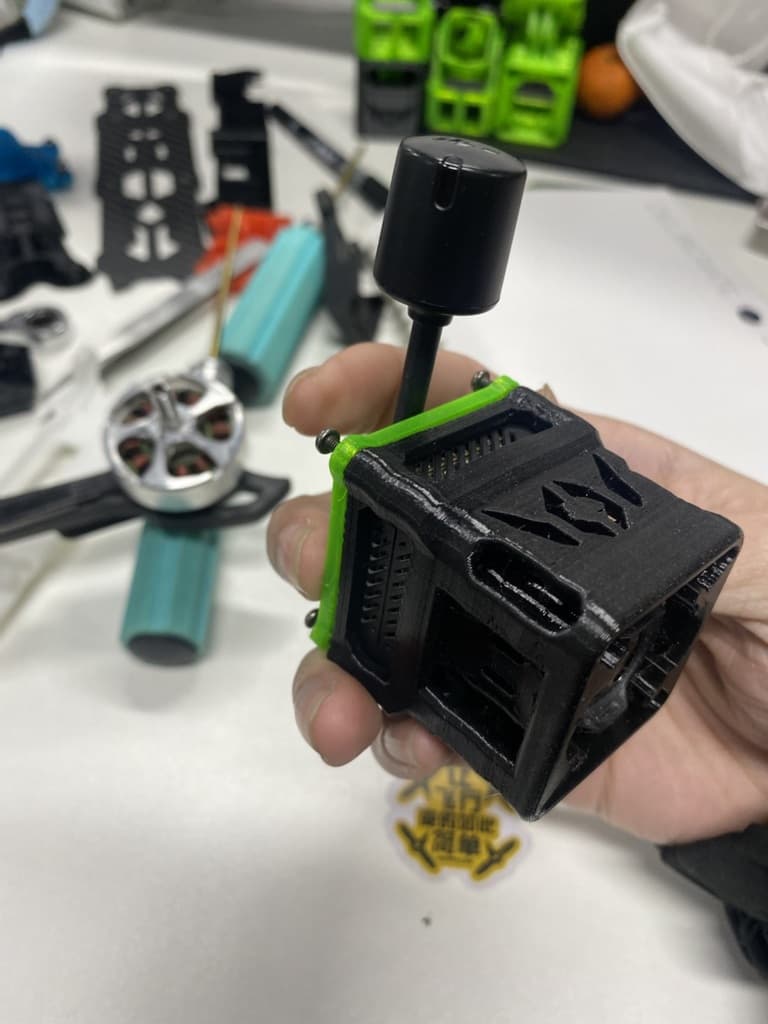
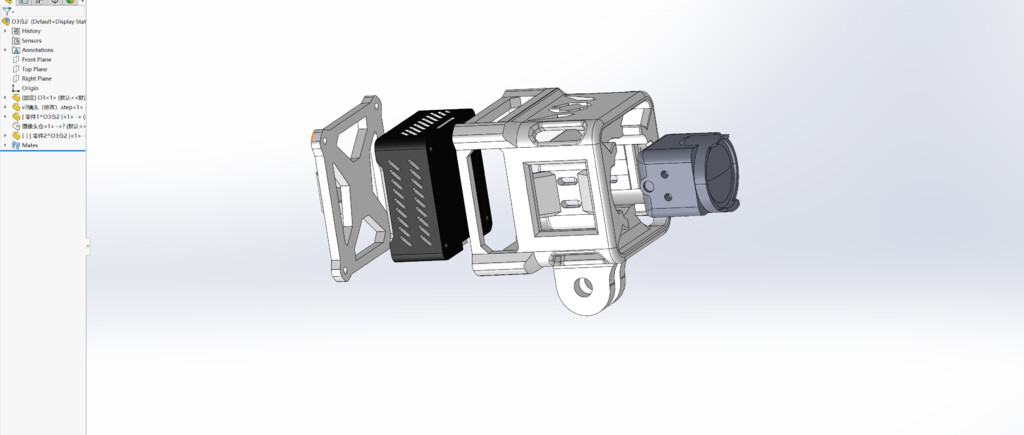
There are a few 3D prints that introduce an ingenious solution to using one O3 air unit across multiple quads: a 3D printed TPU mount. This mount securely houses the O3 air unit, the camera, the antenna, and the necessary wiring. You can purchase this mount or print one for yourself using files available on Thingiverse.
Mount 1 - https://www.thingiverse.com/thing:5827063/files
Mount 2 - https://www.thingiverse.com/thing:5822673/files
Preparing Your Quad for the O3 Air Unit
To get started, remove the top plate of your quad to access the internals. Then depending on access and your FC, you can either just directly connect your air unit into the air unit plug, or if access is an issue, you should solder yourself JST-SH female connector on a wire that then lets you easily plug in the air unit into that without having to fiddle inside your frame.
Mounting the O3 Air Unit: GoPro-Style
The 3D printed TPU mount for the O3 air unit is designed with compatibility in mind. It uses the same mounting system as a GoPro camera, specifically resembling the GoPro Session in terms of form factor. This makes the installation process familiar and straightforward for those experienced in mounting GoPro cameras on their quads.
Installation Steps
- Secure the mount: Attach the 3D printed TPU mount to your quad using the GoPro-style mount. Ensure that it is securely fastened to prevent any movement during flight.
- Position the O3 air unit: Place the O3 air unit inside the TPU mount, ensuring the camera is facing forward and the antenna and wiring are correctly positioned.
- Connect the wiring: Run the connector through the hole below the top plate of your quad and plug it in using a pair of tweezers, ensuring the connector is aligned correctly to avoid damaging the pins .
- Test the connection: Power on your quad and verify that you can see the video feed from your goggles.
The GoPro-style mounting system allows for easy installation and removal of the O3 air unit. It also enables you to utilize existing GoPro mounts, giving you more flexibility when choosing where
Swapping the O3 Air Unit Between Quads
With the TPU mount in place, you can easily swap your O3 air unit between quads without removing the top plate. Simply run the connector through the hole below the top plate, and plug it in using a pair of tweezers. Or to make is easier just make a cable extension with a female connector on the end sticking out of the top plate. This means swapping your FPV backpack over is no harder than swapping your gopro camera. Make sure the connector is aligned correctly to avoid damaging the pins.
Quick and Easy FPV Experience
Once the O3 air unit is connected, you’ll be able to view the feed from your goggles. When you want to swap the air unit to another quad, unplug the connector, remove the mount, and transfer it to your next drone. Plug in the connector, and you’re ready to fly with the O3 air unit on your new quad.
This simple hack can save you a significant amount of money while still allowing you to enjoy the benefits of the O3 air unit across your entire fleet of quads. So, embrace the convenience and affordability of using a single O3 air unit with a 3D printed TPU mount, and elevate your FPV experience today