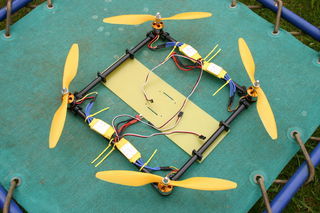
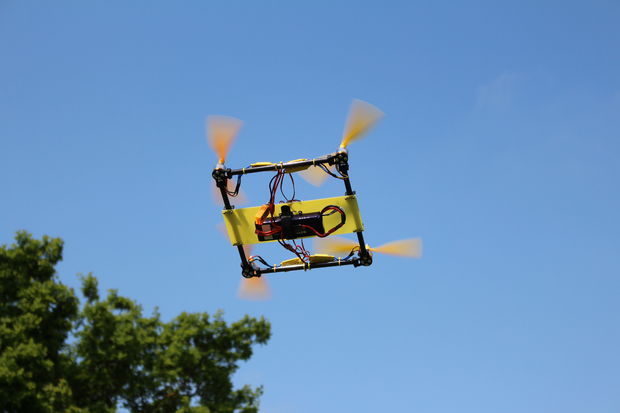
Really simple and strong quadcopter, using common A2212 brushless motors and simple 30A ESC.
For a while now i have been making complex and detailed models, so i thought it was about time to make a simple quad. and the real reason is that i am still learning how to fly! so this simple easy to repair and cheap model is just what i need to help me improve my flying.
Step 1: The main fiberglass sheet.
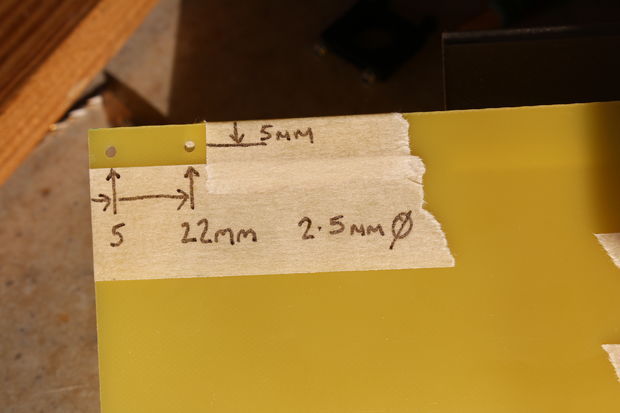
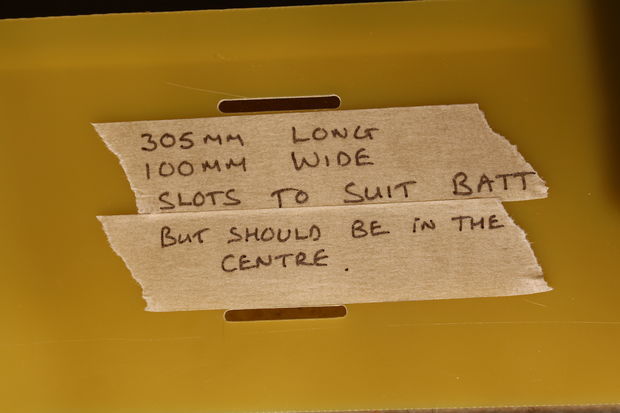
The main central sheet is 1.6mm fiberglass, you can see in the first two picture how i have marked out and drilled the holes for the corner tube mounts and the central flight control board. In the other 4 pictures you can see how i have cut the slots in the sheet to allow the Velcro strap to be threaded through.
Its a simple method to cut the slots, i just mark out the edge of the slot onto masking tape then clamp a thick piece of aluminium to the fiberglass (and work bench) then i chain drill using 2.5mm drill then drill out the slot using a 3mm drill and finally clean up with a needle file.
Step 2: The tubes and motor mounts.
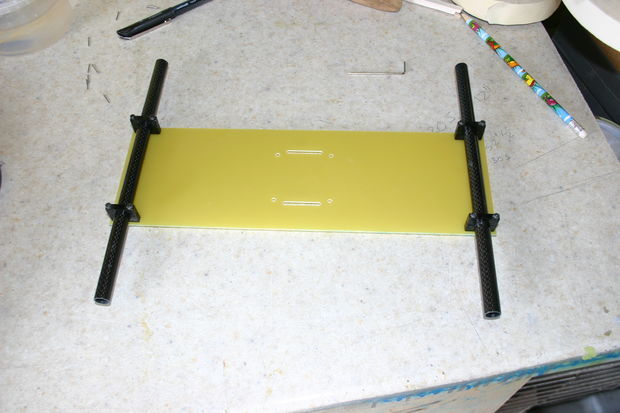
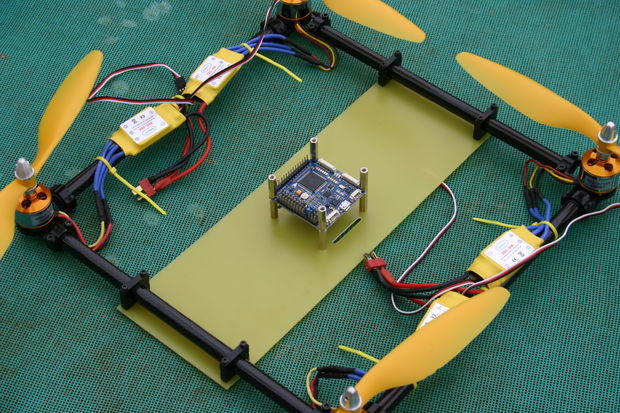
With all the holes drilled you can start to fit the hardware. at this stage don’t tighten anything up fully until all sections of tube are in place.
With the first tubes in place make sure the same amount is sticking out each side then add the motor mounts and the last two carbon tubes making sure they are the same length. Fit temporary M3 screws to clamp the two motor mounts in each corner then if happy with the alignment tighten up all the clamps.
Then you can take out the temporary M3 screws and fit the motors making sure you alternate between clockwise and anti-clockwise rotation.
The flight control board should be mounted so the rotation is correct with the arrow. For the All In One Pro board the front left motor should rotate clockwise (looking from the top)
Step 3: Wiring
Now all the hardware is complete its just a simple matter of adding the power wiring and flight control board connections.
The motors in my case are already wired in pairs so it was just a simple matter of adding a two into one power connector. And the flight control board should be wired up as per you type of board.
You may need to synchronize all the ESC but thats easy to do, in most cases you turn on the transmitter then put the throttle up to 100% then turn on one motor at a time with its servo lead connected directly to the throttle channel on the receiver and you should then be able to connect the battery and set the throttle range. on these simple ESC’s they beeb to confirm 100% then you lower the throttle to 0% and the ESC beebs again to confirm it has been accepted. the ESC then beebs a number of times to confirm the battery cell count then other once to confirm its ready.
And that is it! connect a battery and get flying!