Our new 8bit Alexmos 3 axis gimbal controllers dont include a USB port to ensure the price is as low as possible. However this introduces abit more work when upgrading the firmware and requires you to solder on some pin headers before you can connect it to your PC via the included RS232 adapter board.
How to connect to your PC
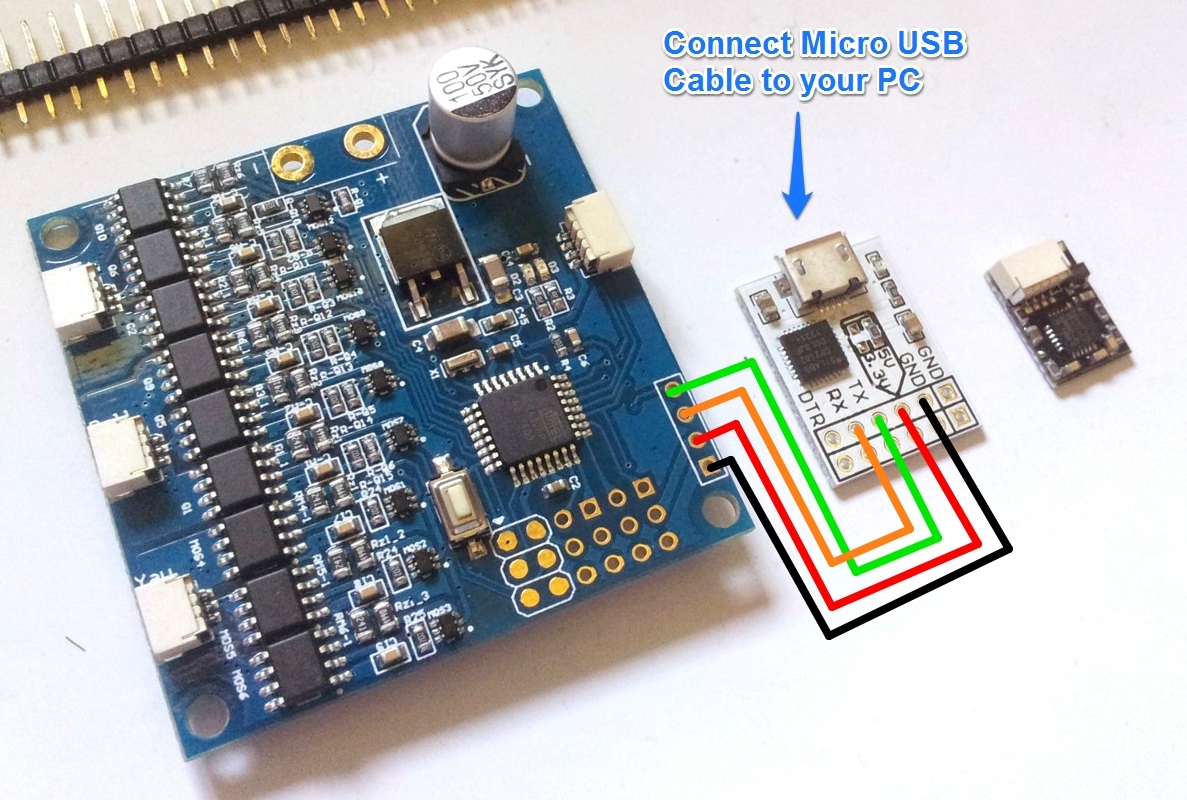
In order to configure the settings on the board you will need to connect the RS232 to USB board as shown in the diagram below. Its a good idea to use some jumper wires if you dont have and spare cables.
How to upgrade firmware
When upgrading the firmware on this board you need to jumper one of the pins to GND that you need to take in order for the firmware upgrade to be successful.
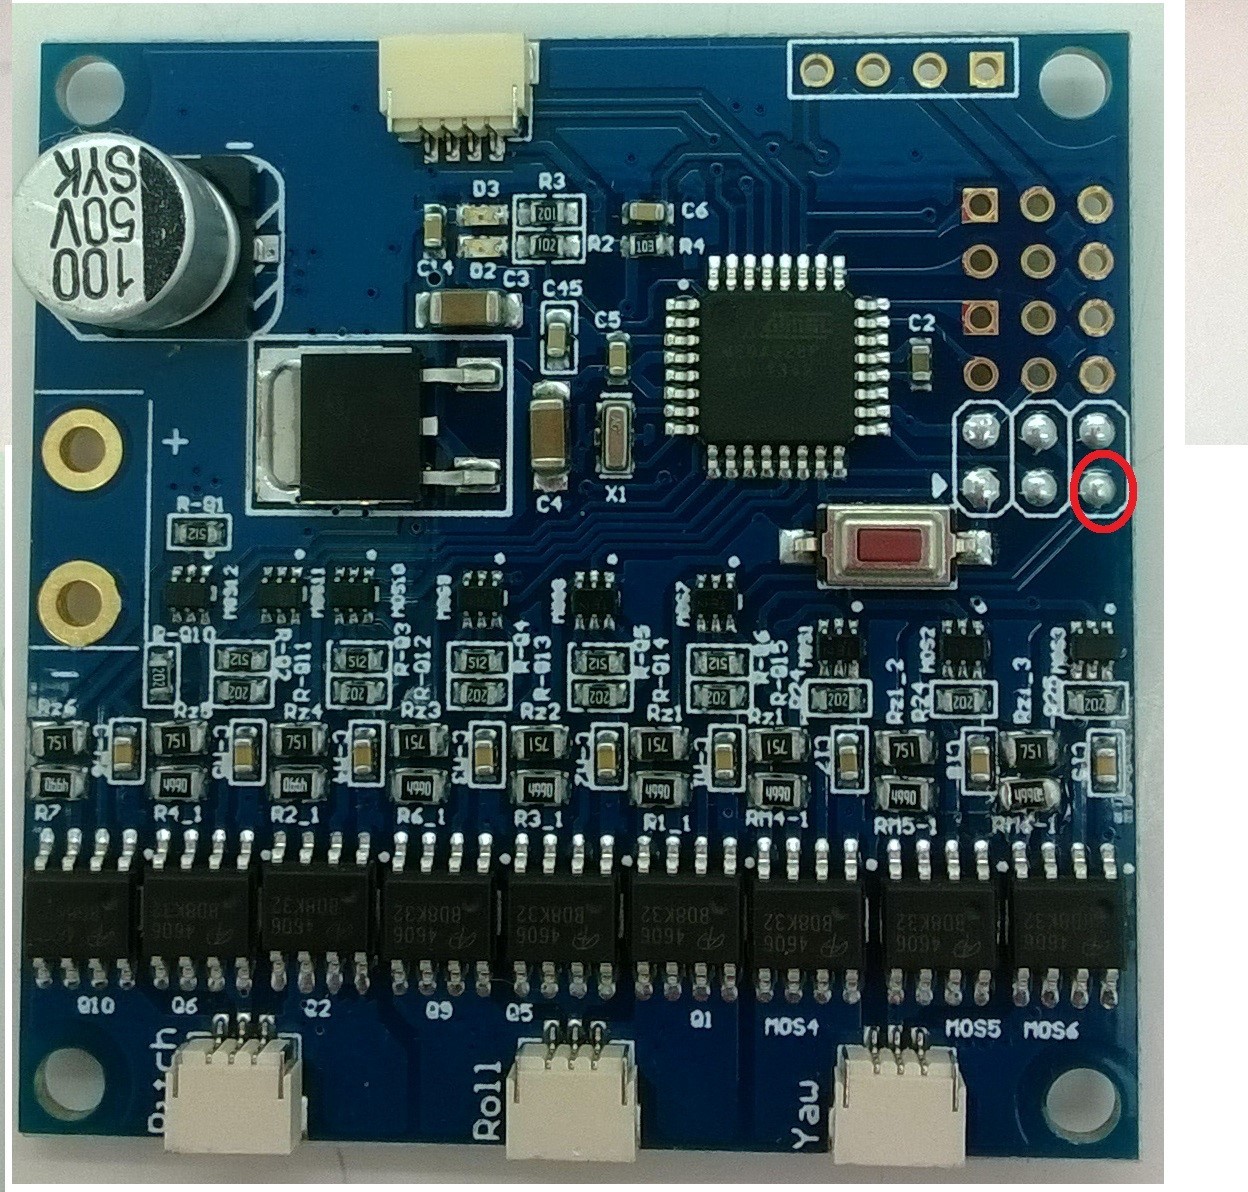
- First, locate the soldering point as circled out on the PCB board
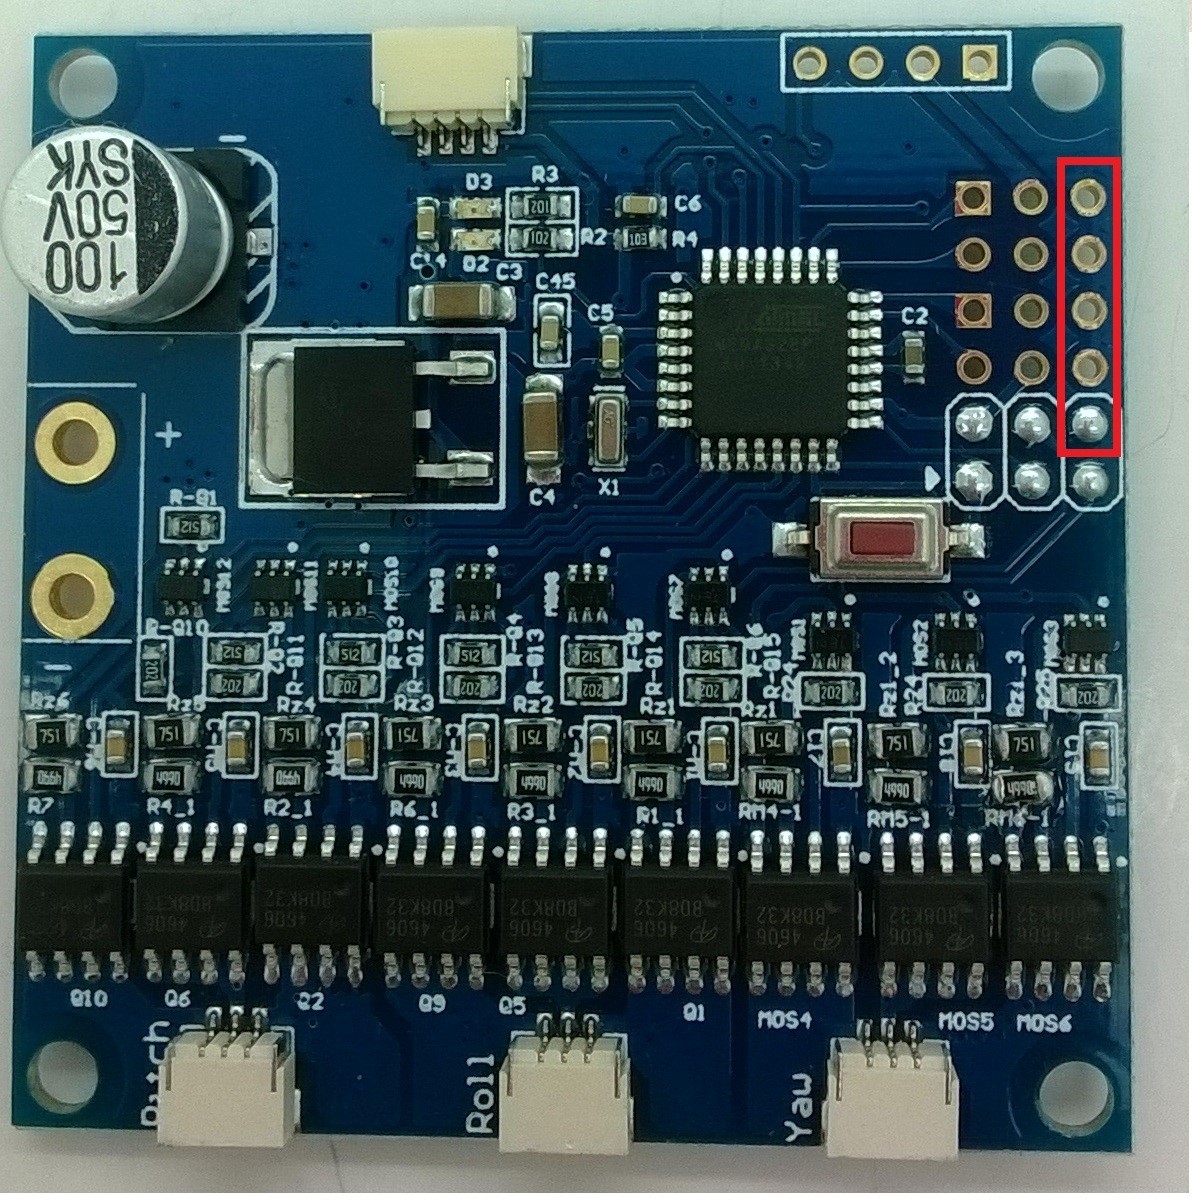
- Before you flash the new firmware, you need to connect this solder point to GND of the PCB board. You can use any points within the red frame as GND point as shown in below diagram.
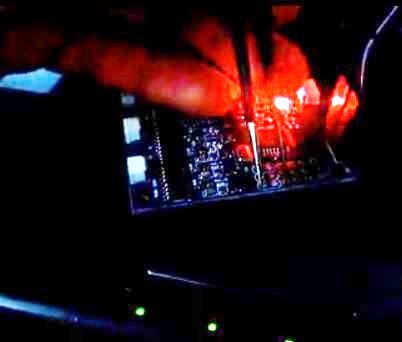
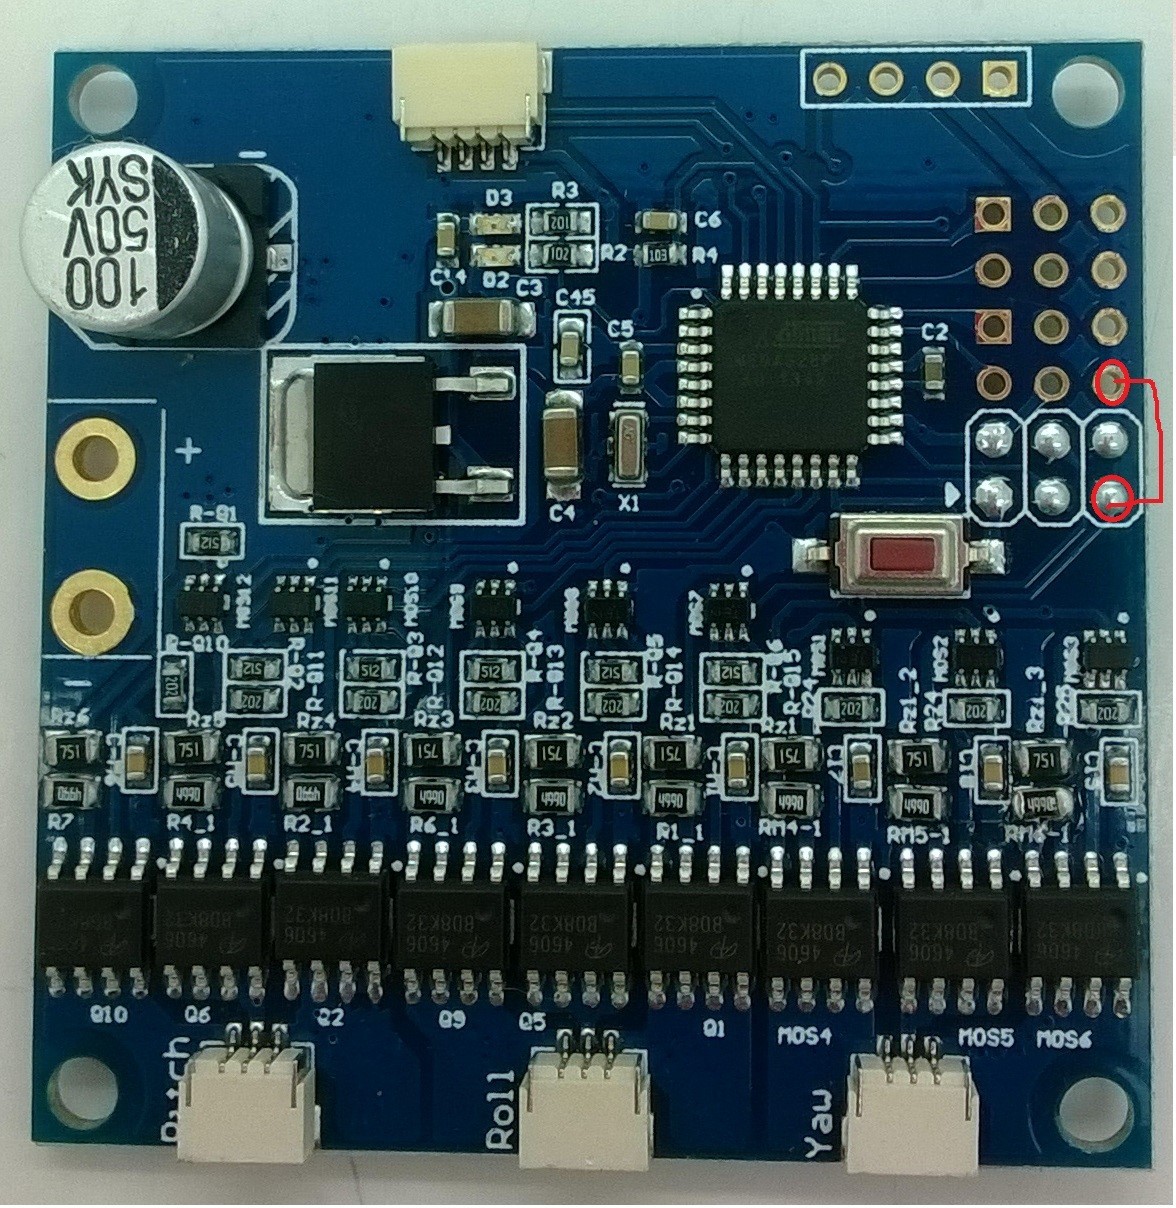
For example you can connect the two points as shown below. I do this using a metal tweezers set.
- Now you need to plug in your USB to serial port board, open GUI software, load the firmware you want to flash, then click “FLASH” button on the GUI interface, and disconnect the joint between the two points (the short circuited two points) within 1 second, then wait for the upgrading to complete.