Hi all!
Let’s do something a bit different!
I was browsing around the internet and spotted a 5" racing build someone had made. Everything was totally normal, with the exception of their motor orientation - they were inverted.
I’m well aware that’s not something new, people have done weird motor orientations before, but I rarely see them done in a way that I like, on a frame that makes sense, so, after trying very hard not to use that as an excuse to get a load of new parts, I caved and started to get stuck in.
My thinking was, pusher builds have a flaw - it’s hard to take off from the ground. I’ve seen videos with people taking off on the motor shafts, and the thought alone makes me cringe! With frames around like the Ummagawd Remix (and clones…) and the seemingly forgotten or ignored GepRC KX5 “Elegant” (which was actually released before the remix!), I thought I’d found the perfect candidates for me to satisfy my curiosity and desire for not-the-norm.
After seeing people with claims of 5-10% more efficient flights, I realised I absolutely needed to test this for myself.
First off, the parts list:
- Motors: Diatone/SunnySky EDGE 2450Kv (v2)
- Frame: GepRC KX5 Elegant
- ESC('s?): Spedix GS40A (AKA Overkill!)
- Flight Controller: HolyBro Kakute F4 v2 (non-AIO, one of my fav’s)
- Camera: TBA
- VTX: ChaosFPV 25-800mW VTX (SMA) w/ Foxeer Lollipop
- RX: FrSky XM
- Props: Emax Avan Flow (Black)
The frame, for me, was an obvious choice. I like Ummagawd’s Remix frame, quite a lot, as does everyone else - but that’s just it - EVERYONE knows and likes it - it’s not mine, it’s not unique!
Granted, neither is the KX5, but it’s a lot less well known (and has even been accused of being a clone!), and I actually prefer the way it looks. The Armattan Chameleon-esque cage at the front just appeals to me, and GepRC include an array of useful niknaks in the box, like a PDB (with XT-60), 2 battery straps, and a buzzer/LED board that integrated nicely with the frame.
Other parts, such as the motors and ESC’s, were chosen based off of what I know I like - but I should say that these particular choices are not parts I’ve flown before. I’ve flown 2300 and 2700 kV motors, and I feel like these Diatone 2450’s (which they use on their M5 quads) are going to be ideal for me - not too high, and not too low, perfectly balanced, as everything should be (no prizes for the reference, I’m afraid!). Oh, and they look nice. The ESC also looks nice, with a well-machined heat spreader, blue soft mounts (which I’m not too sure provide much benefit, but, I digress), and pre-soldered battery wires, how couldn’t I say no? Besides, I like to have way more headroom than I need on my ESC’s for peace of mind and future adaptability, at least, that’s what I like to tell myself!
The rest of the build parts are parts I’ve used and liked before (bar the XM, it’s okay, but it’s just what was available!). The Kakute with soft mounted IMU and brilliant documentation was actually from a previous build, the props are durable, fly well and look awesome (IMO), and the VTX is, to me, the absolute best bang for buck out there. The antenna is small and out the way, and I’ve found it to be durable which for me, is a must!
So, let’s start the build!
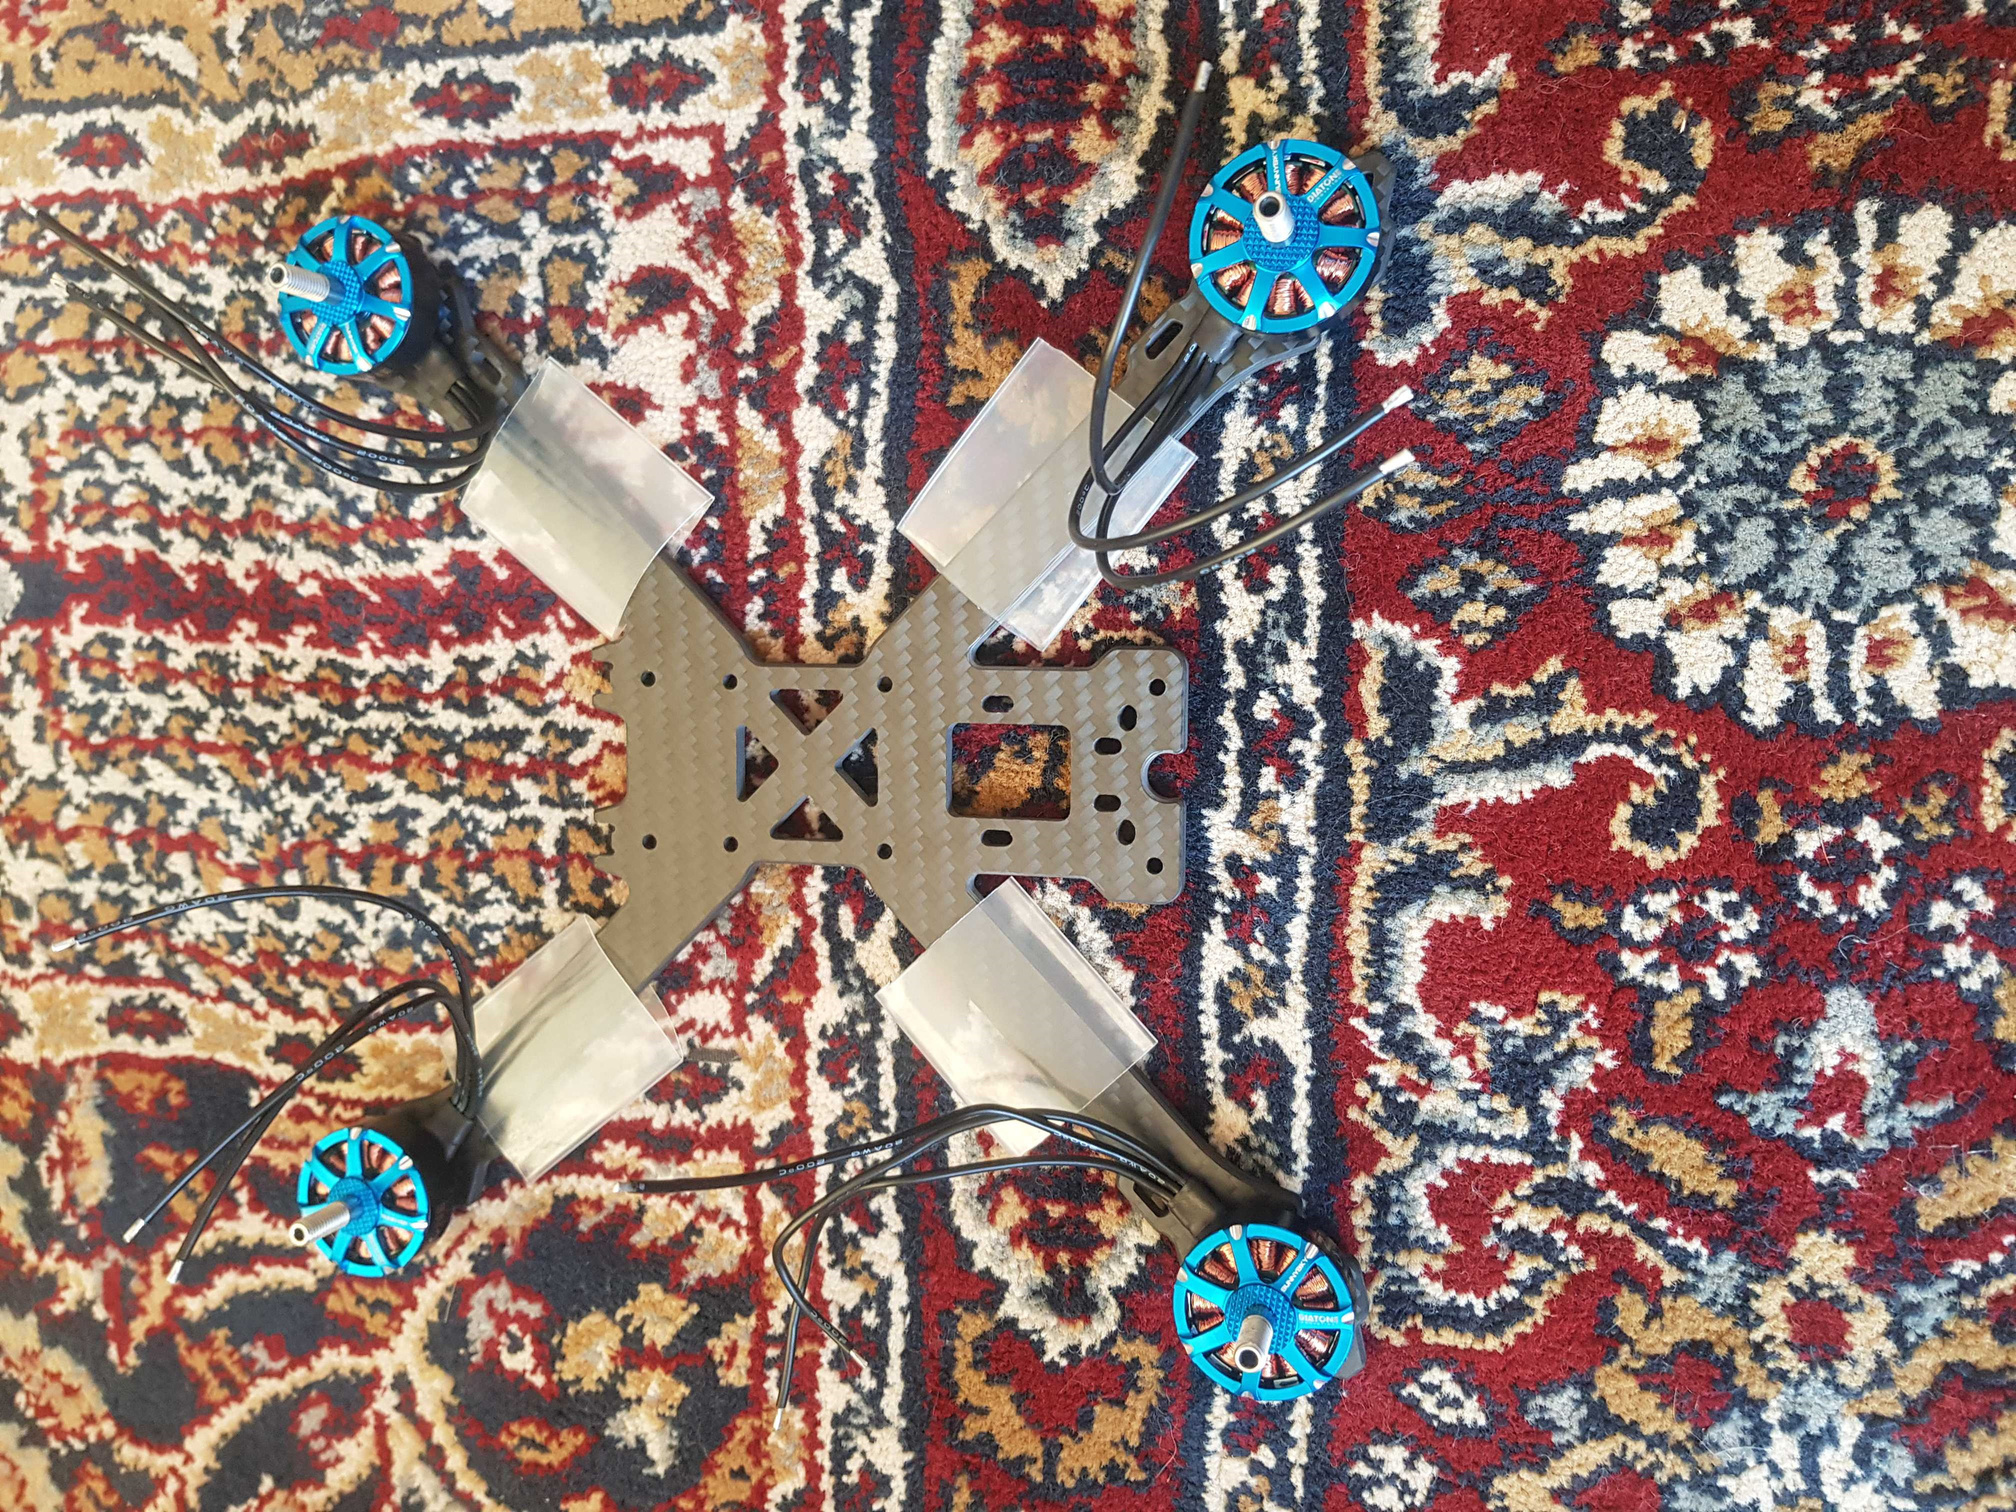
The very first thing here was to place 4 lengths of clear heatshrink around the arms of the quad, to neaten everything up and protect the motor wires somewhat, and to then install the motors. I’ve got 4xCW thread motors, because you really don’t need alternating orientations with lock nuts, and it’s just that bit easier to remove and install the nuts when I’m changing props. Not much to see here other than that, so, moving on:
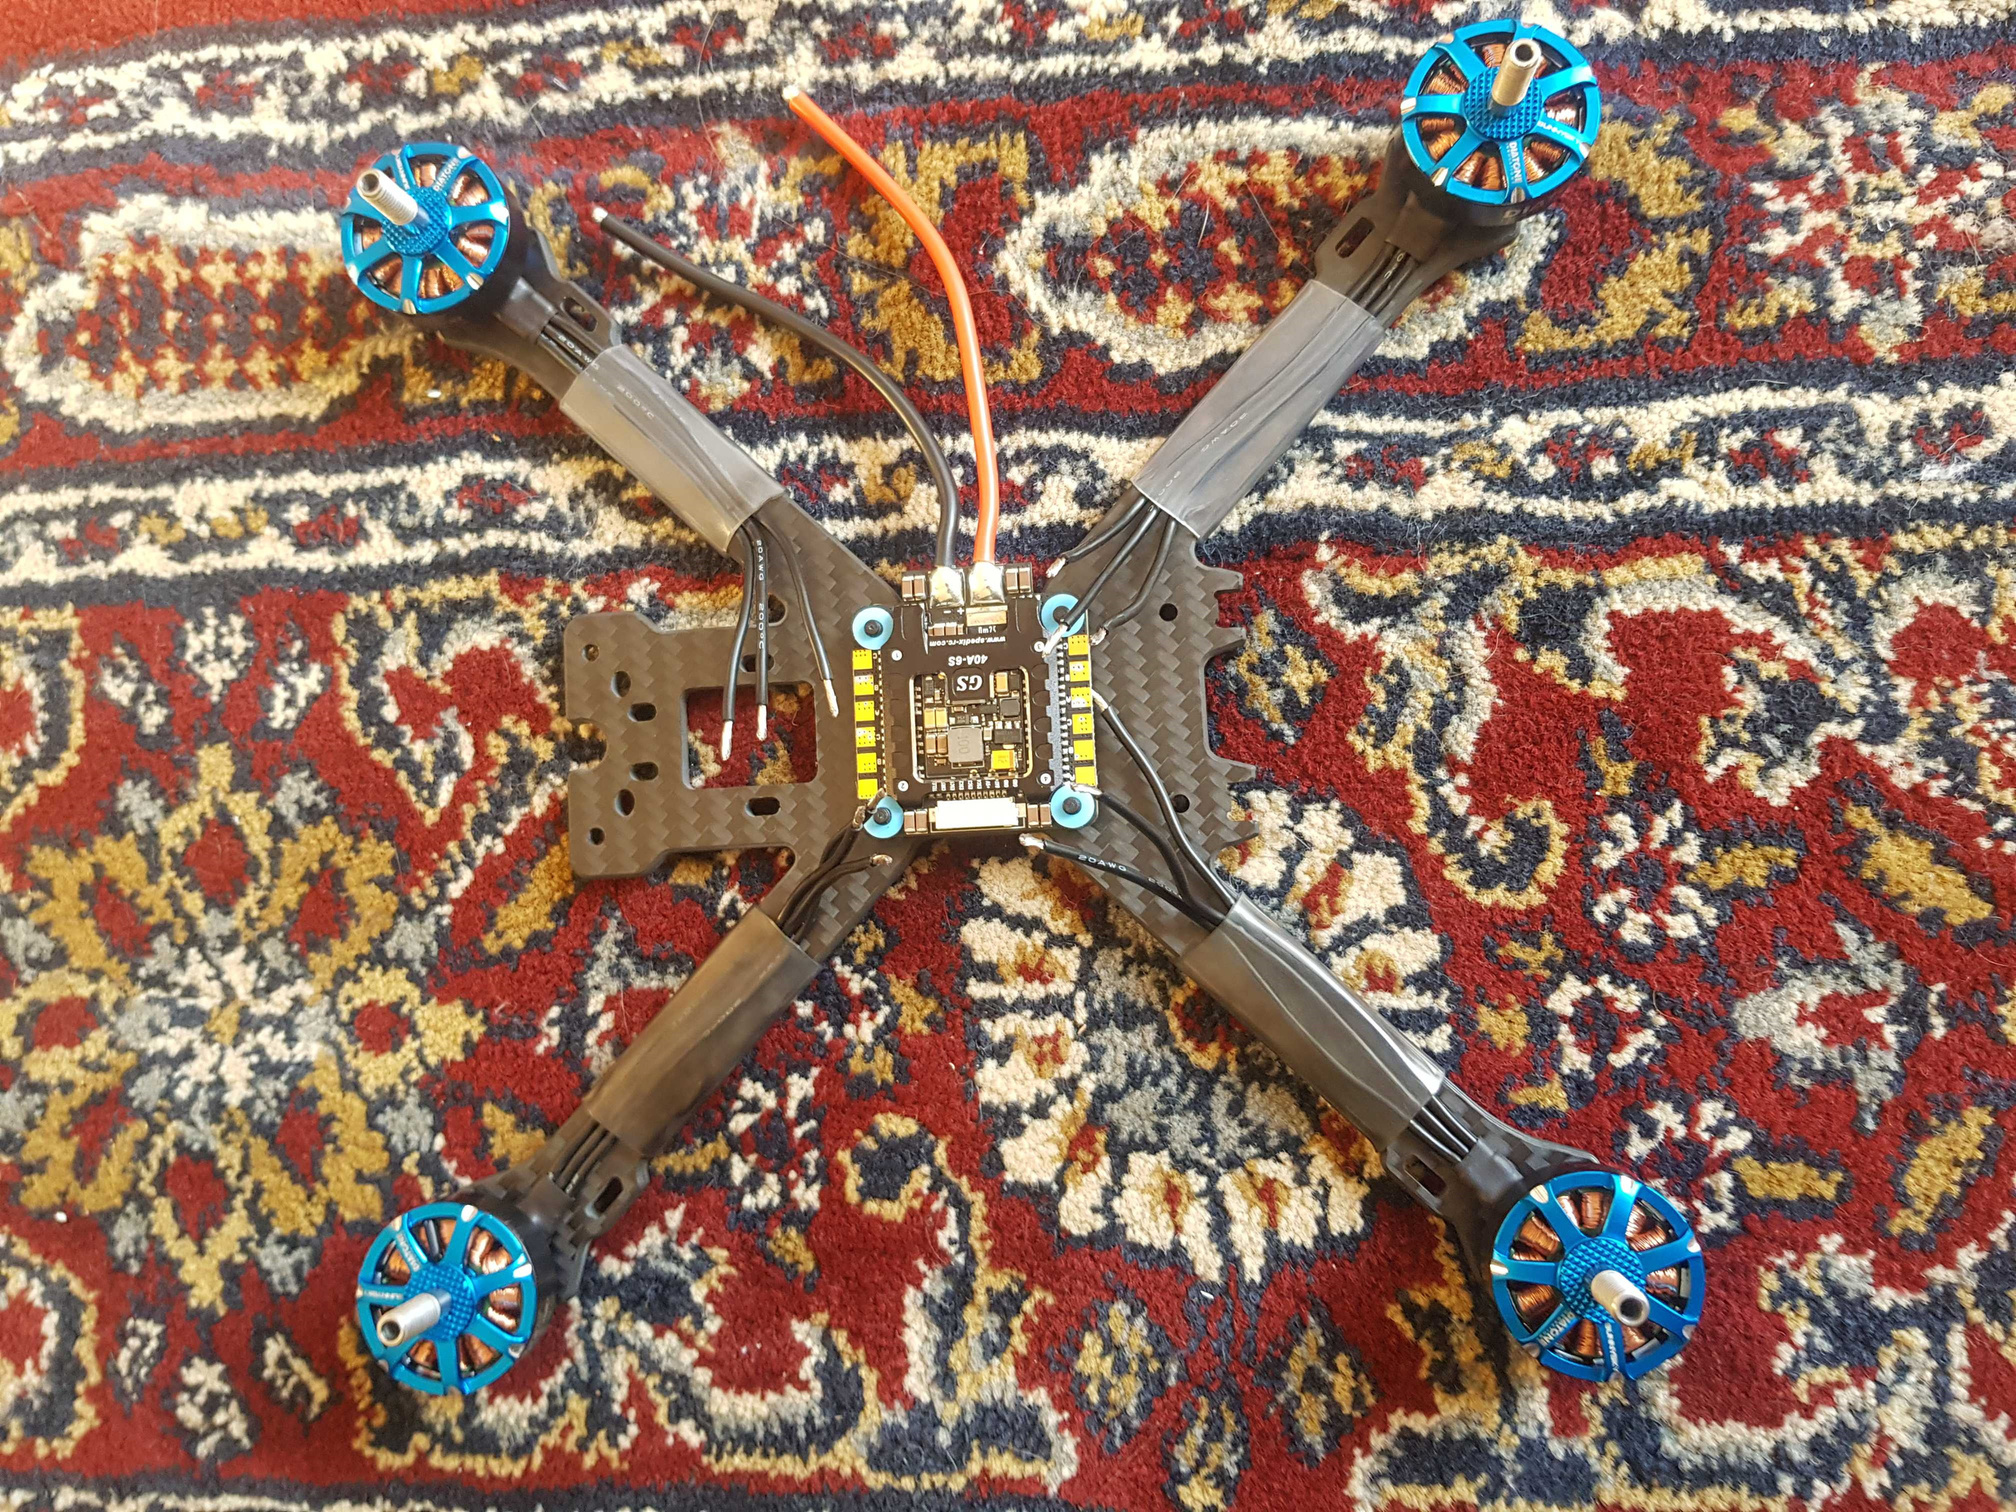
Here, I’ve threaded the motor wires through the heatshrink and, well, shrunk it. The heatshink was somewhat too wide, so a lot of heating took place, and you can see that the motor wires still have a bit of wiggle room. Oh well. I’ve also installed the ESC to the frame, which requires popping the 4 small blue soft mounts into place first. A bit fiddly, but nothing awful. I haven’t paid much attention to the orientation of the ESC - I just knew that I wanted the battery wires at the side of the frame (though in hindsight I don’t know if I’d do the same…) and I wanted it oriented this way up. The stack in this frame is mounted ‘upside down’ to the top plate, so the ESC here is upside down as it sits flush that way. All of the orientation issues will be easy enough to correct in BLHeli Suite and the BetaFlight Configurator later on.
Not much happened here, the motor wires were trimmed and soldered in place. Some of the joints were me, some were my girlfriend, so no being mean now, okay? ![]()
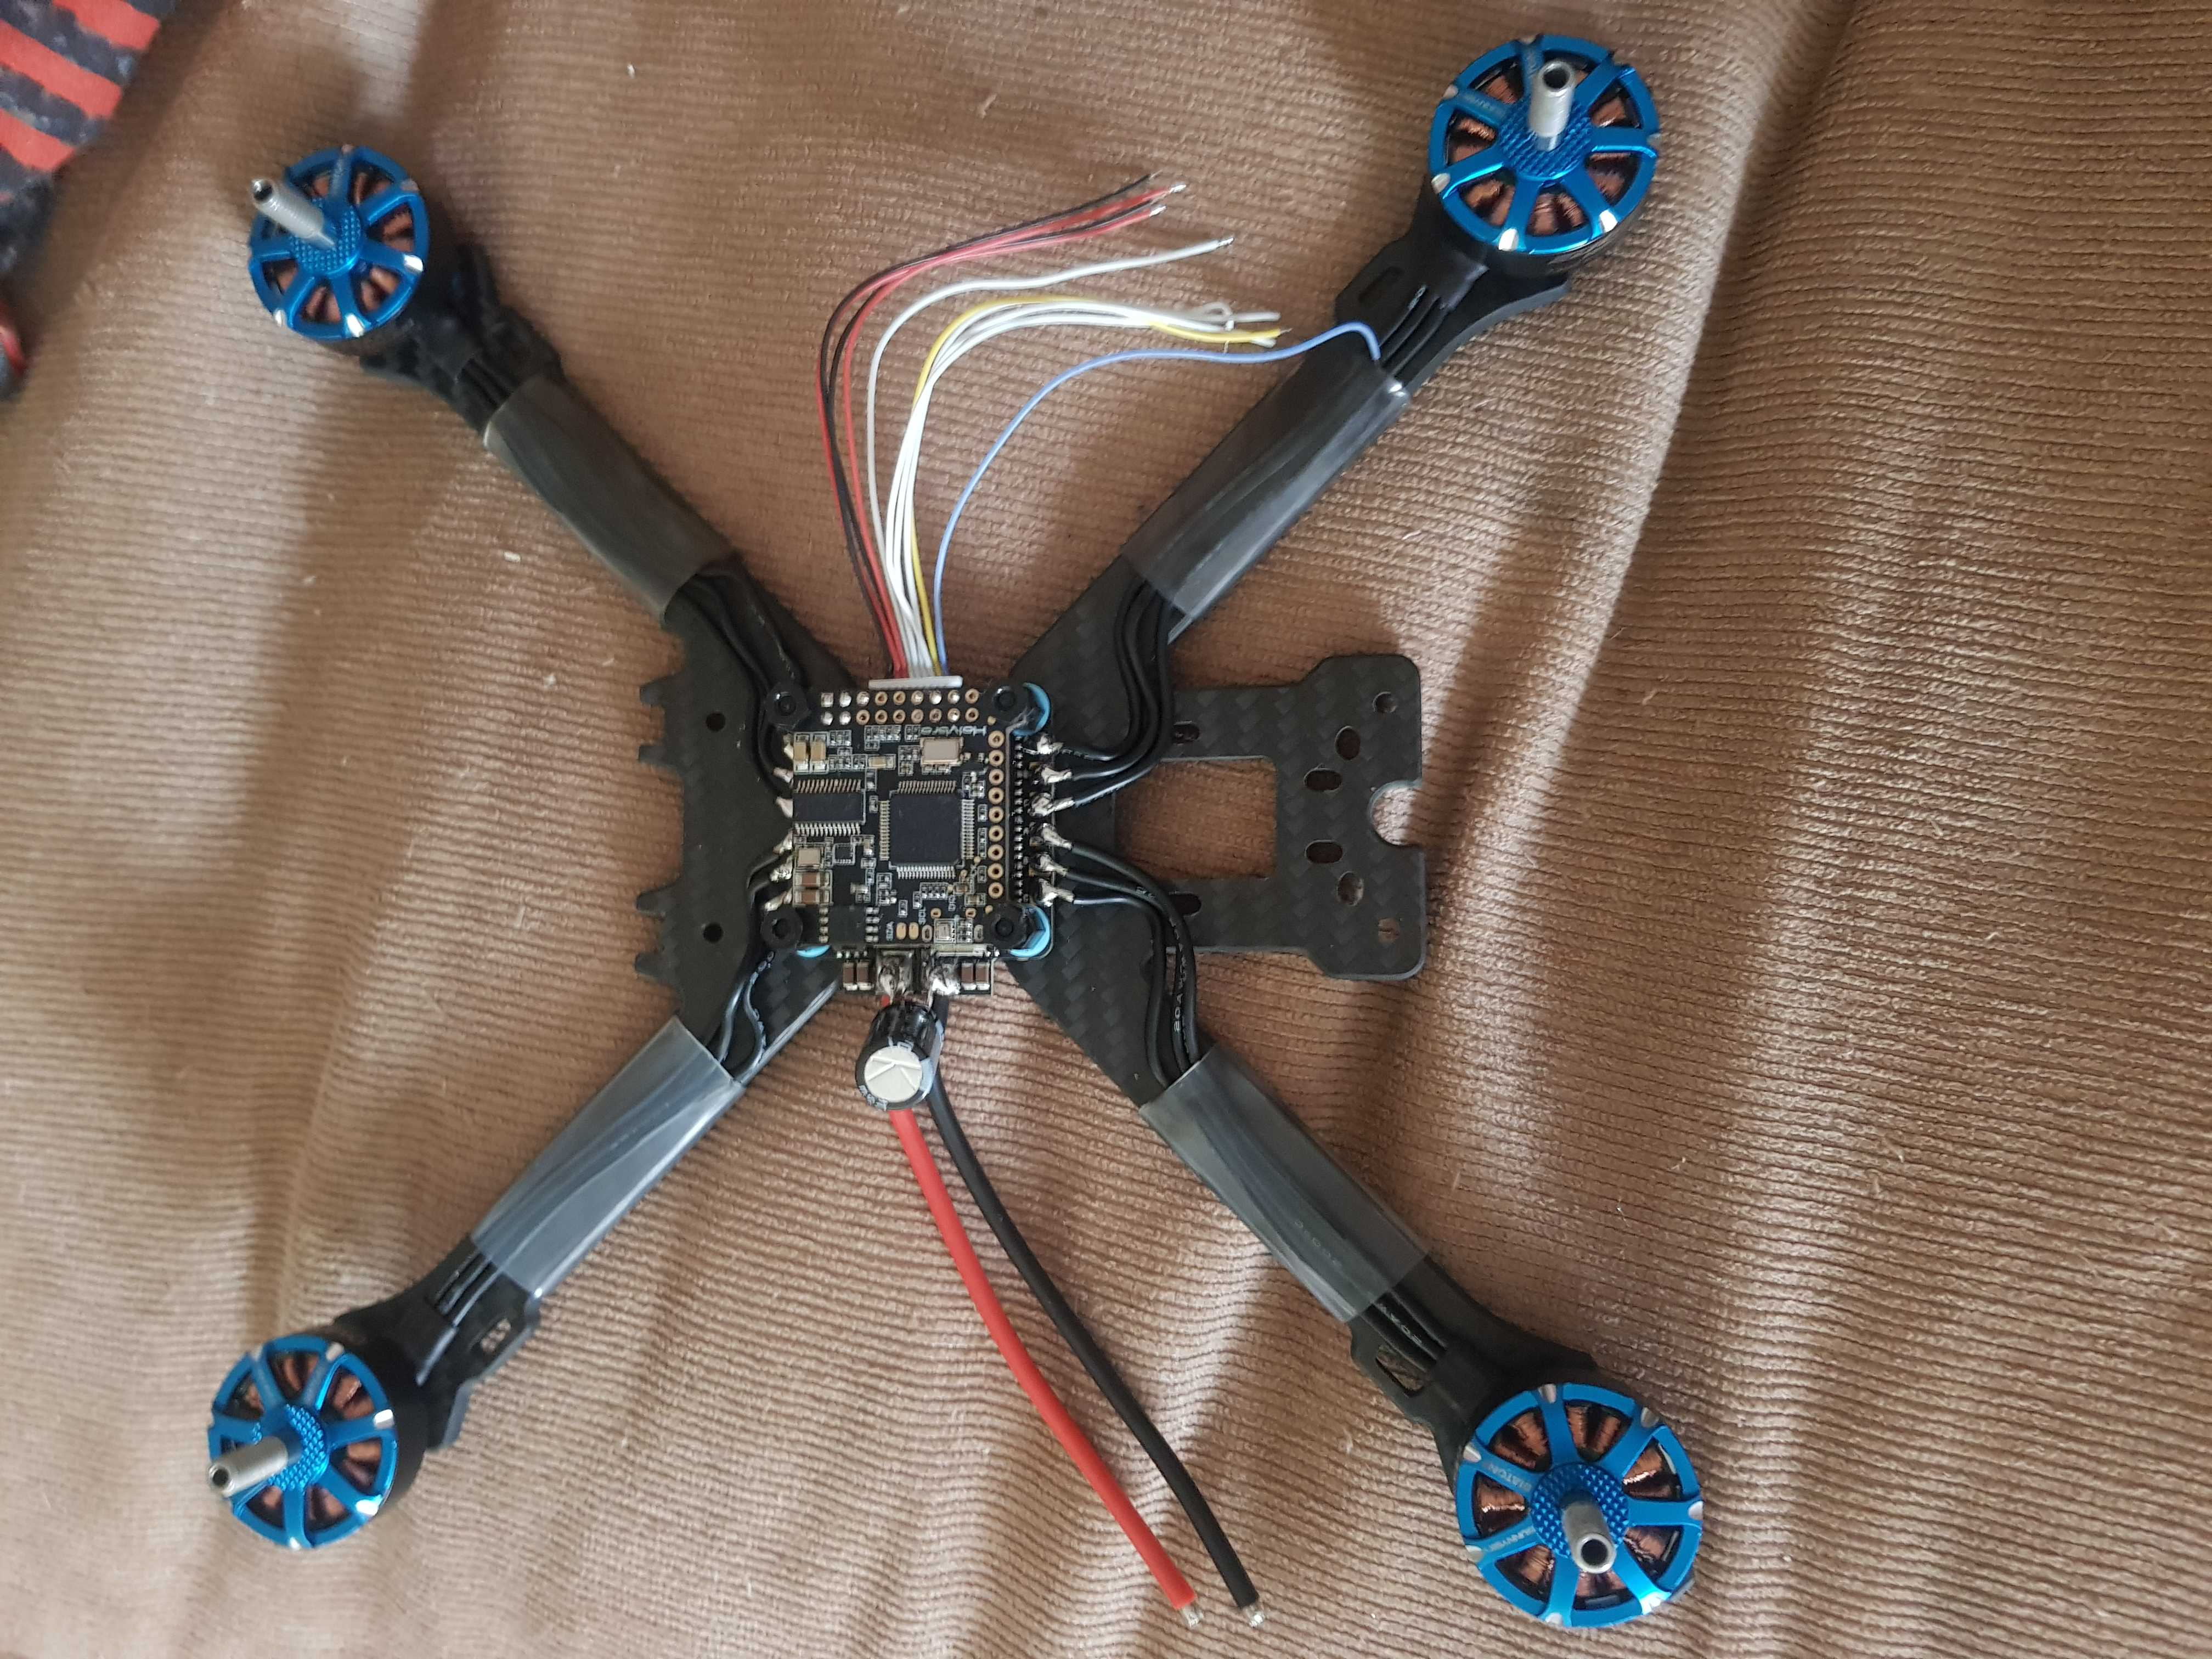
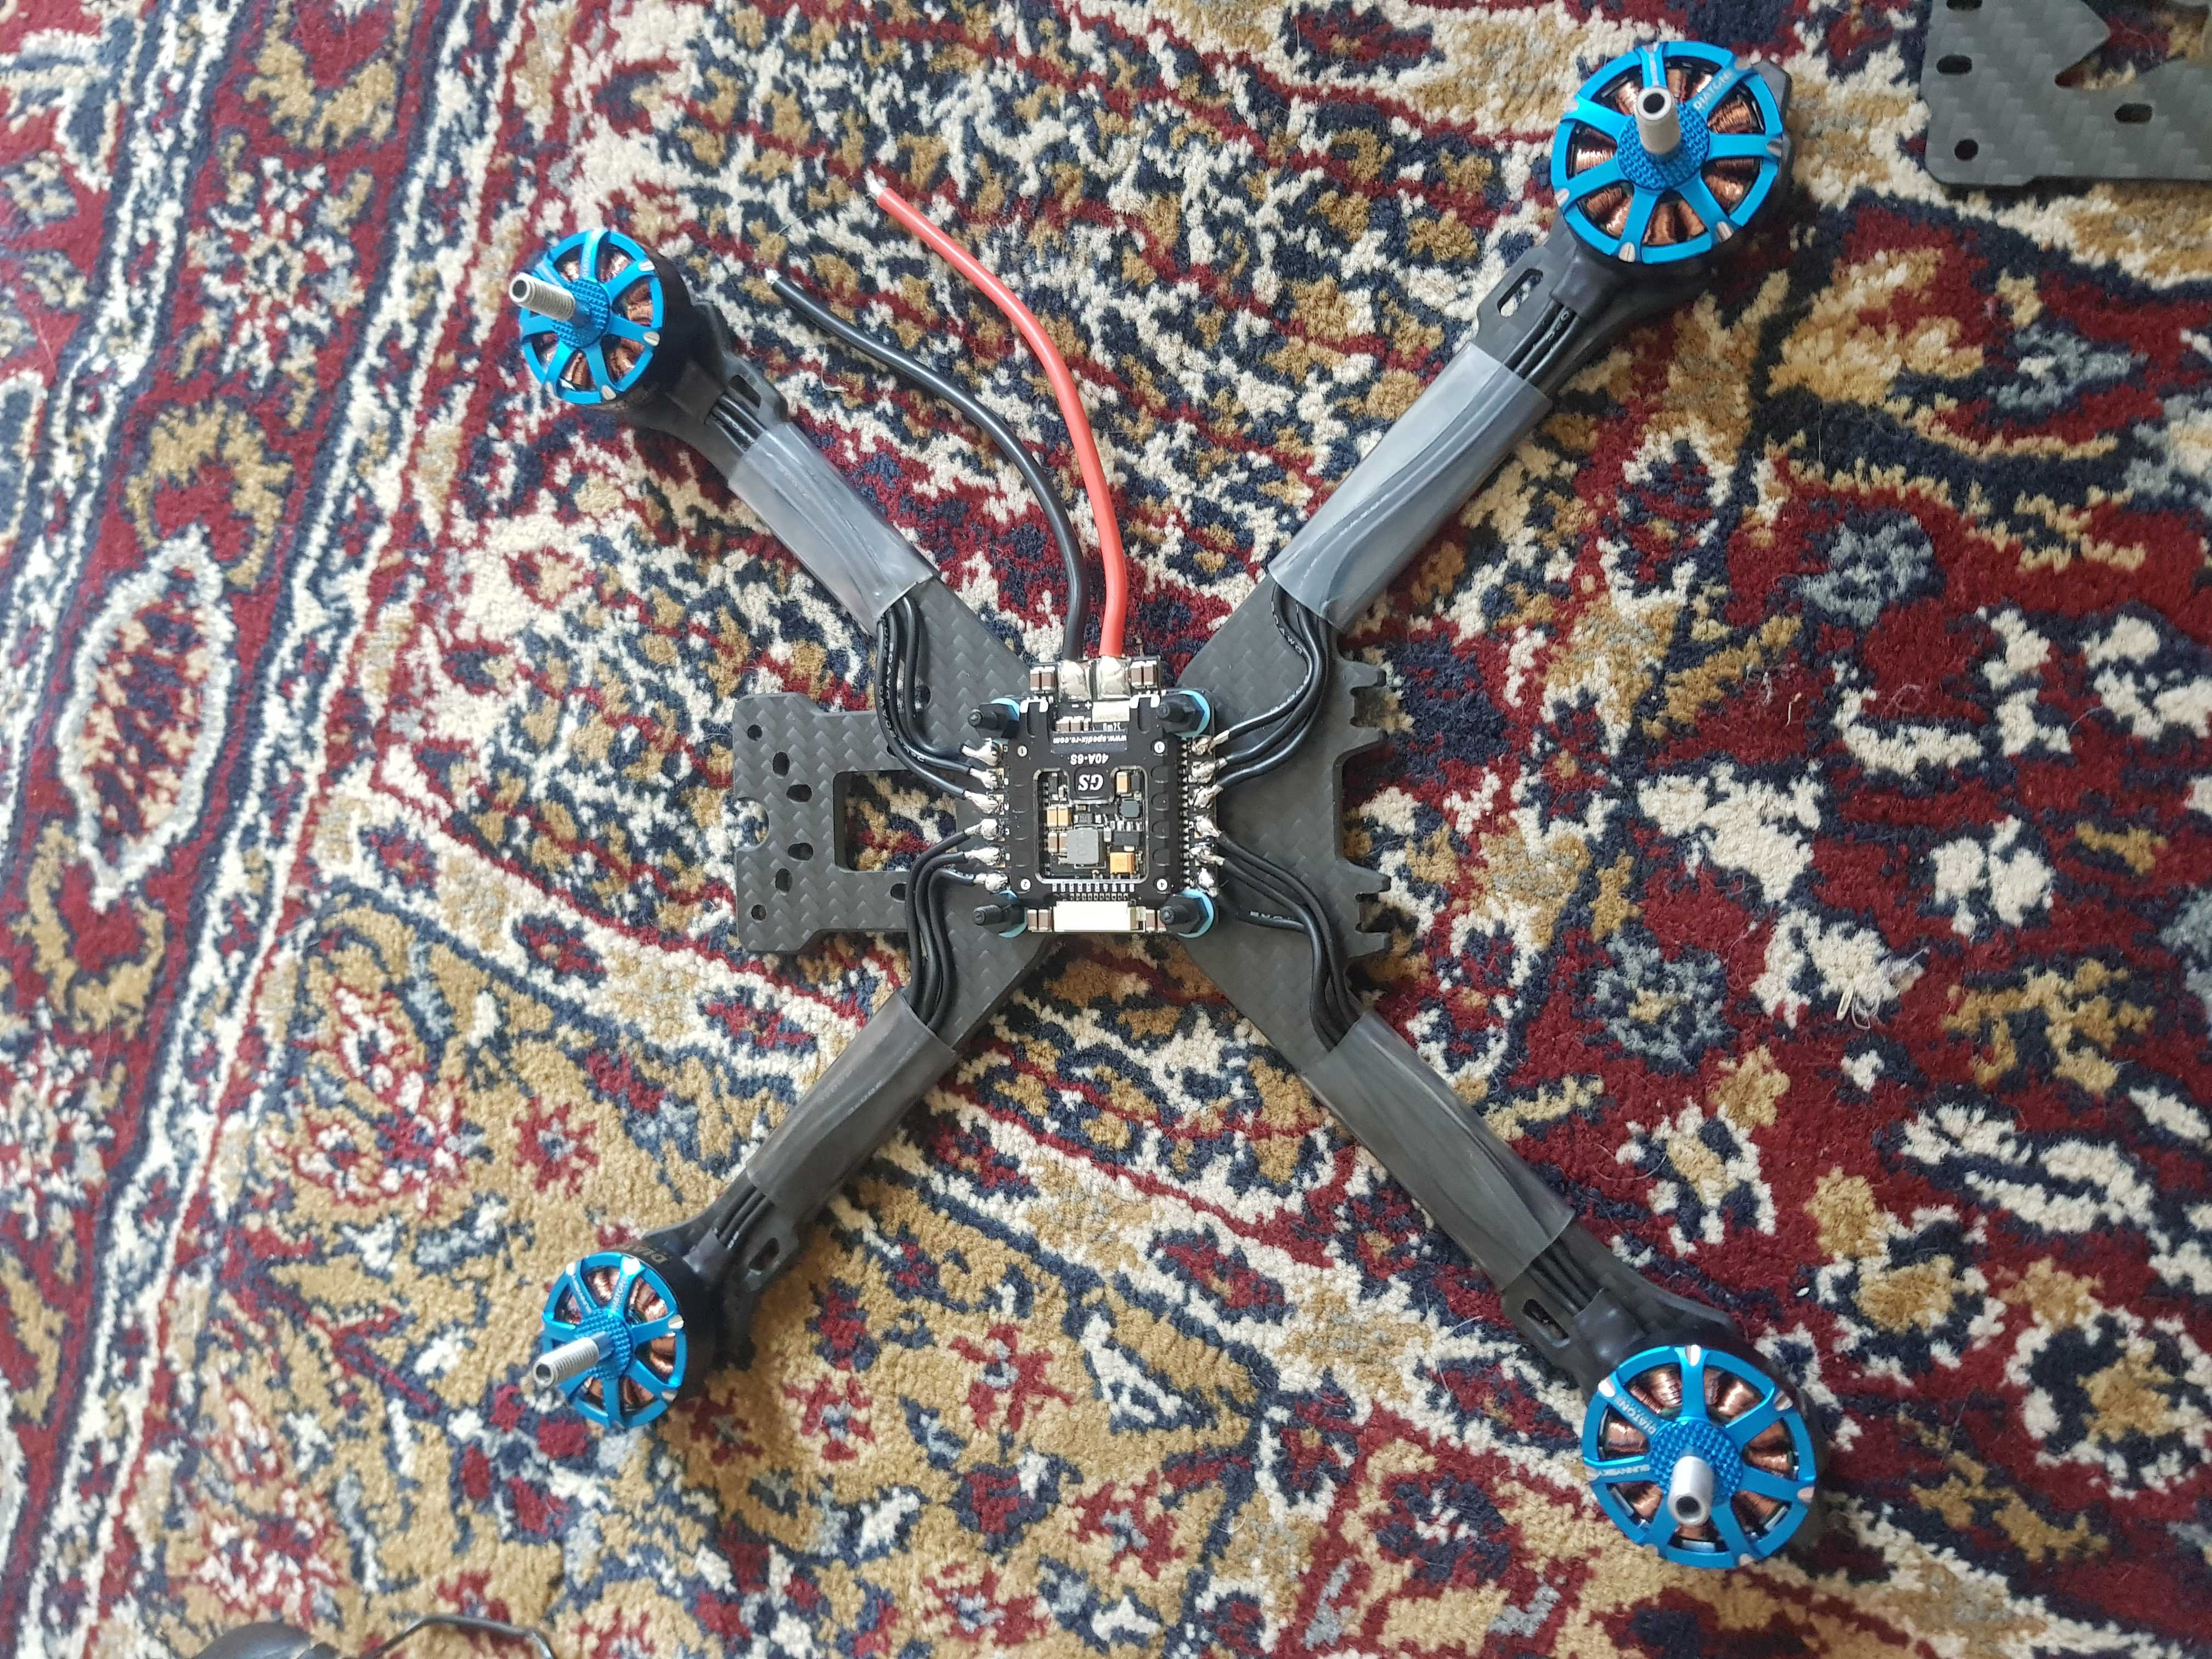
The Kakute has been mounted what looks to be upside down, however it’s not. The stack will sit upside down, so all I’ve done here is make sure there’s enough space between the GS40A and the Kakute’s soft-mounted gyro so that nothing awful will happen, and secured it in place so that the front of the board is towards the front of the frame. The cable you see is one of two included with the GS40A (they seem to be identical). A capacitor, provided with the GS40, has been poorly soldered in place here, too ![]()

Here I’ve soldered all of the wires in place onto the Kakute. Vbat, ESC1,2,3,4, Current sensor and ESC telemetry. The remaining wire you can see dangling around is a 5v+ from the ESC, which doesn’t really have a place on the Kakute but frees up a 5v pad as I’m going to use this to power the FrSky XM RX.
I’ve also cut down the XT60 wires, soldered the connector in place and sound some nice matchy-matchy heatshrink to cover it up ![]()
Here I’ve installed, bound and heatshrink wrapped the XM receiver. Nothing special, just 3M taped it to the side of the frame later on to keep it out of the way. It does work surprisingly well, though, I am impressed for the cost and size!
The next thing was getting the VTX all soldered up. I’ve followed the kakute manual to ensure that all of the connections are in their correct places, and so that I can use SmartAudio later on. Just as a note, I’m using the RDQ & AKK patch Betaflight Firmware on the kakute as the VTX I’m using shares the same manufacturer. This should get SmartAudio working as intended.
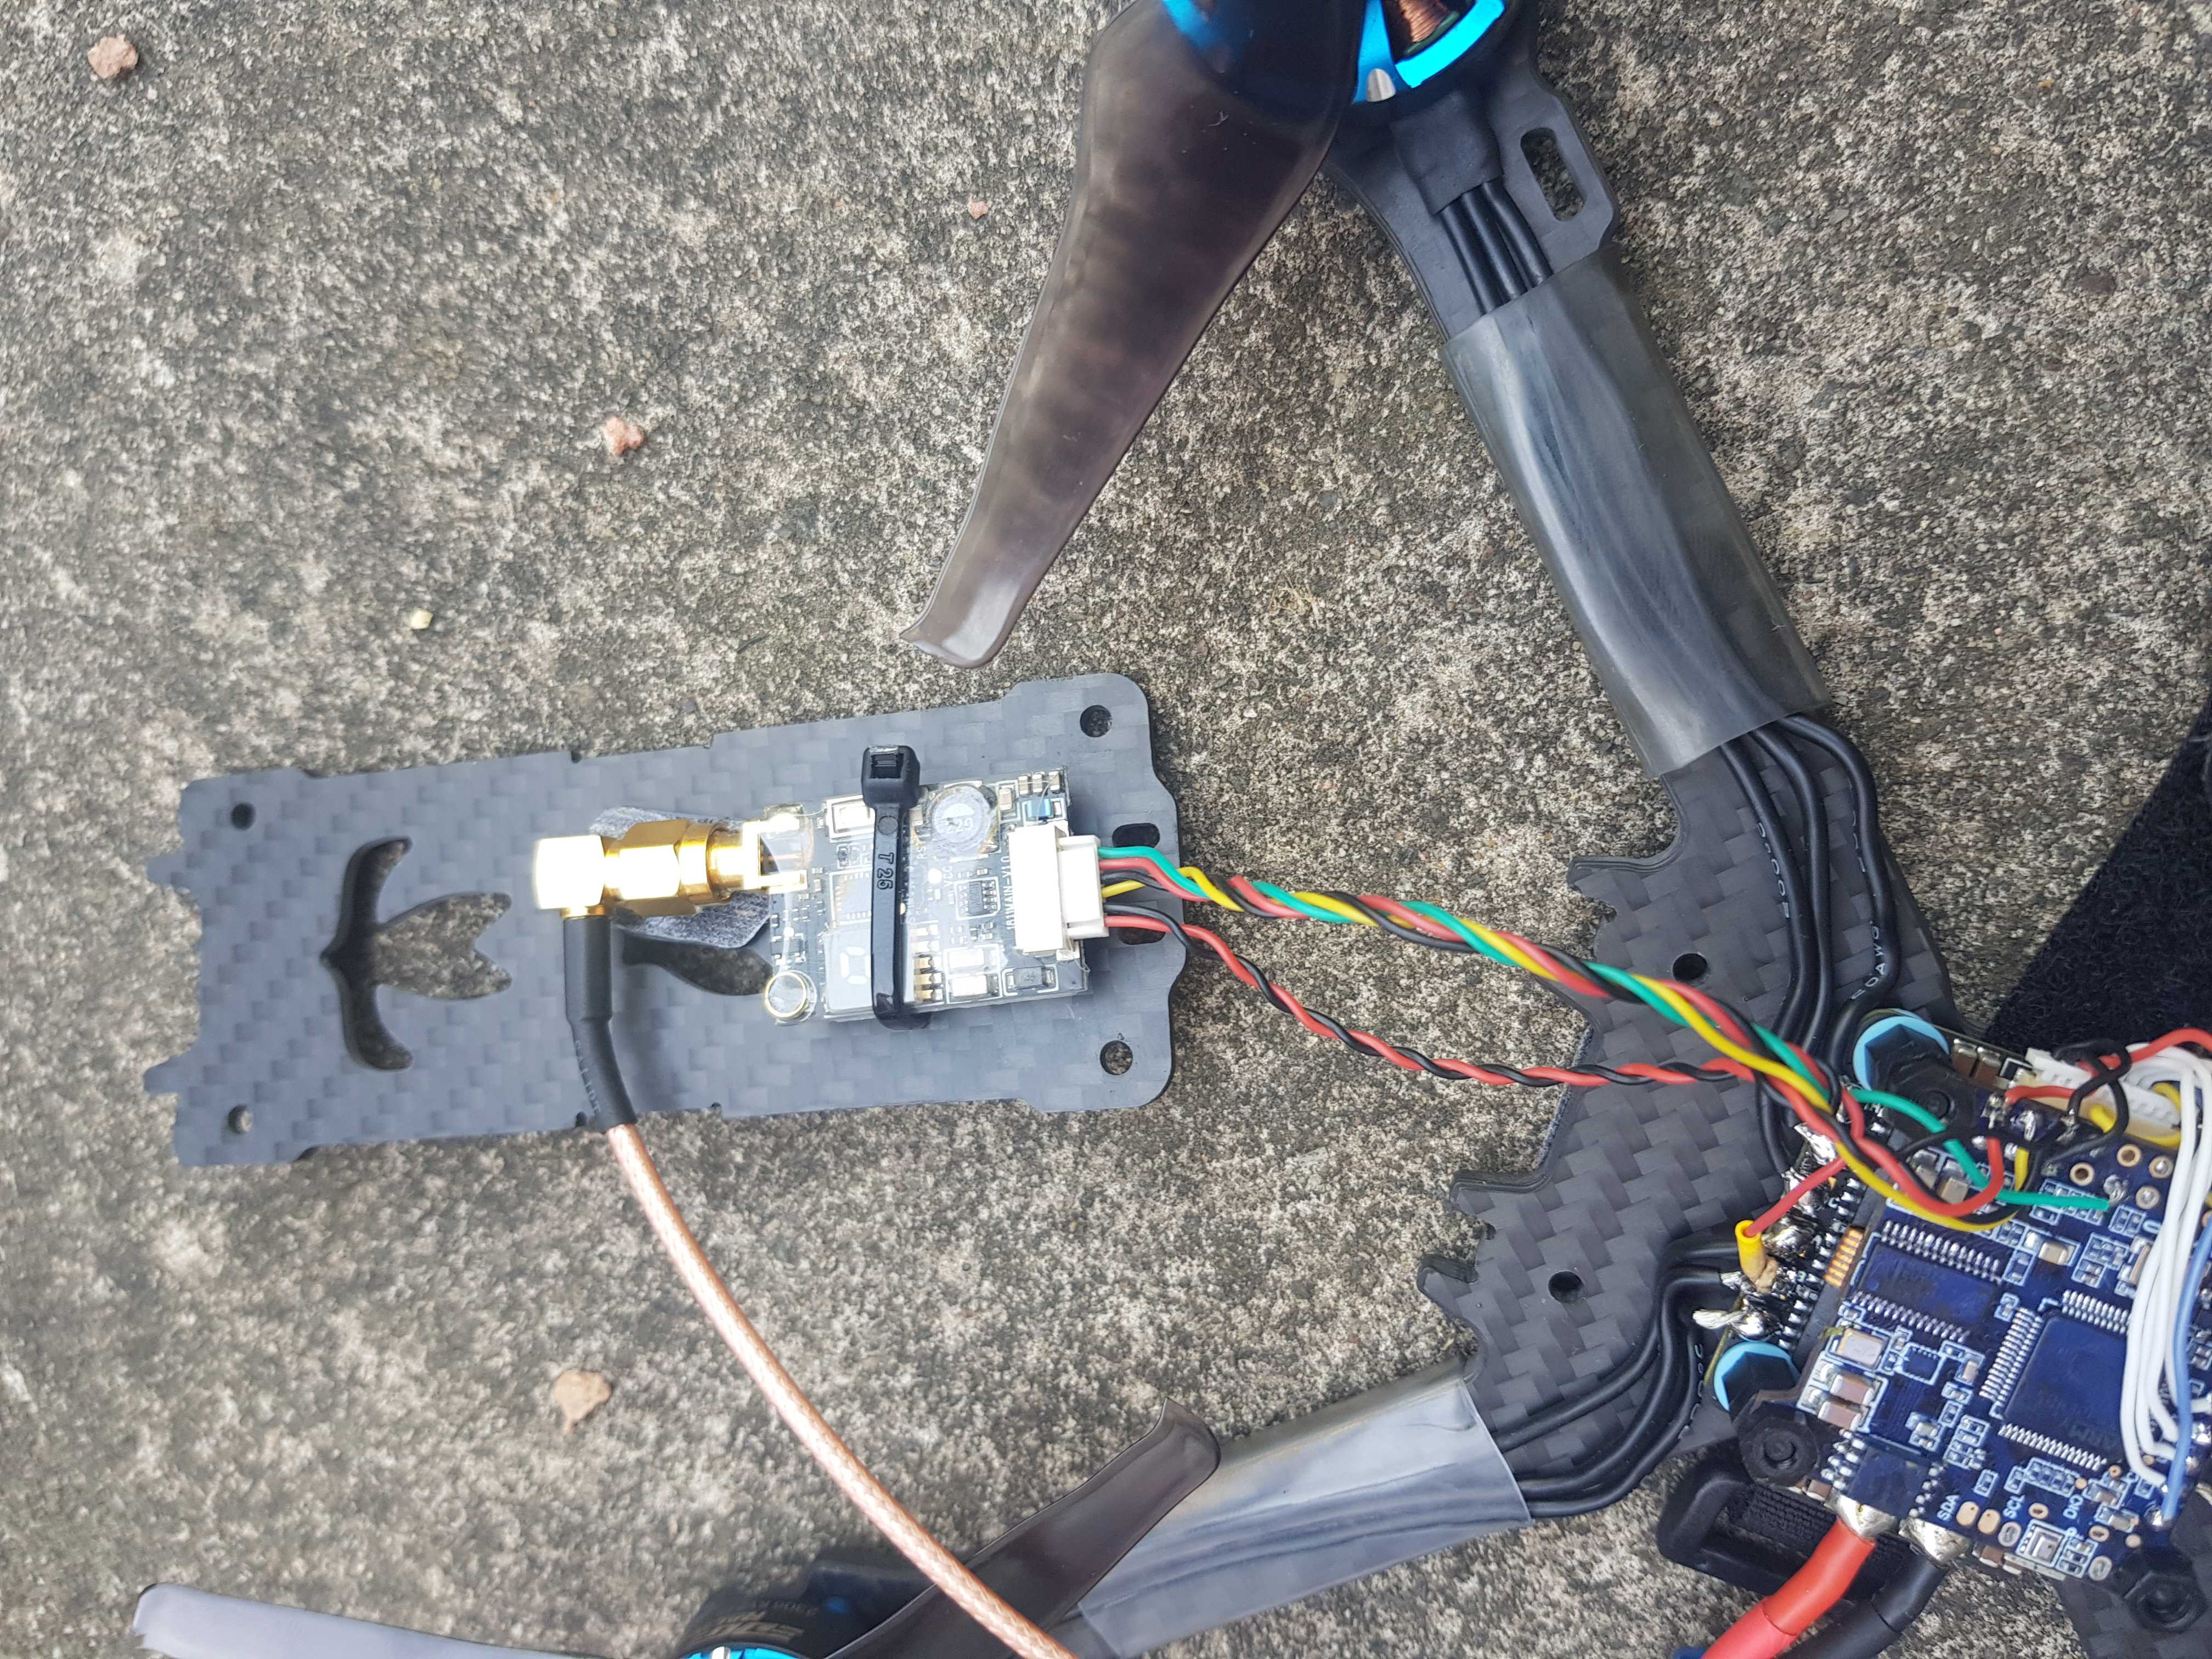
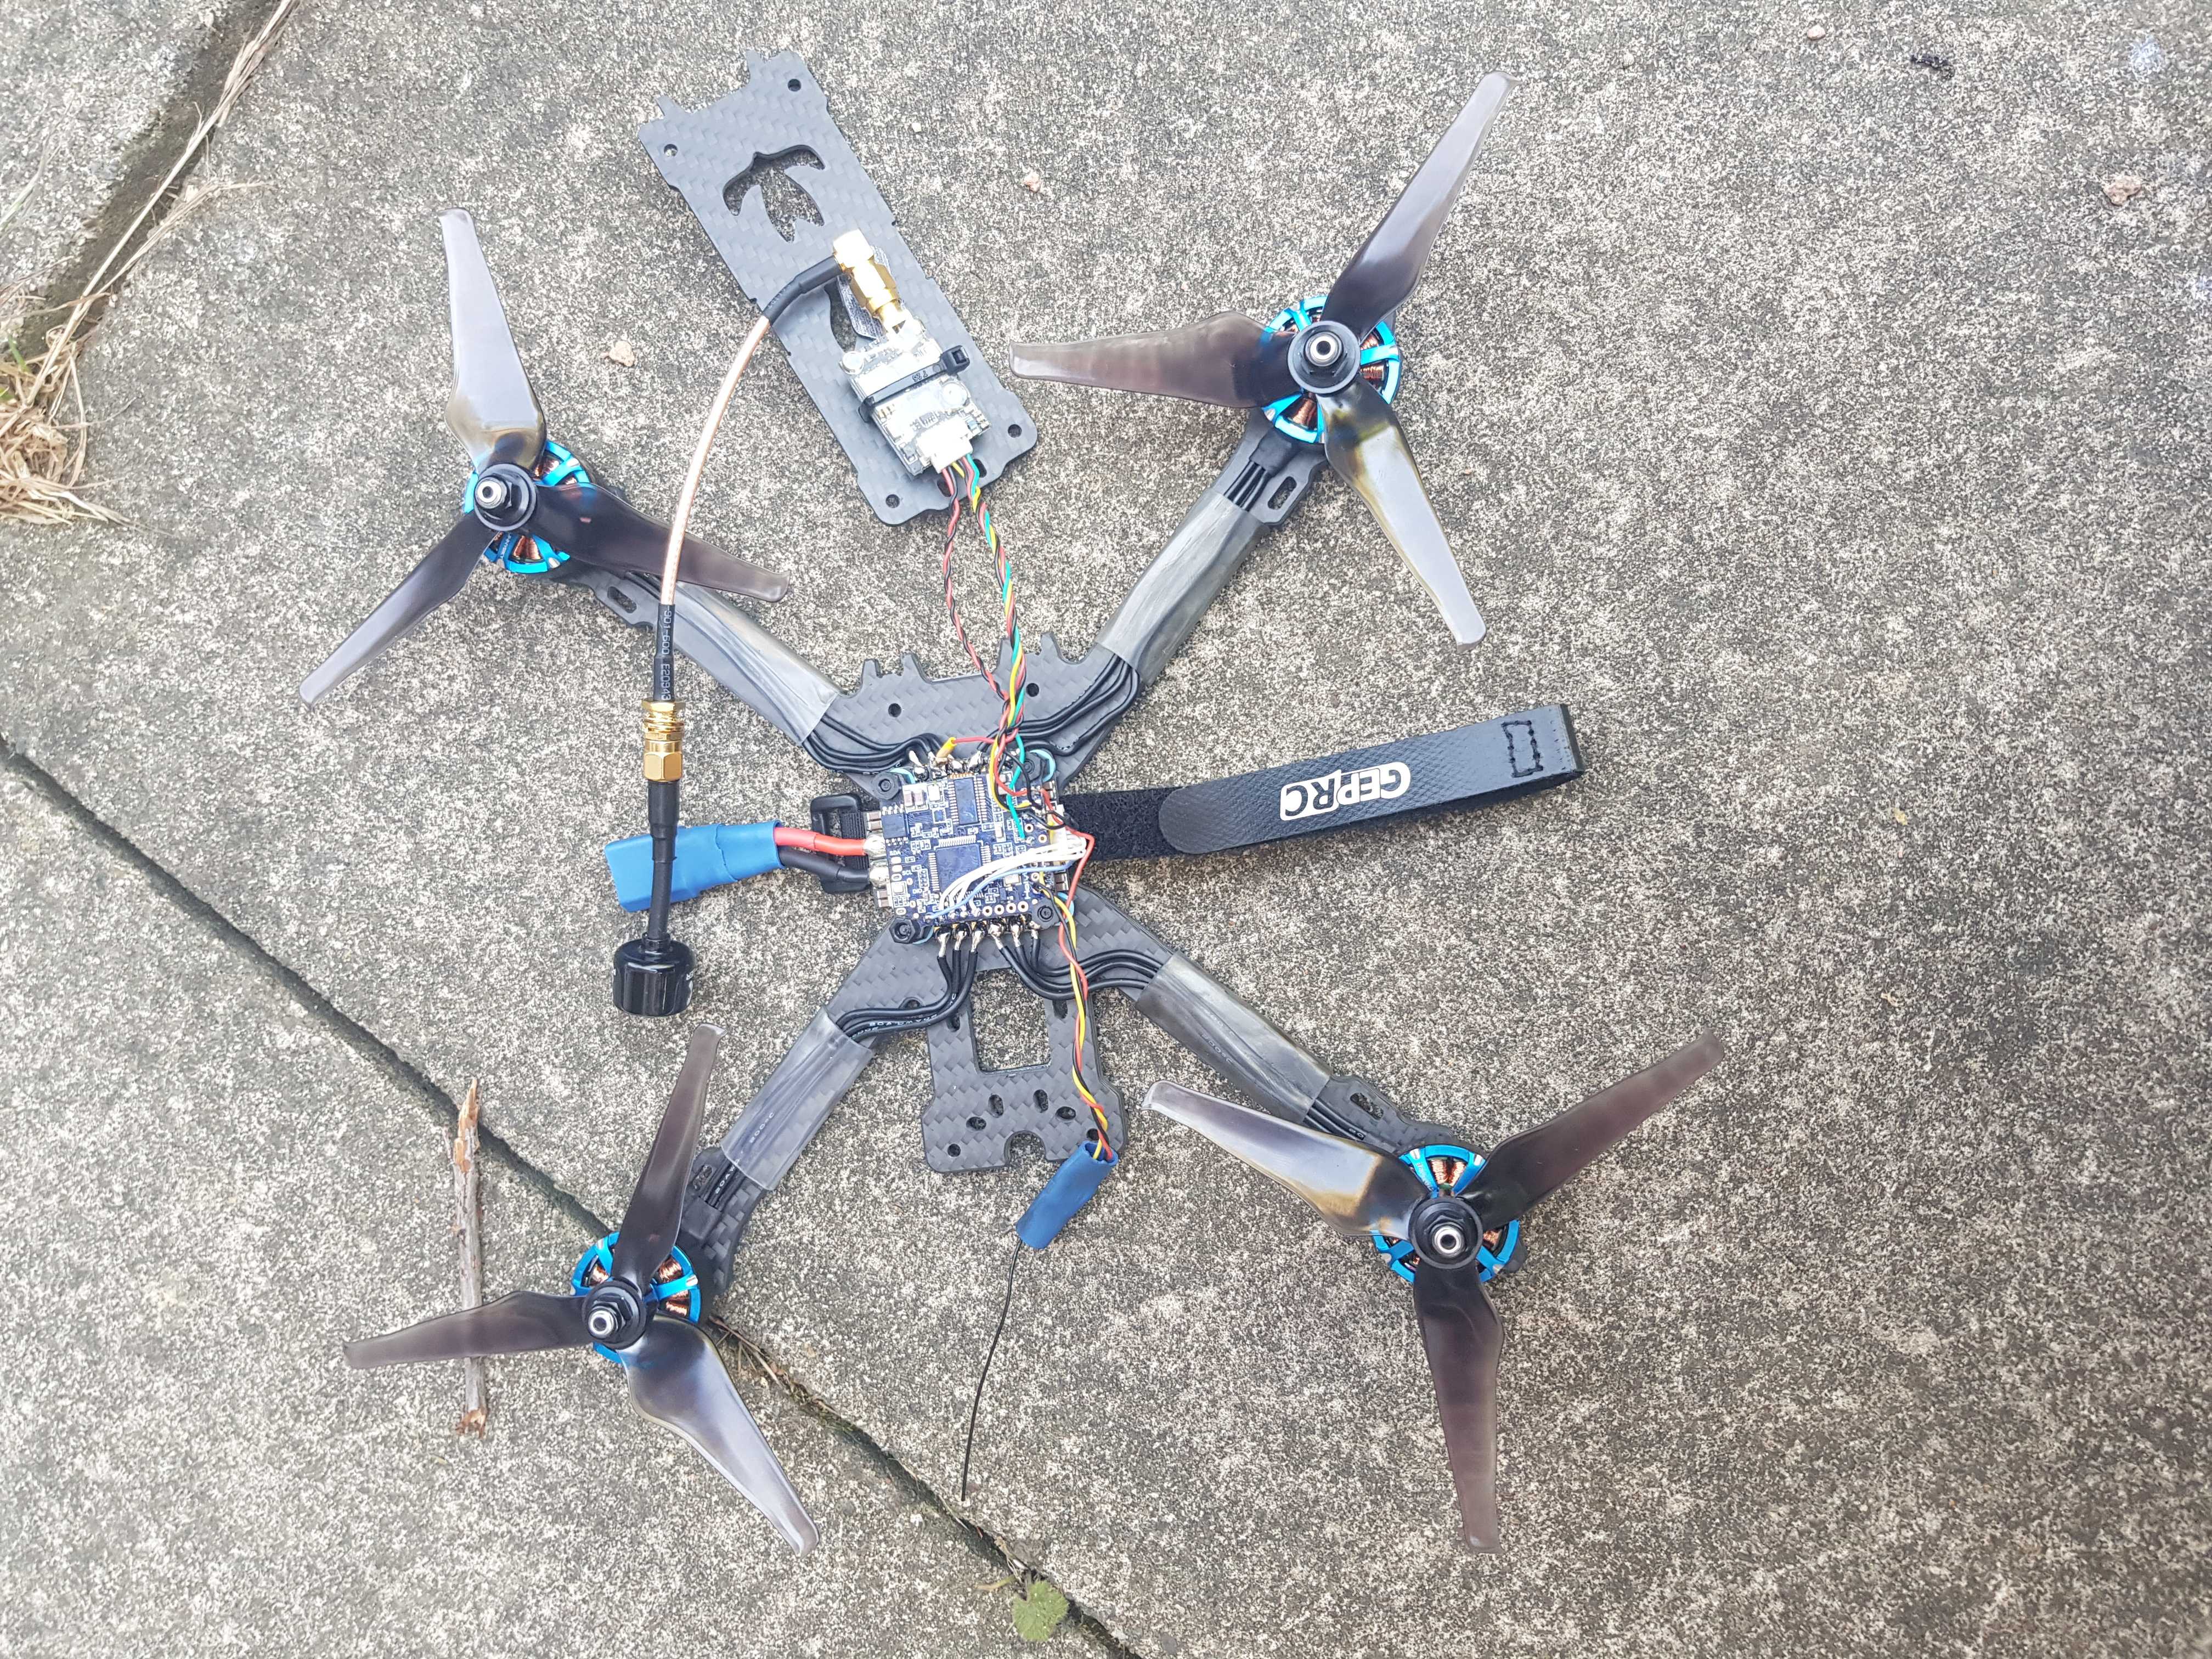
Here the VTX has been secured by a cable tie to the bottom plate of the frame, it’s a bit of a squeeze with that pigtail but it does fit!
One thing notable here is to make sure your VTX and SMA connector are isolated from the frame, I used some spare 3M foam pads and Battery pad material from the GepRC battery pad (included with the frame) to make sure nothing’s touching. My last quad has some noise issues that I believe come from my poor isolation of the VTX.
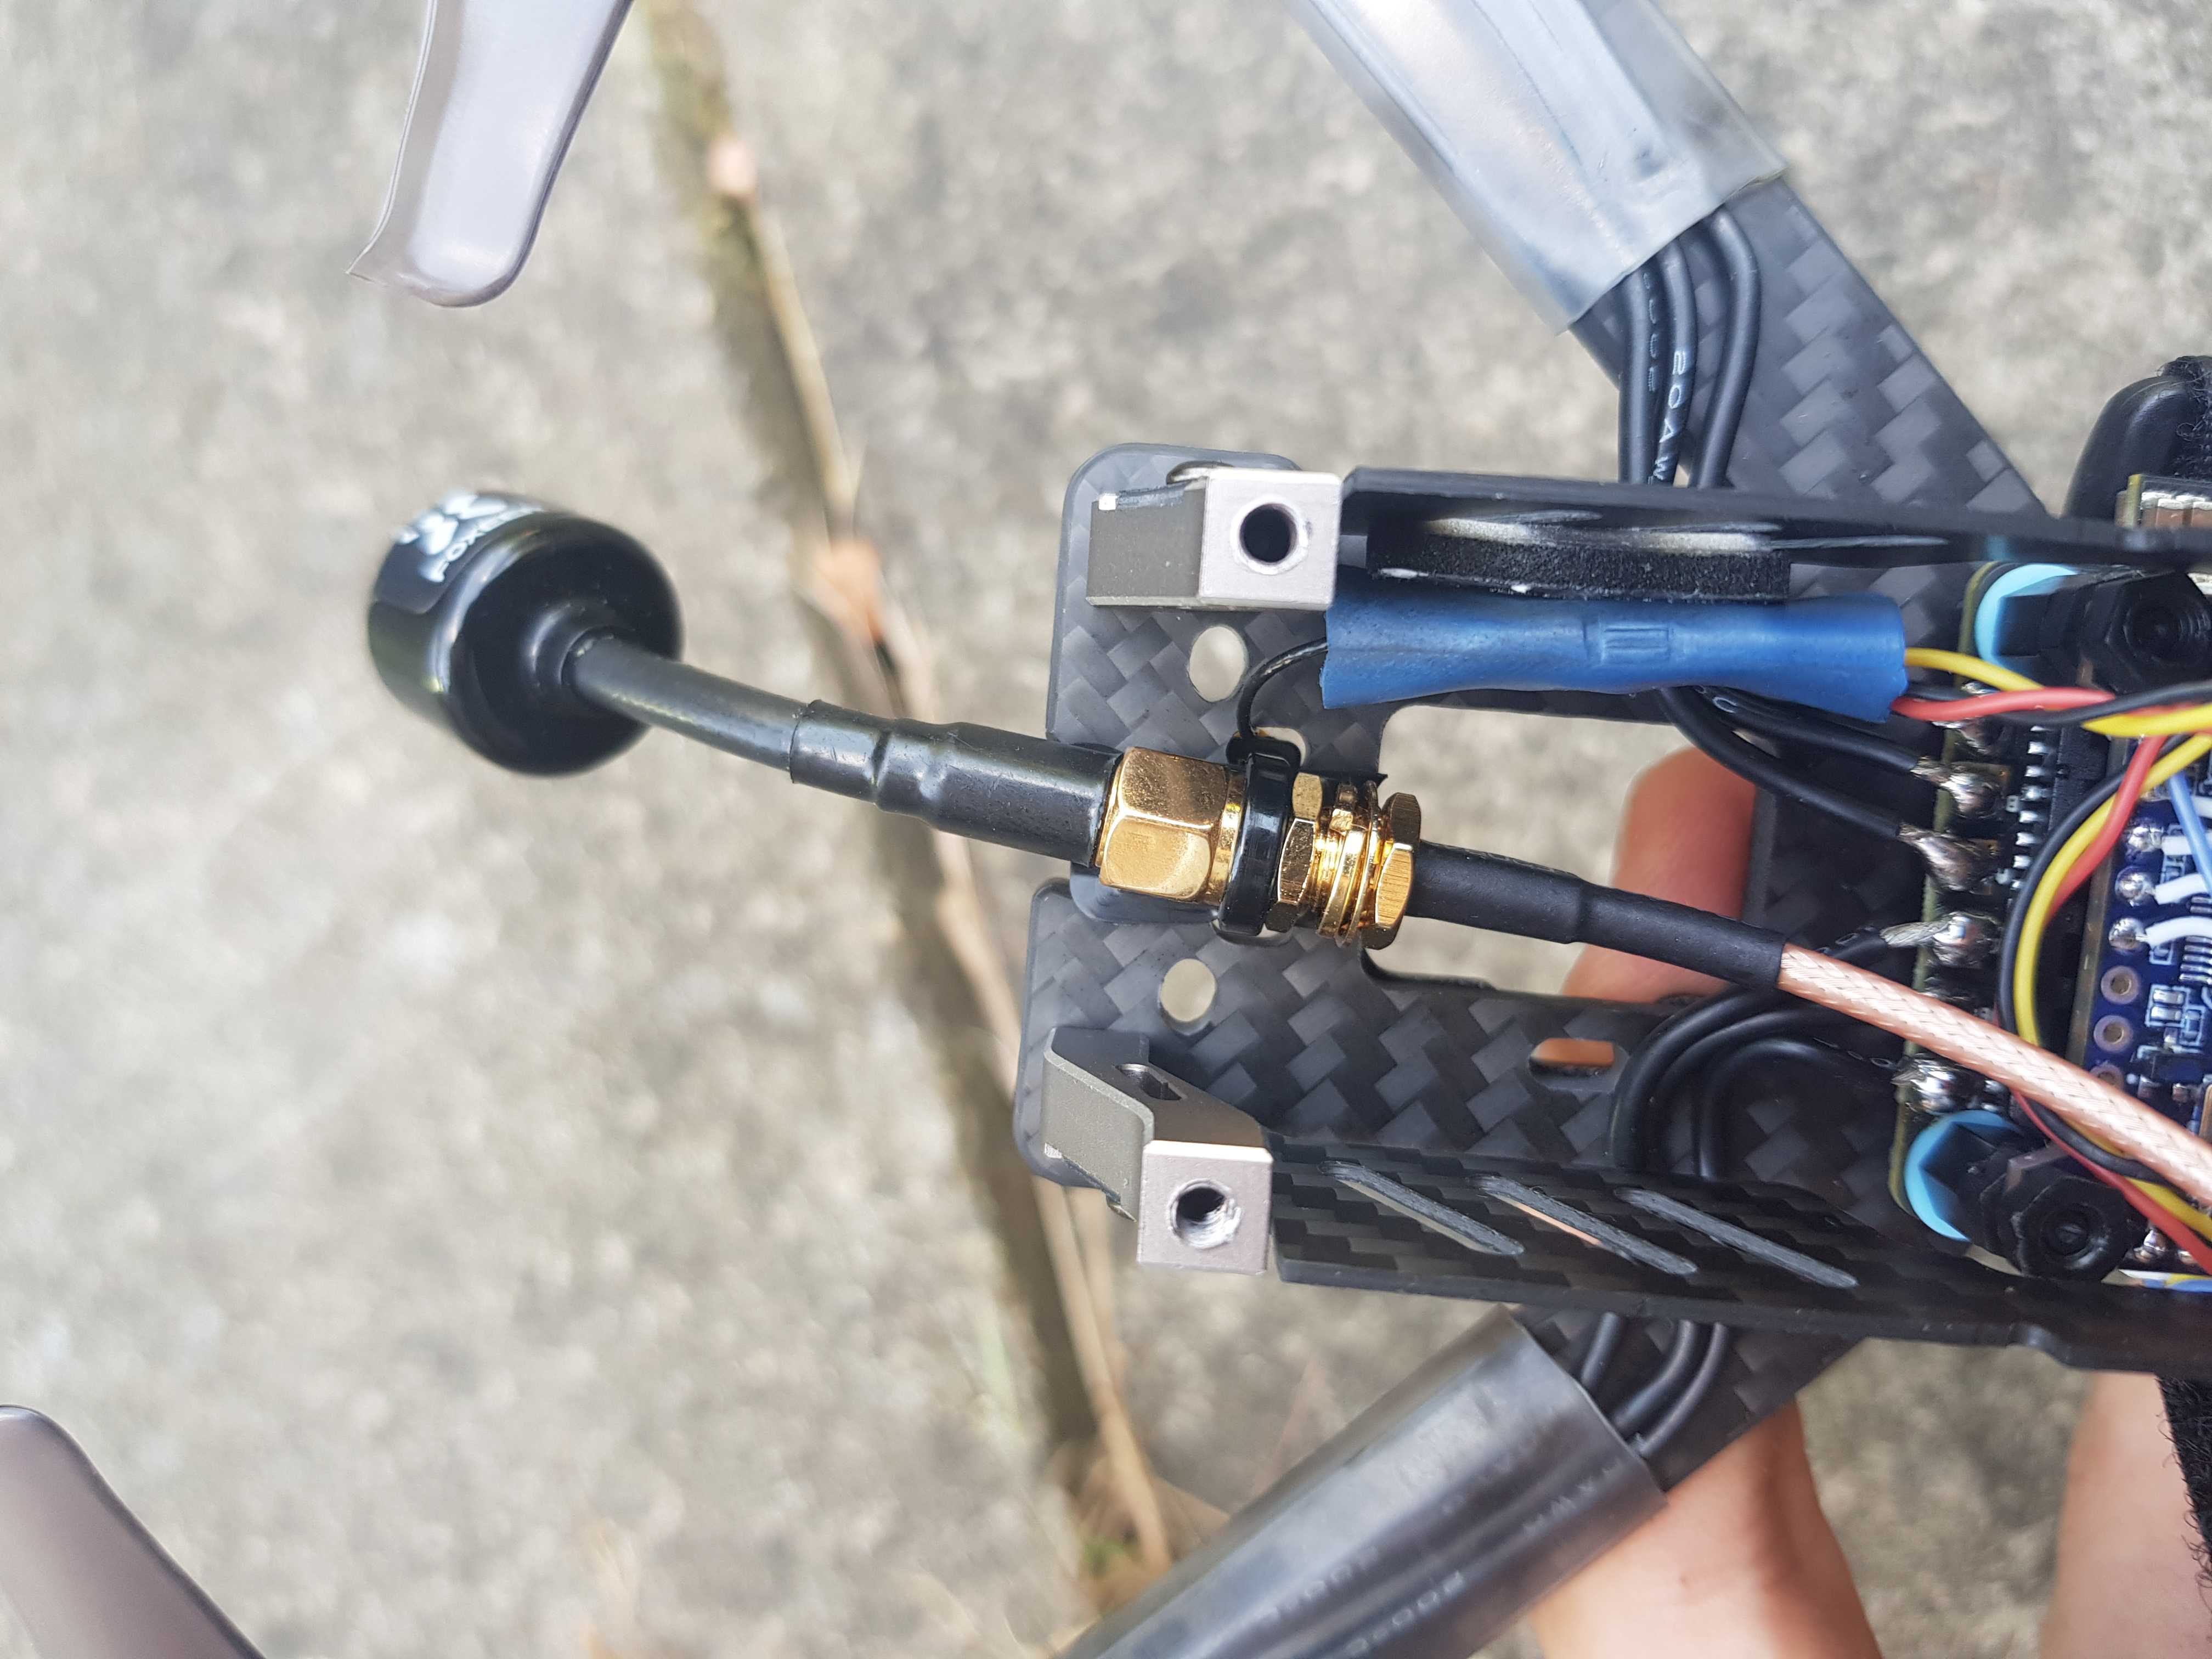
Same story here - Isolate that SMA!
I installed a second cable tie later on to hold the Lollipop antenna a tad more securely than this. This is attached to the top side of the frame.
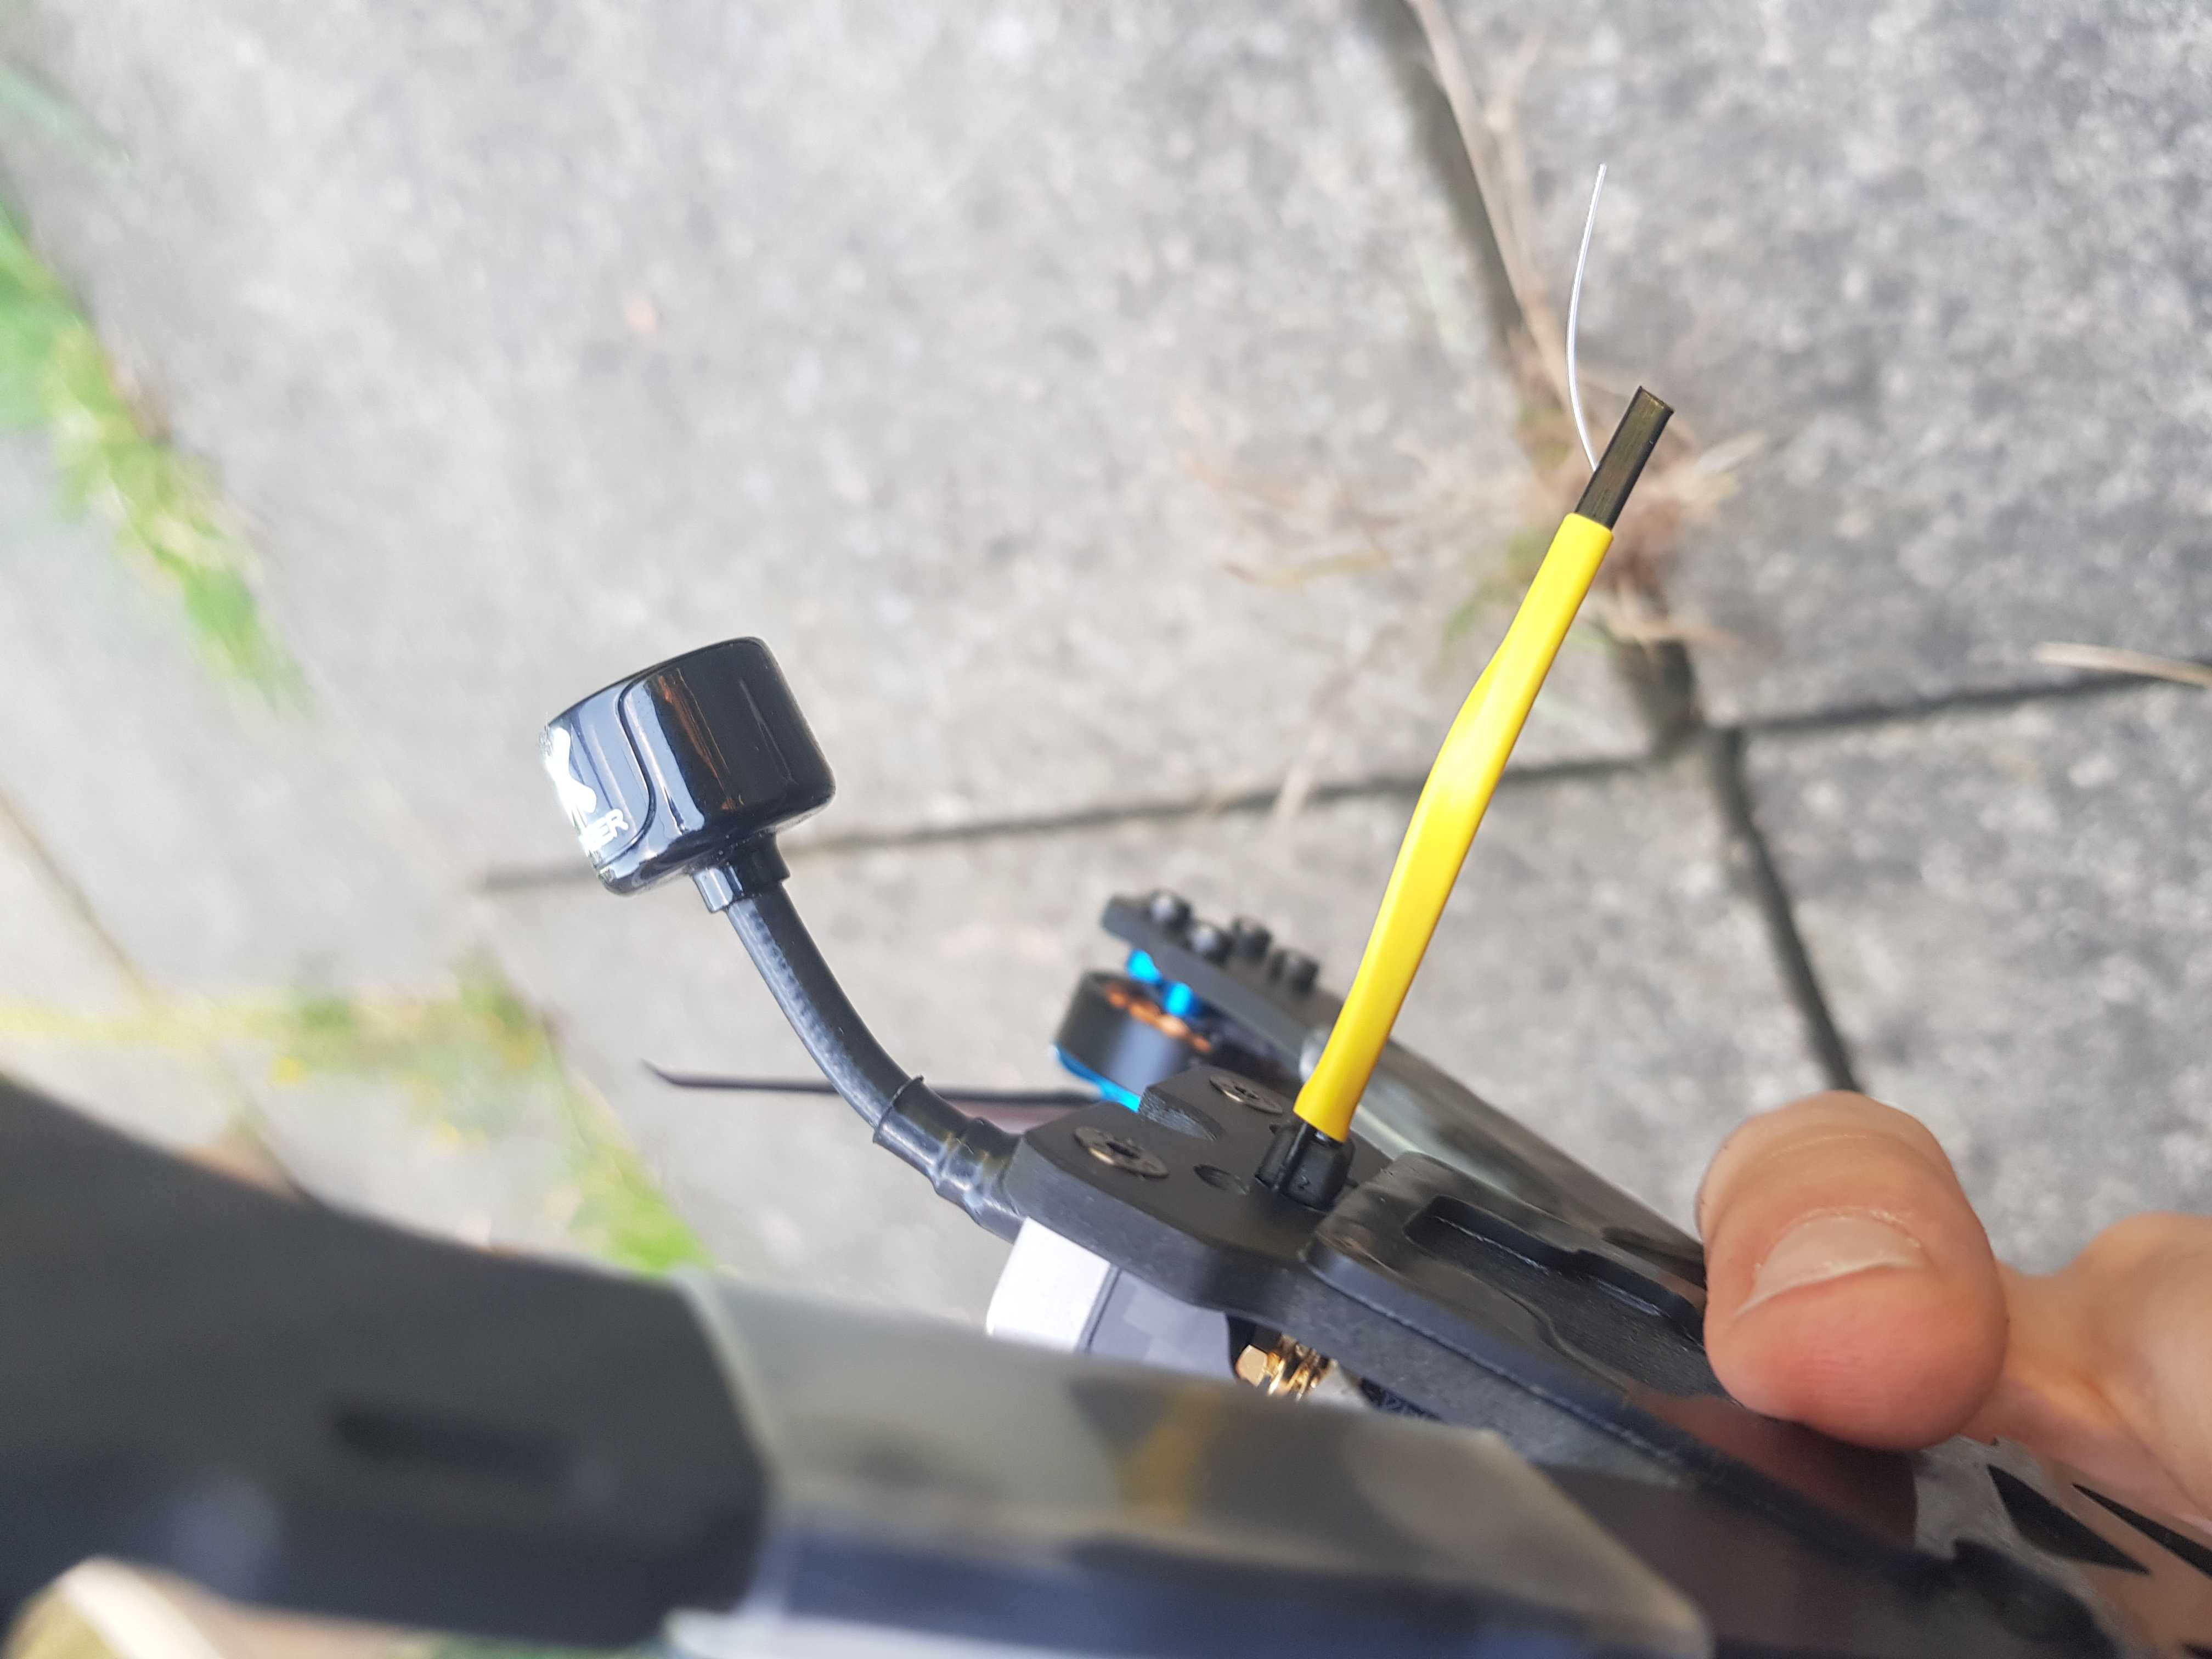
I’ve poked the XM antenna through the top plate and heatshrinked to one of the cable ties holding the VTX pigtail in place. Unfortunately, I couldn’t find blue heatshrink ![]()
The battery protects this antenna rather well, though, I don’t think anyone should use a battery for a bash guard!
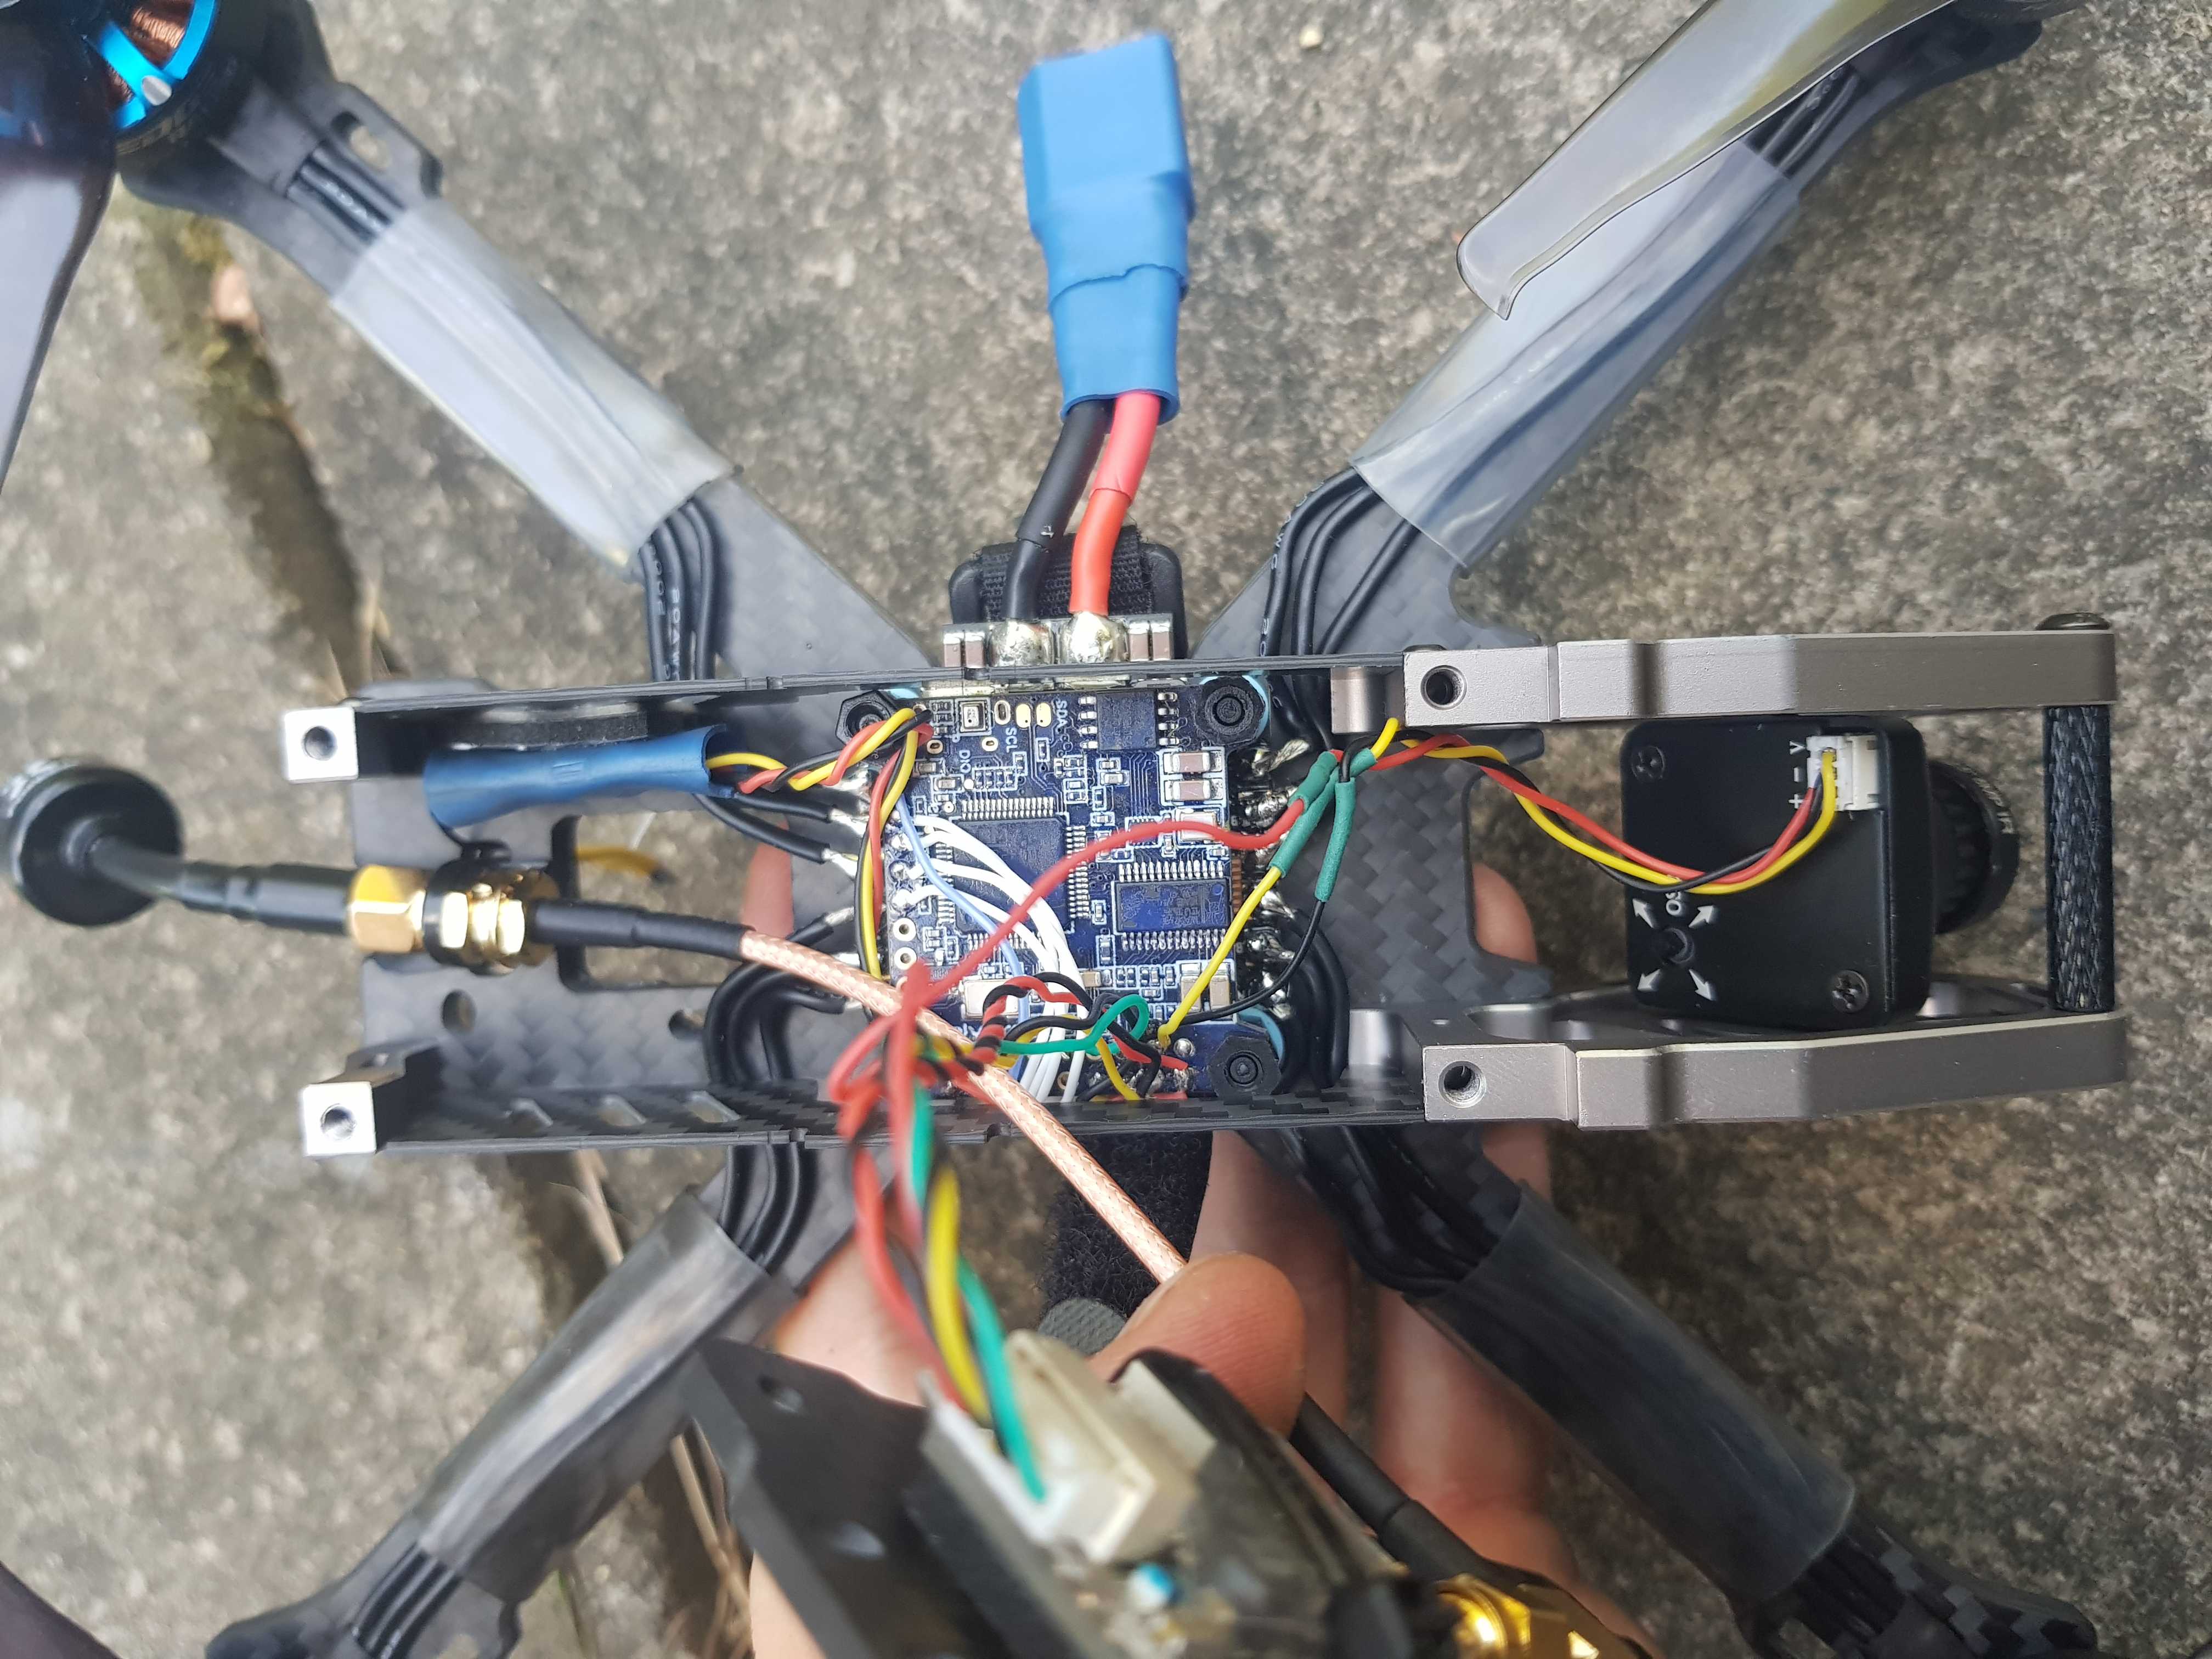
Here the camera is wired up, again, as it should be according to the Kakute’s documentation. It’s some no-name camera that we found laying in a parts bin, and it has it’s quirks, but seems to run just fine on 5v. Maybe I’ll swap it out, but I am known to be a total sucker for aesthetics and I just can’t find another black or blue camera laying around, no matter how hard I try!
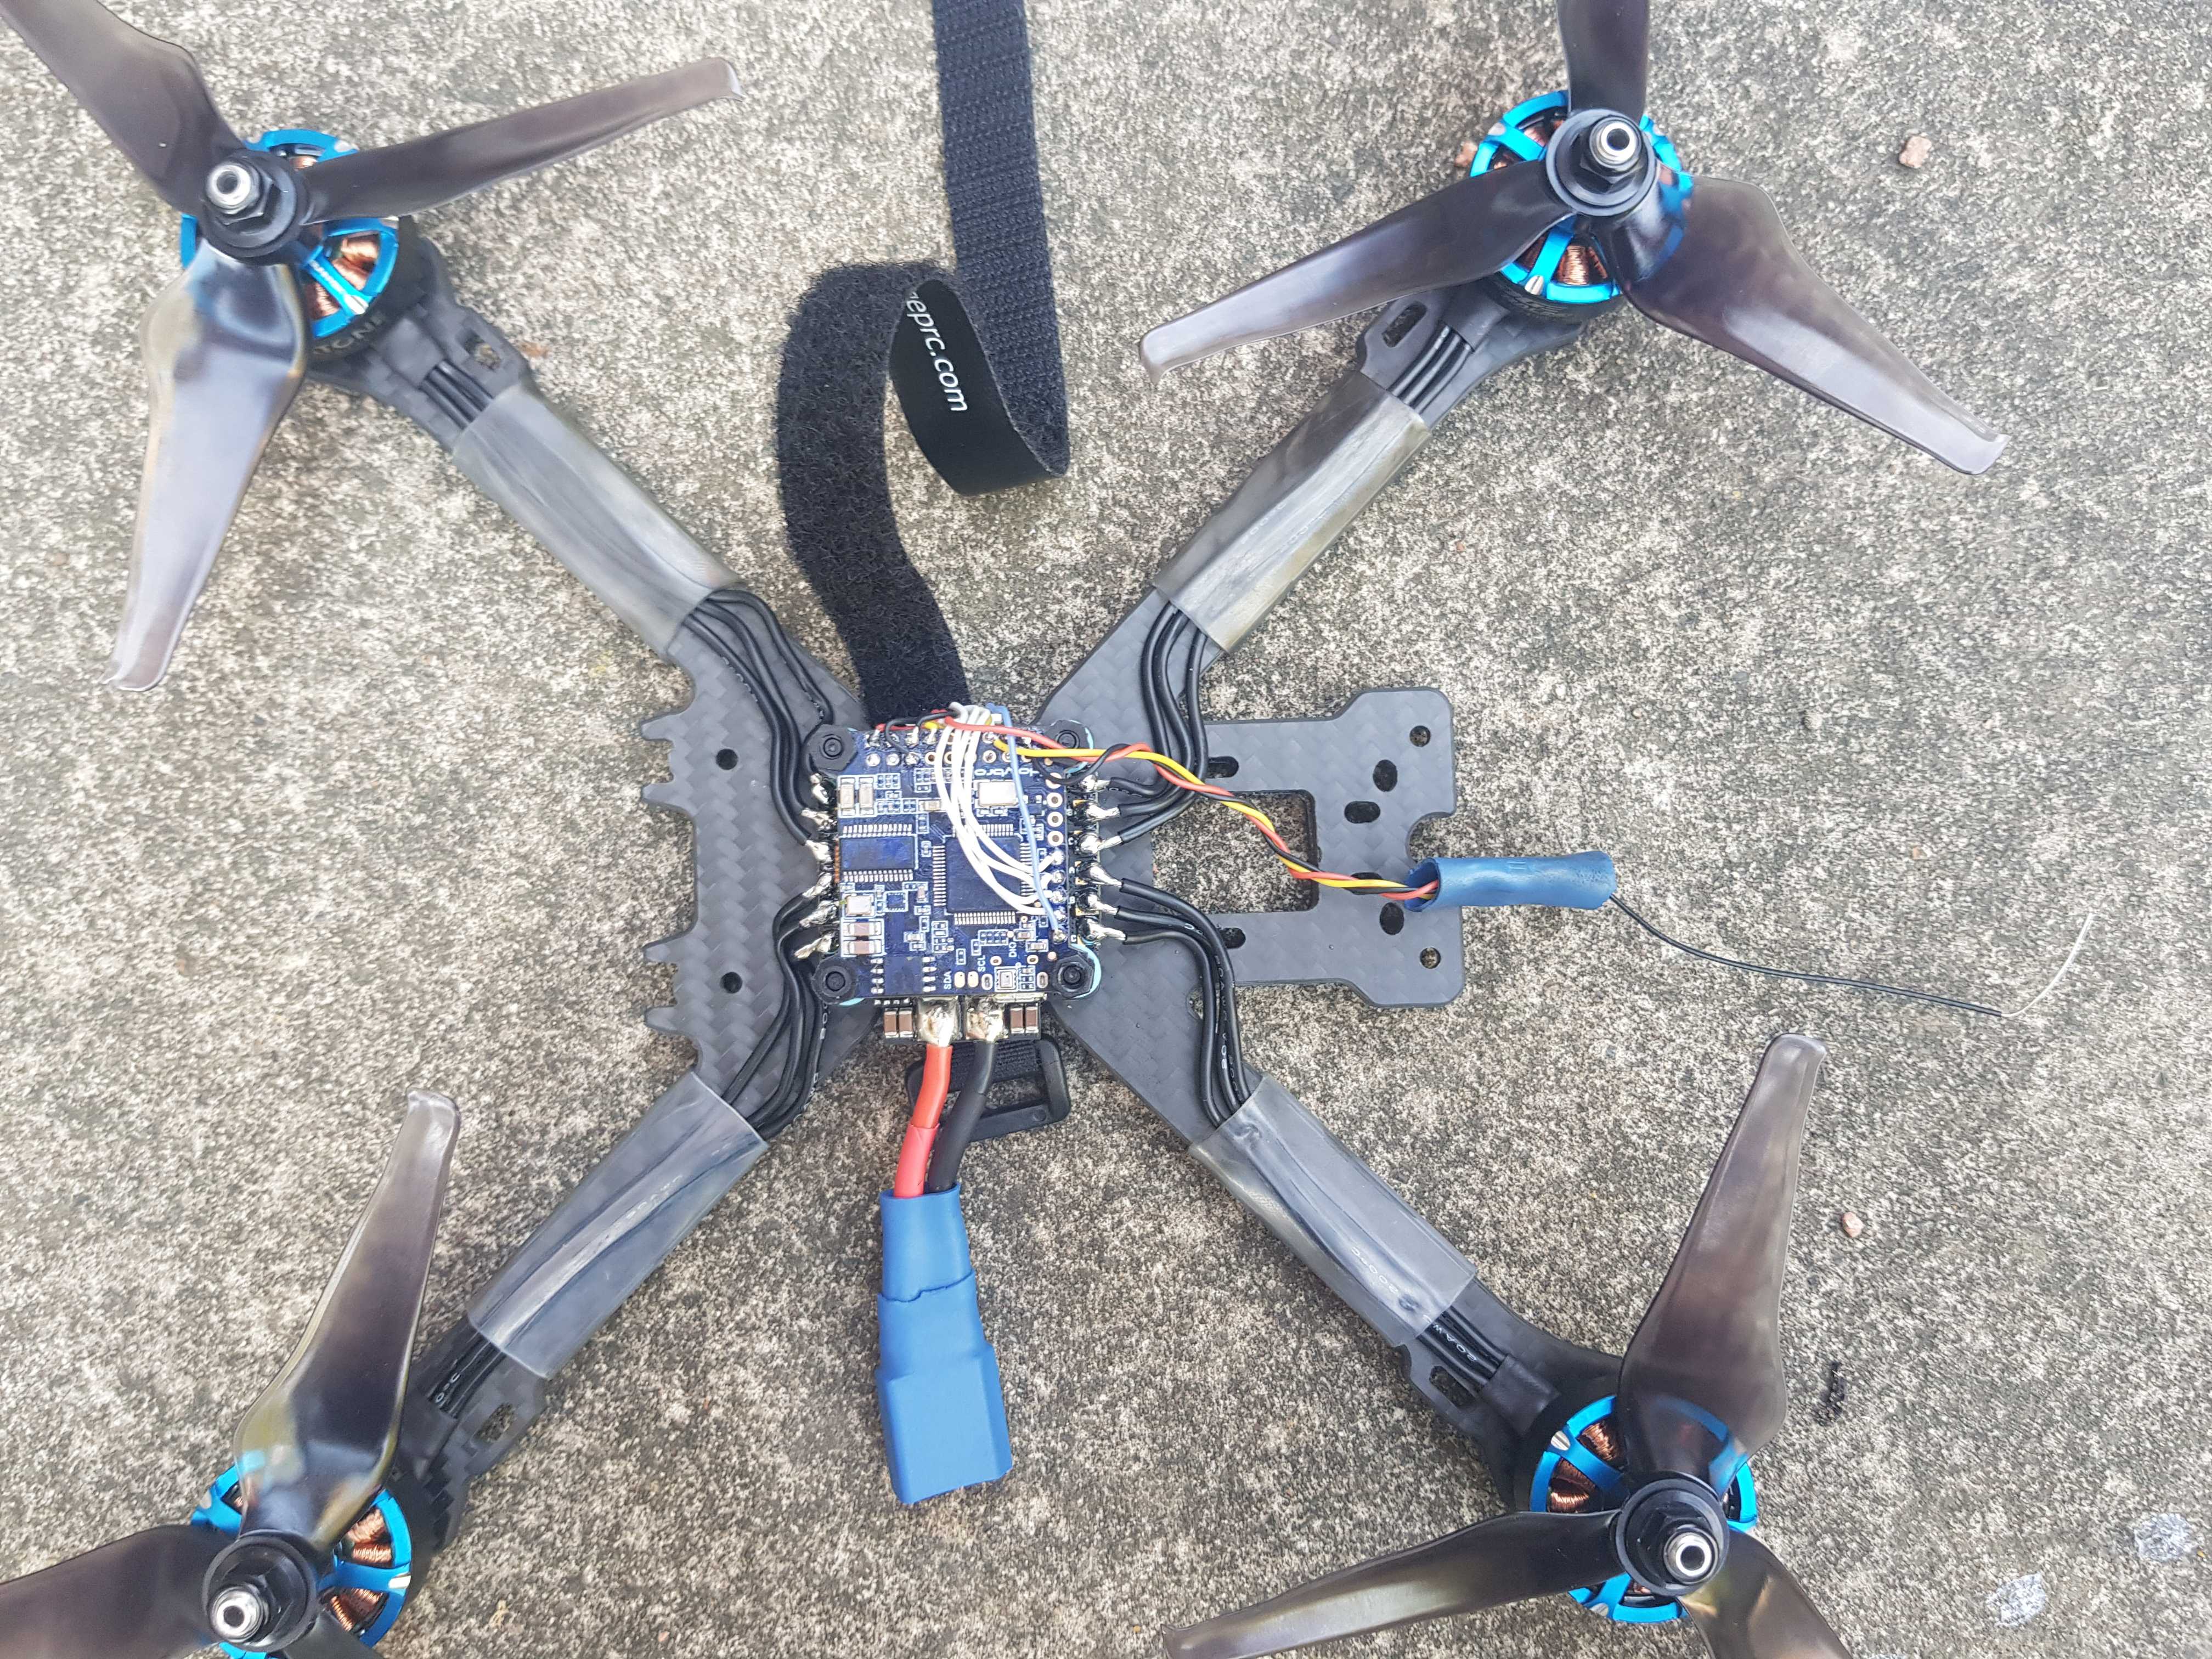
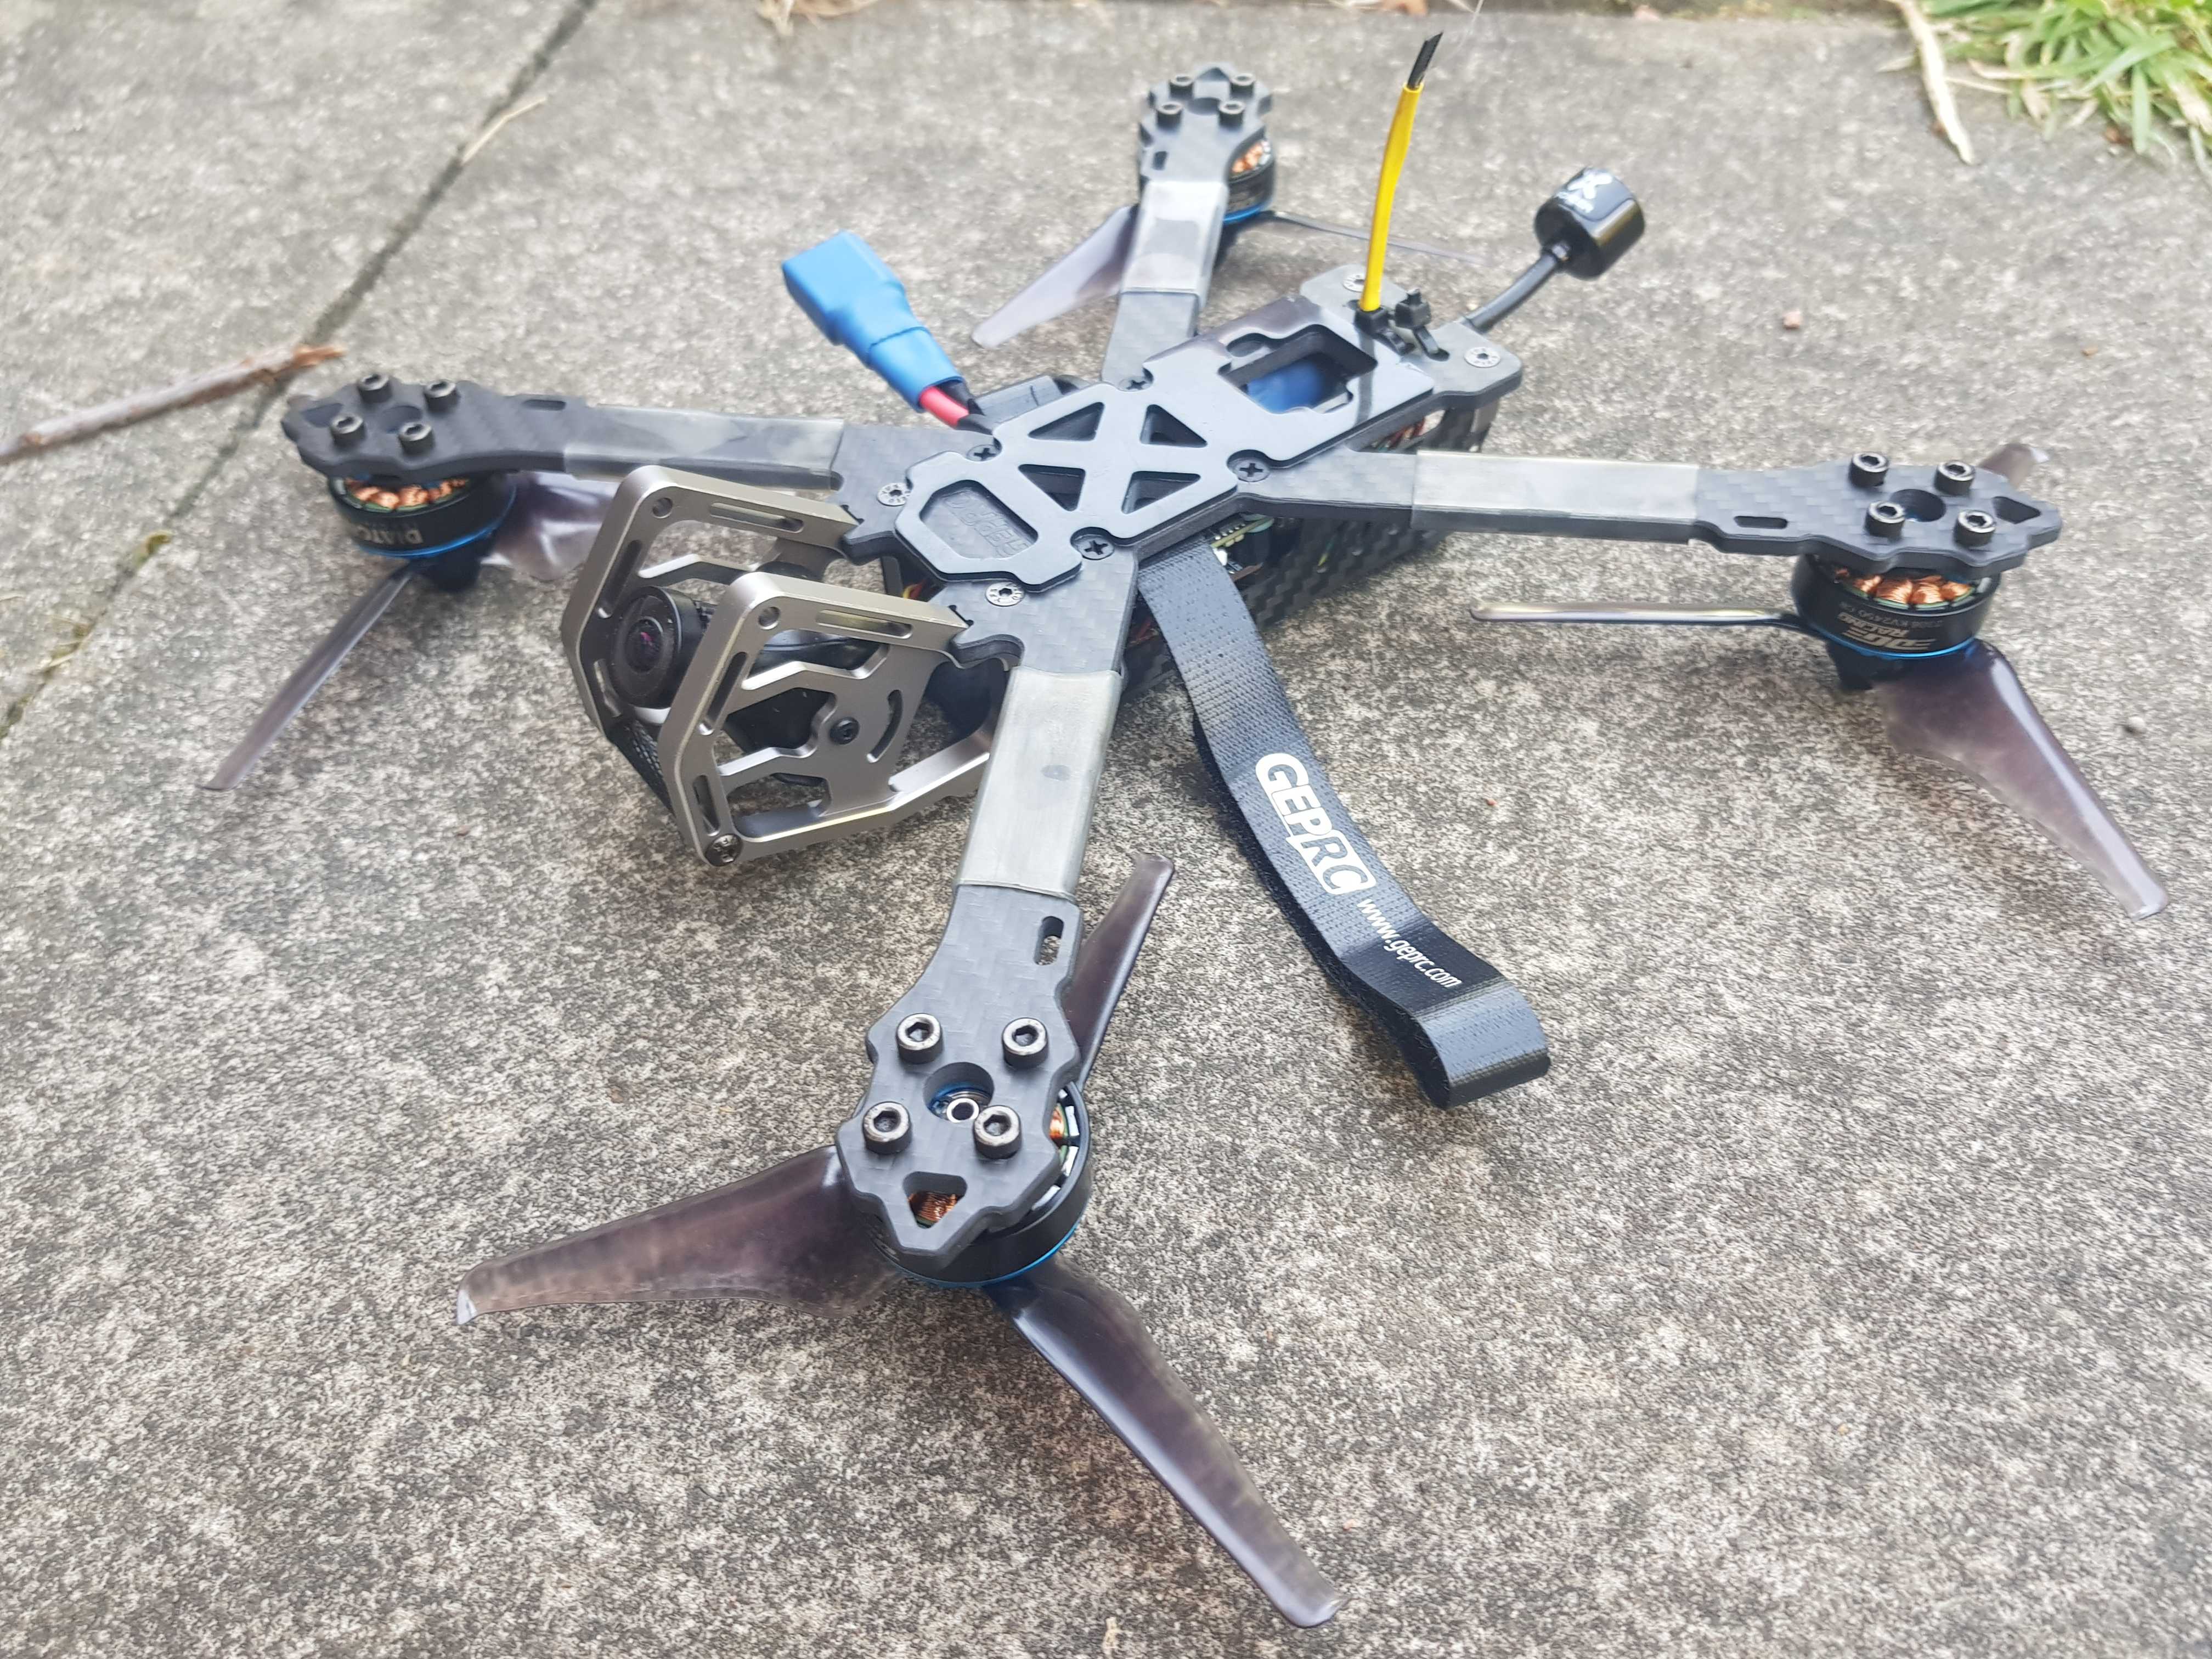
So, all that was left to do was to close it up, force the screws to squeeze everything together, and pray it came to life…

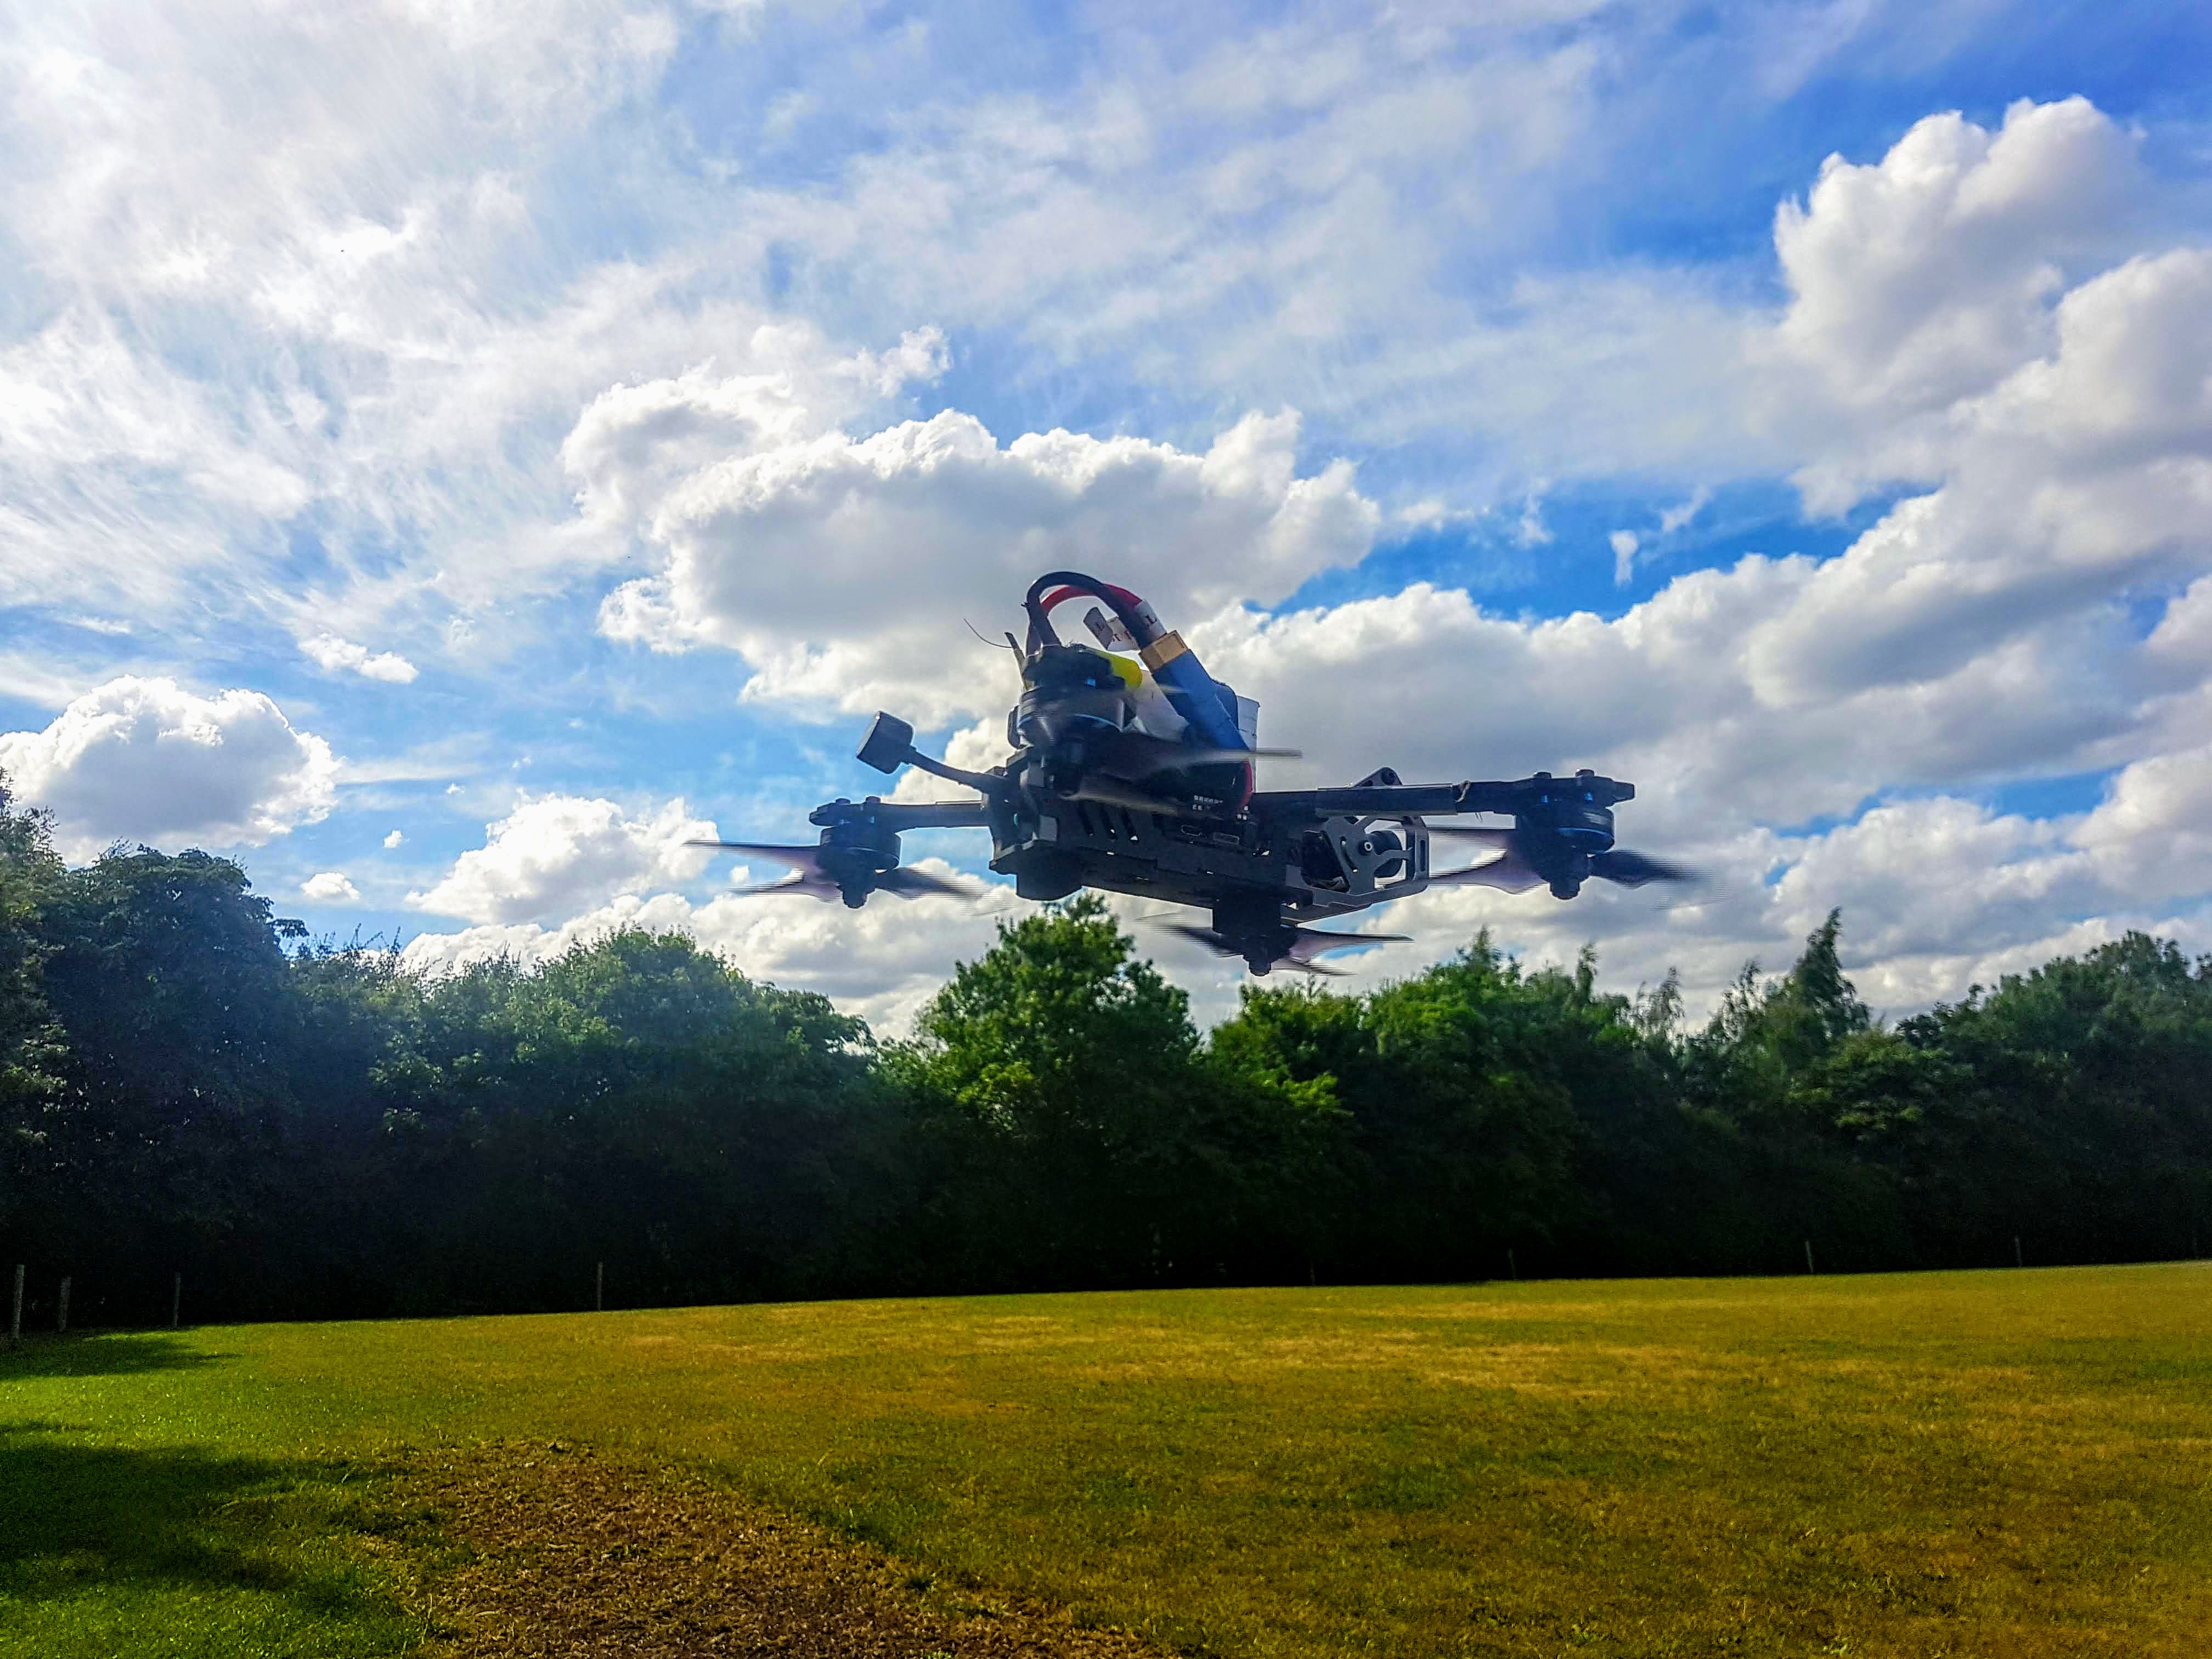
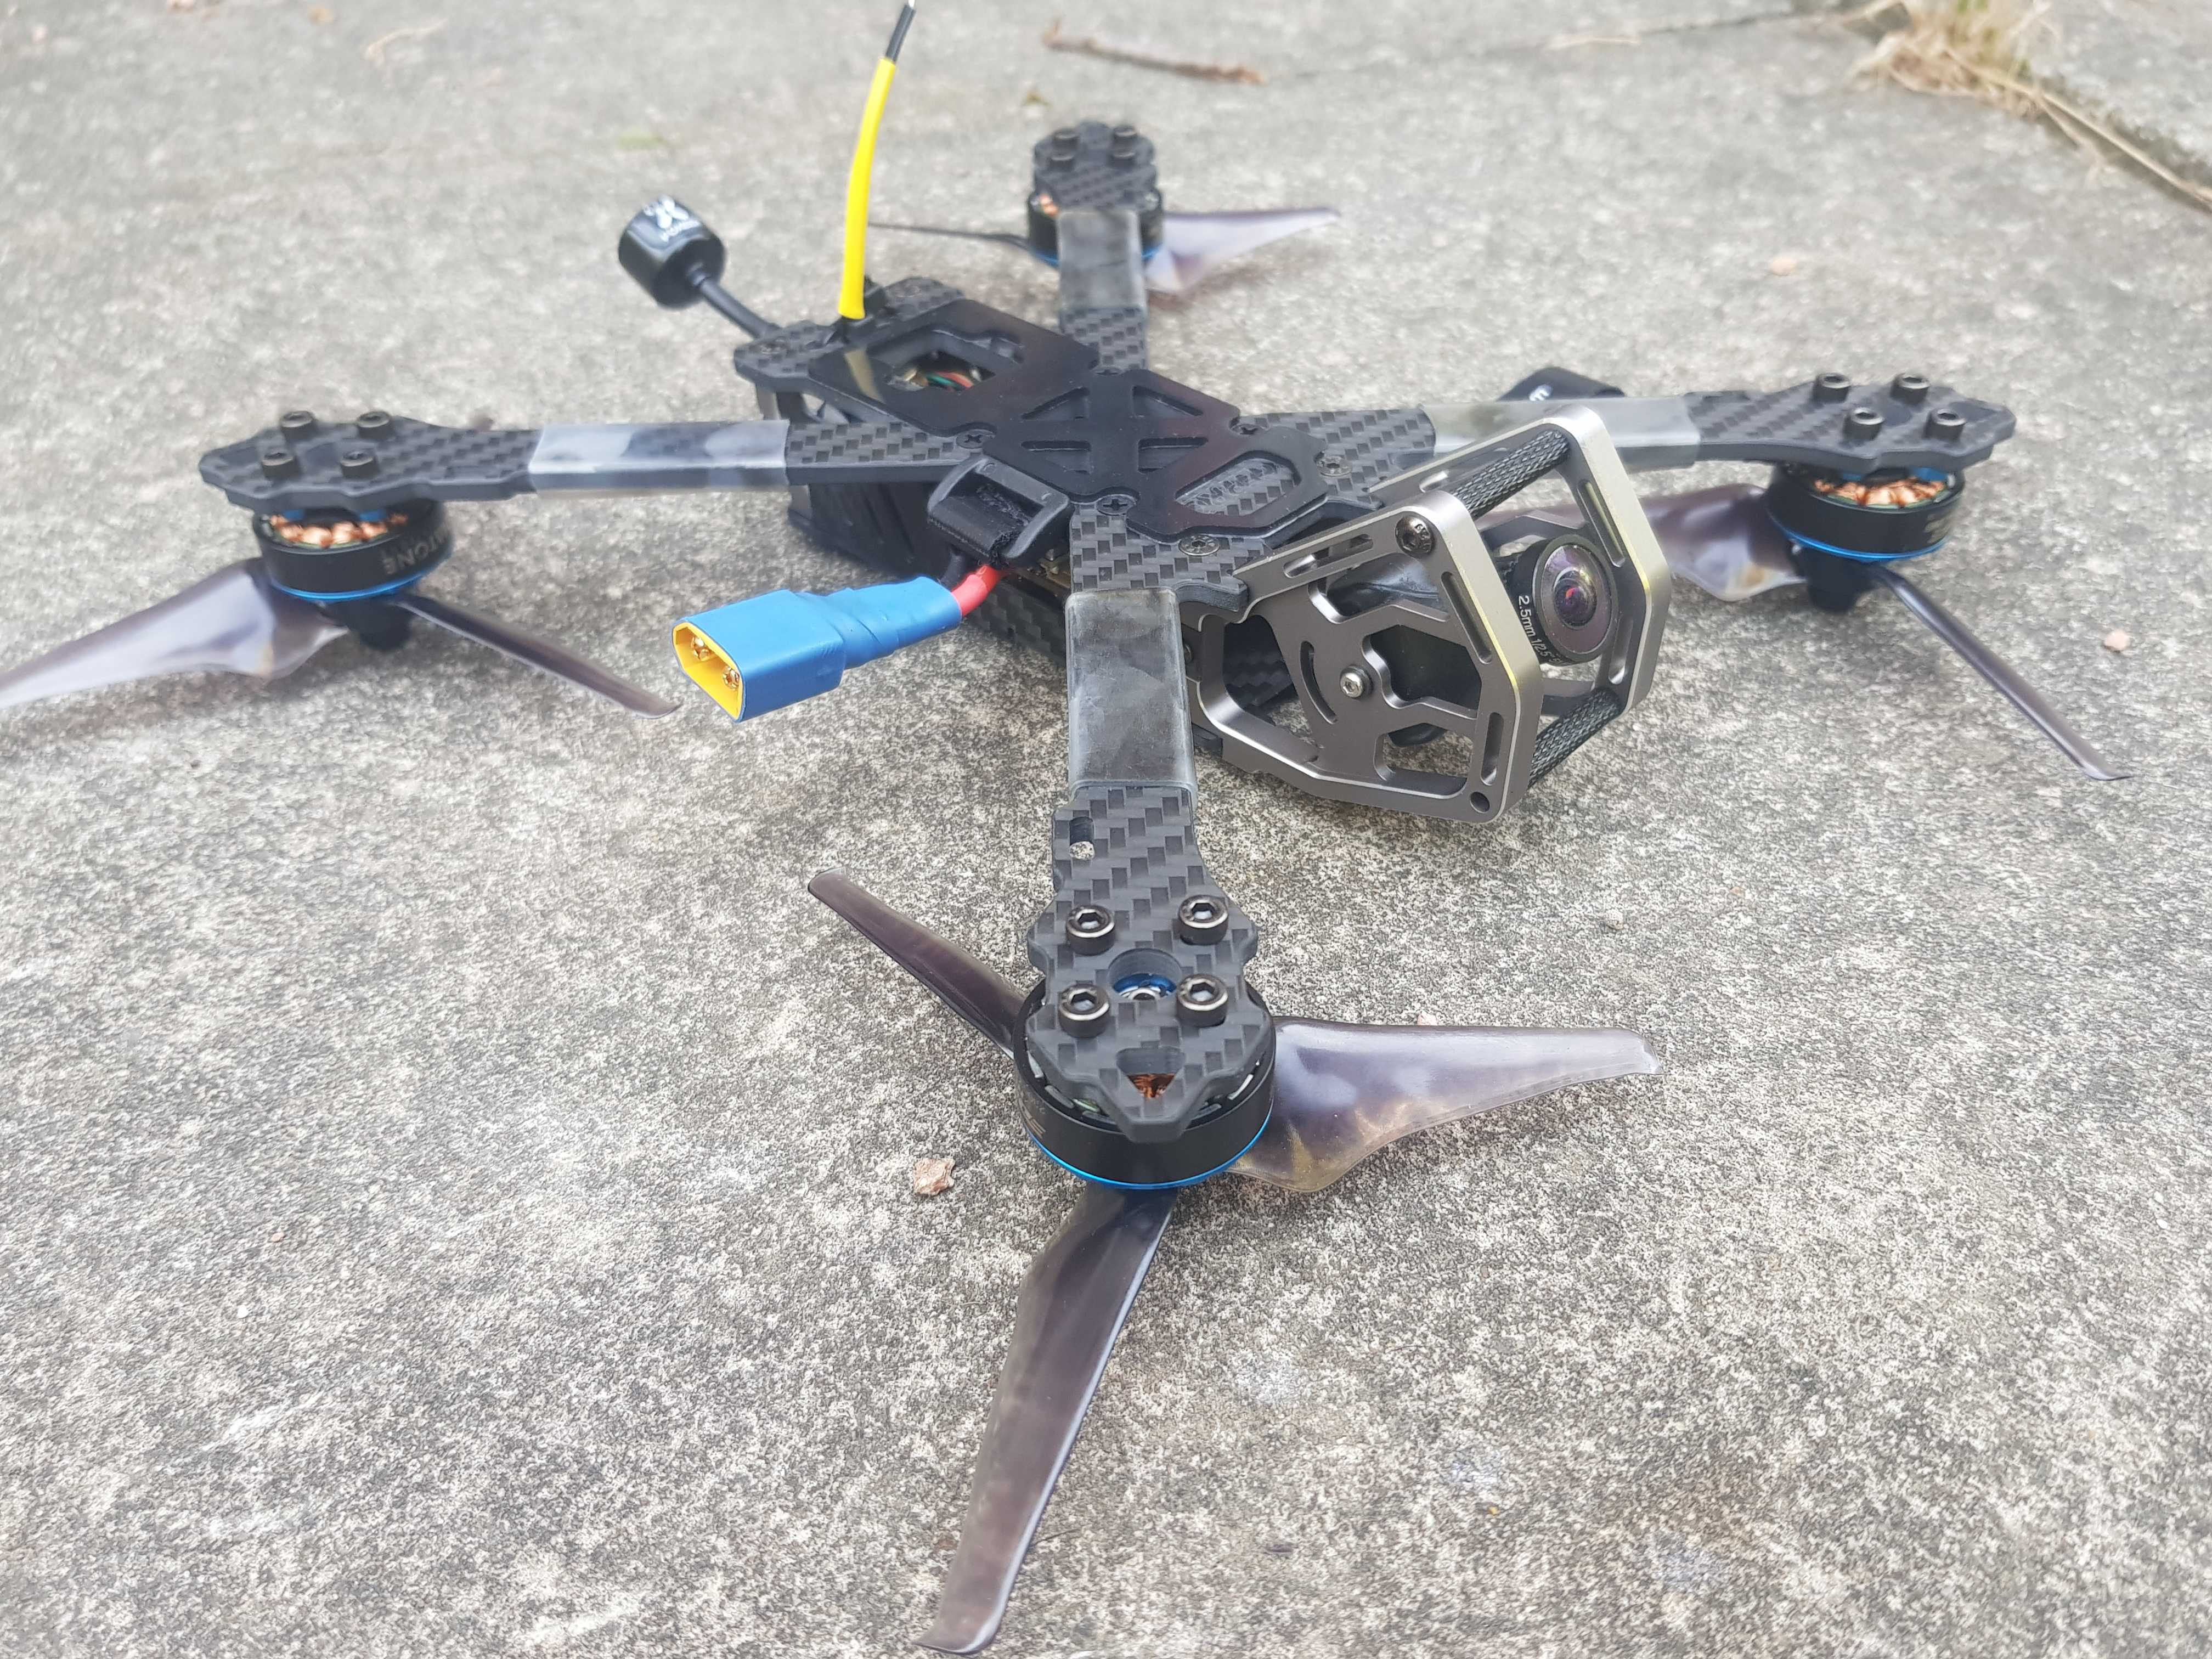
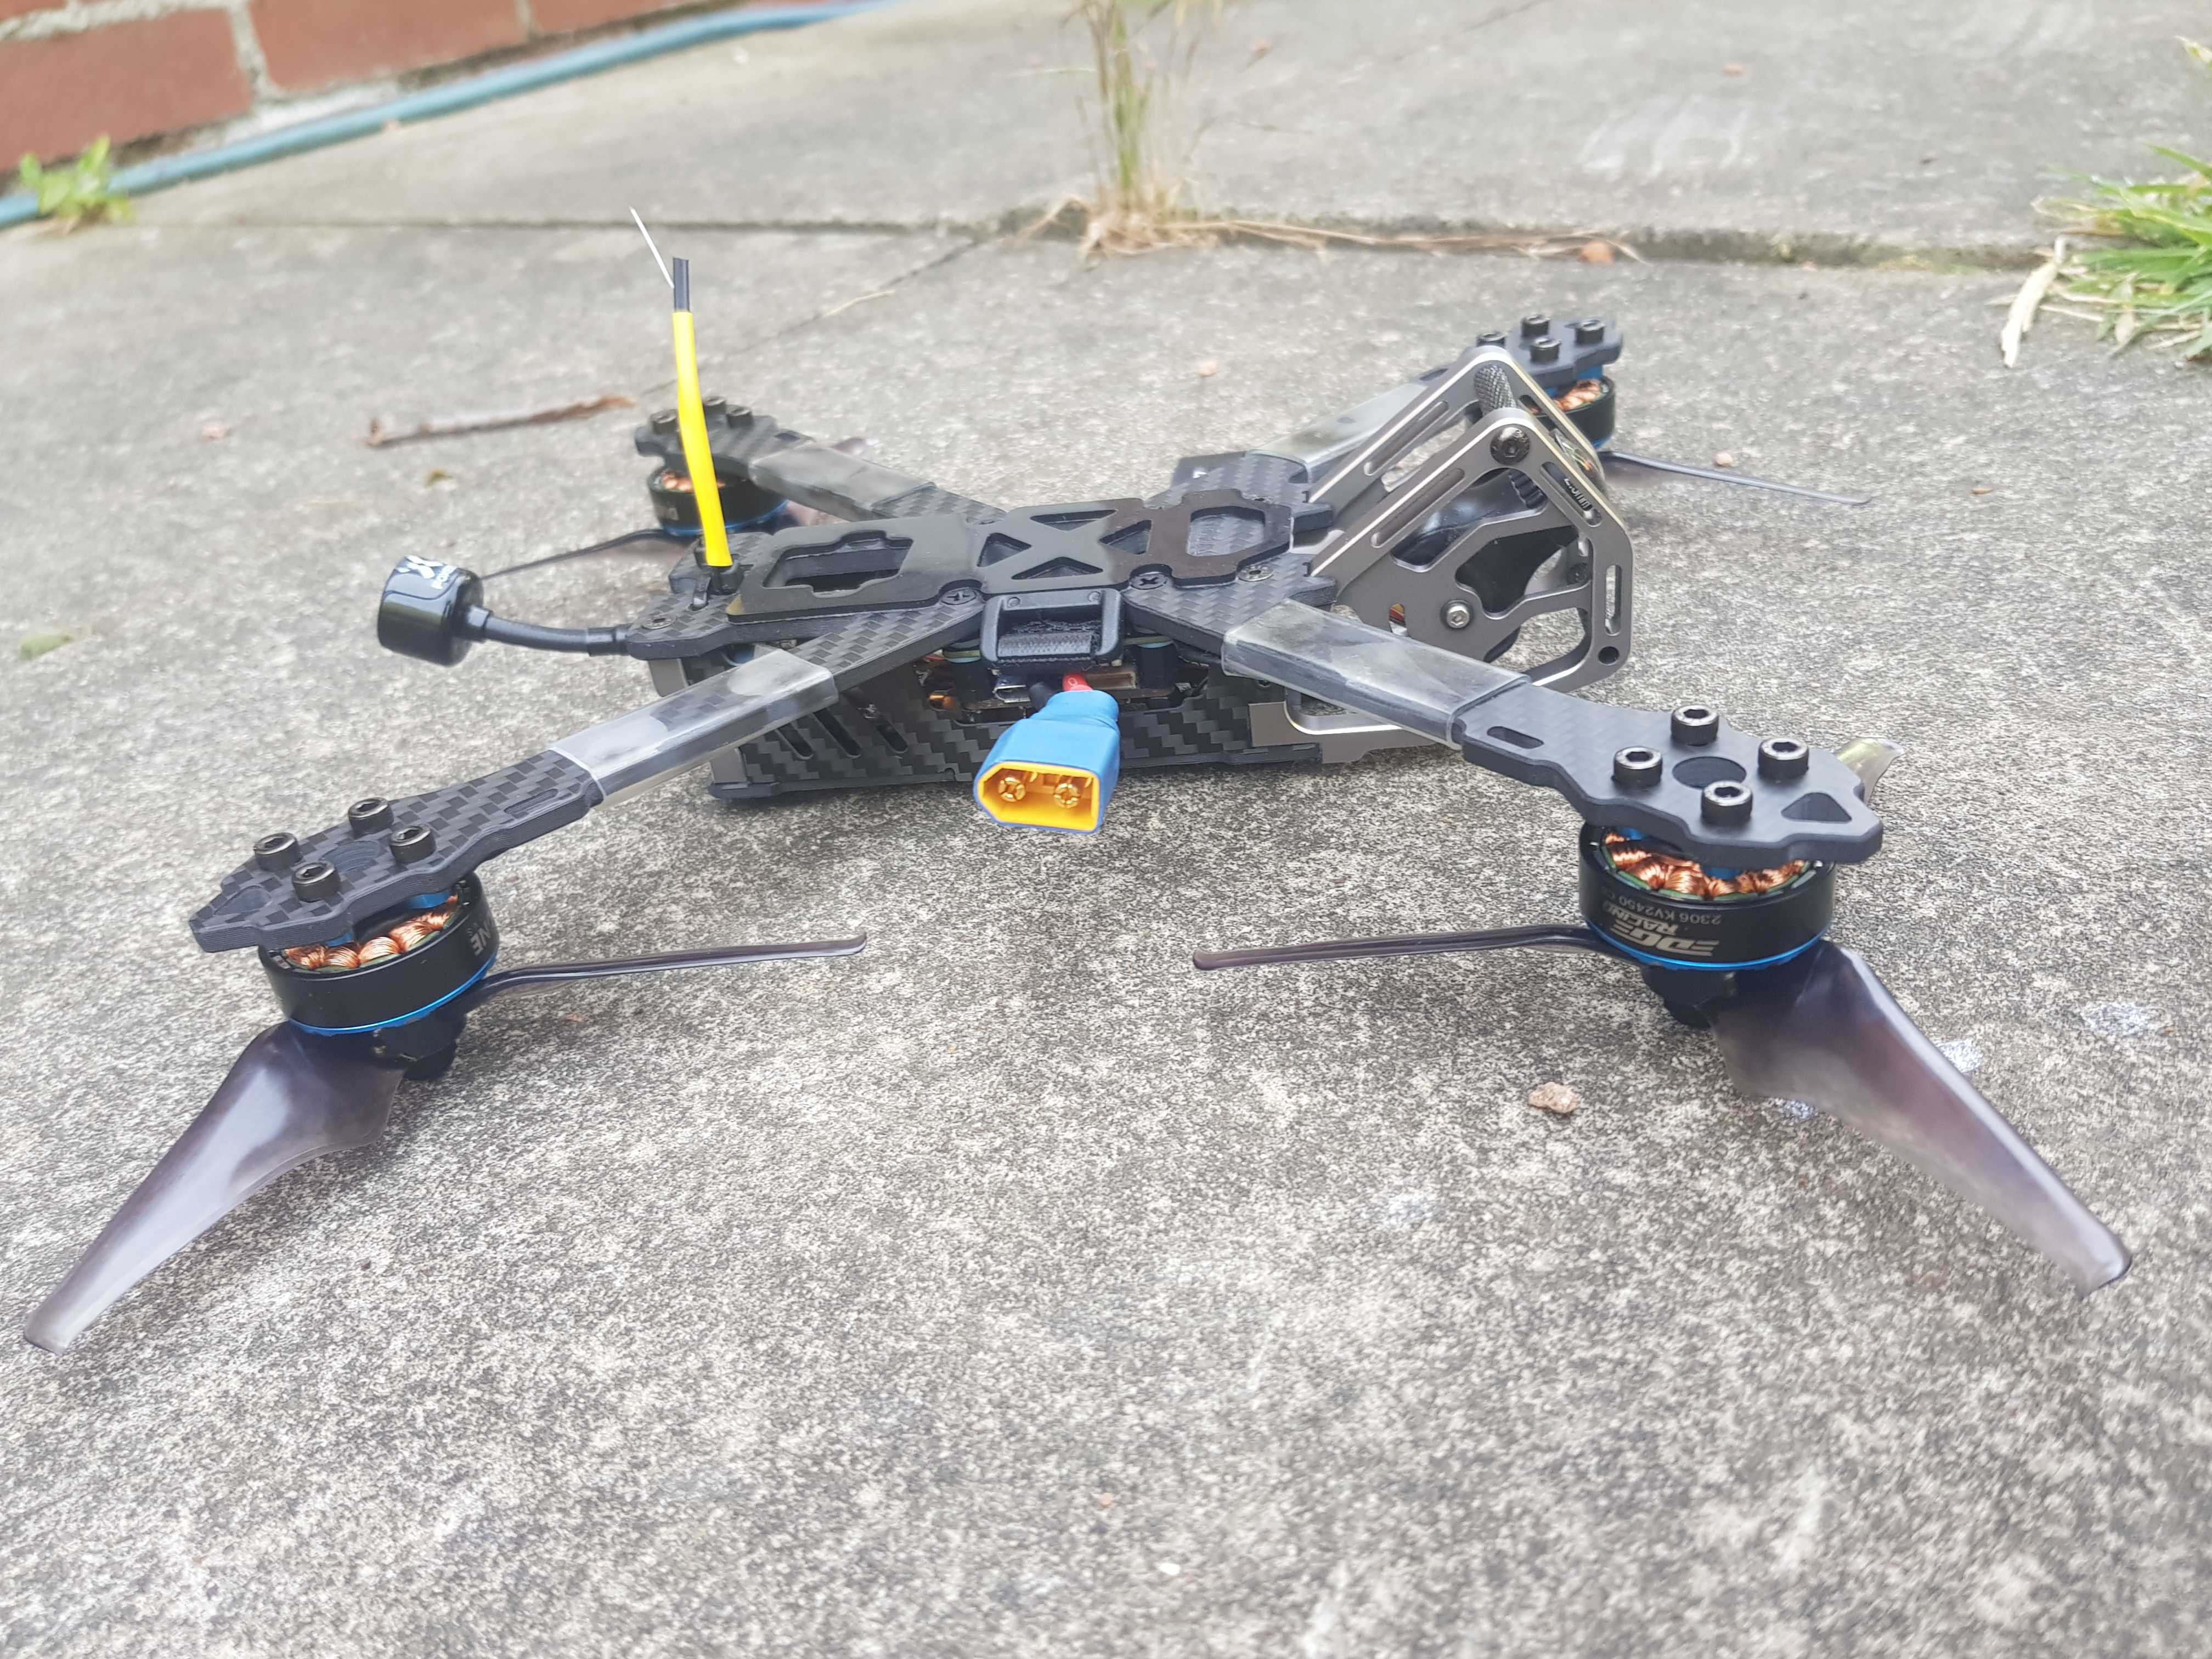
And it did! Here’s the new member of the crew, dubbed ‘Bing’ by my girlfriend:

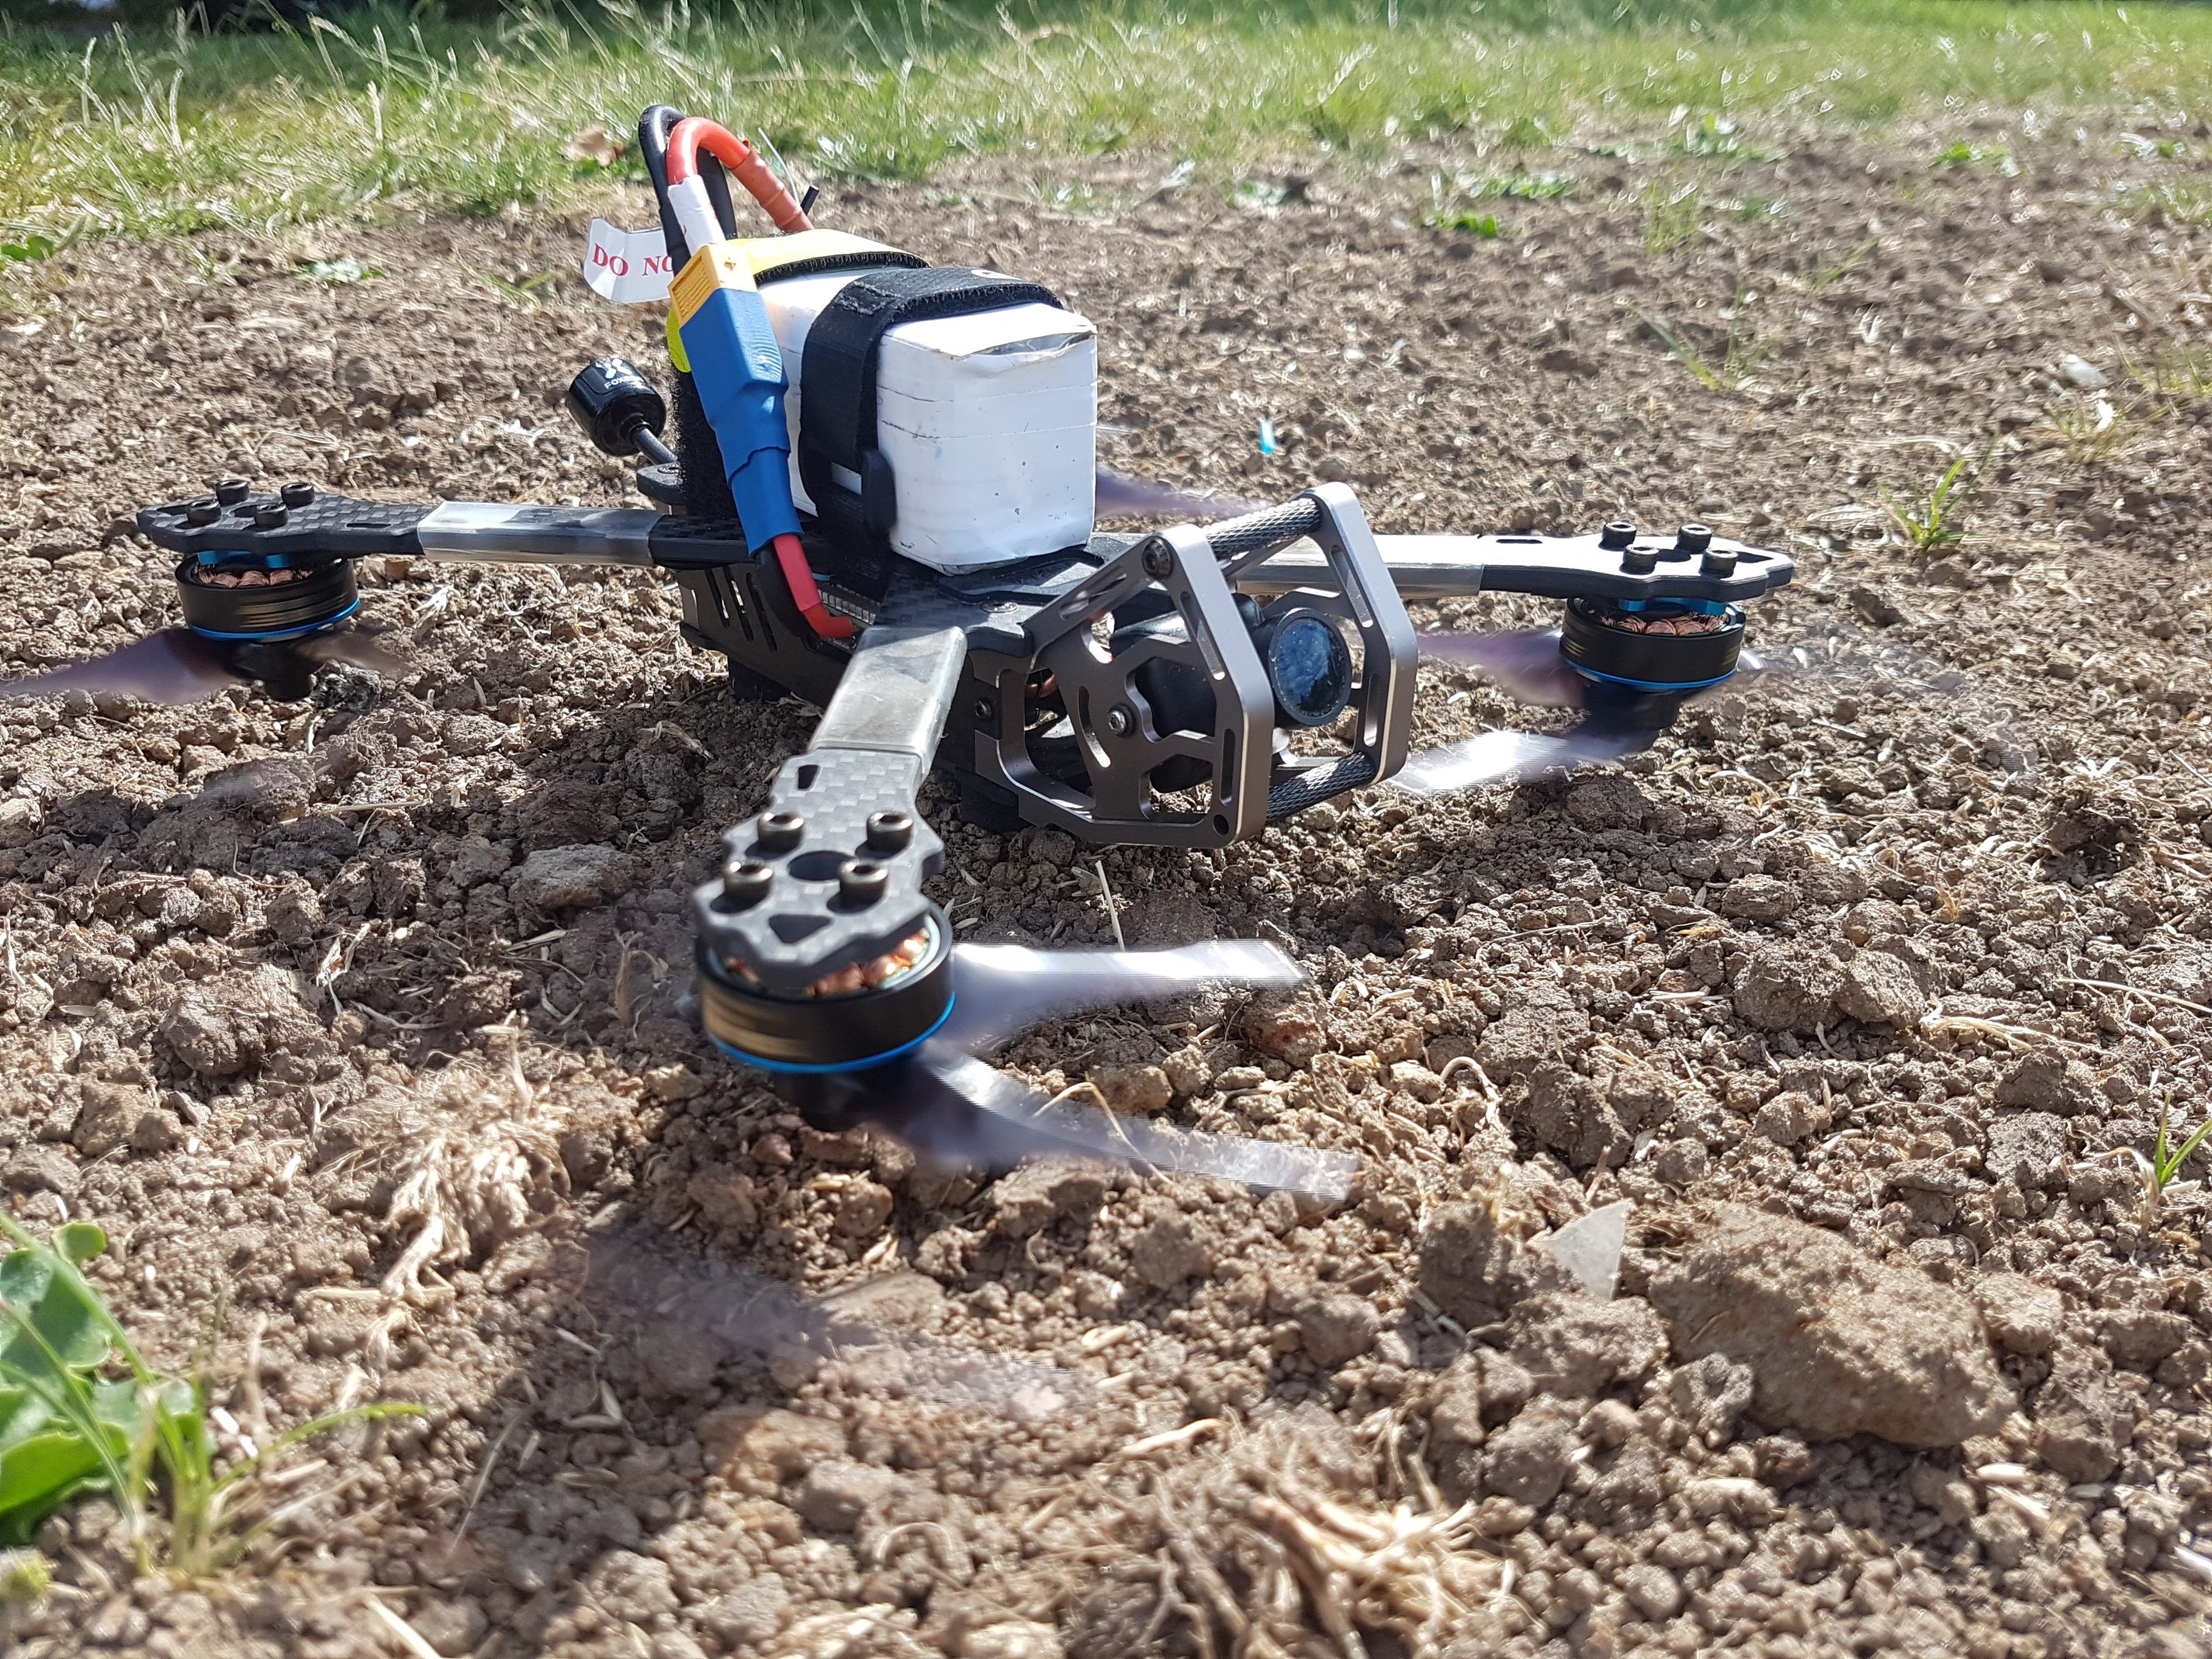
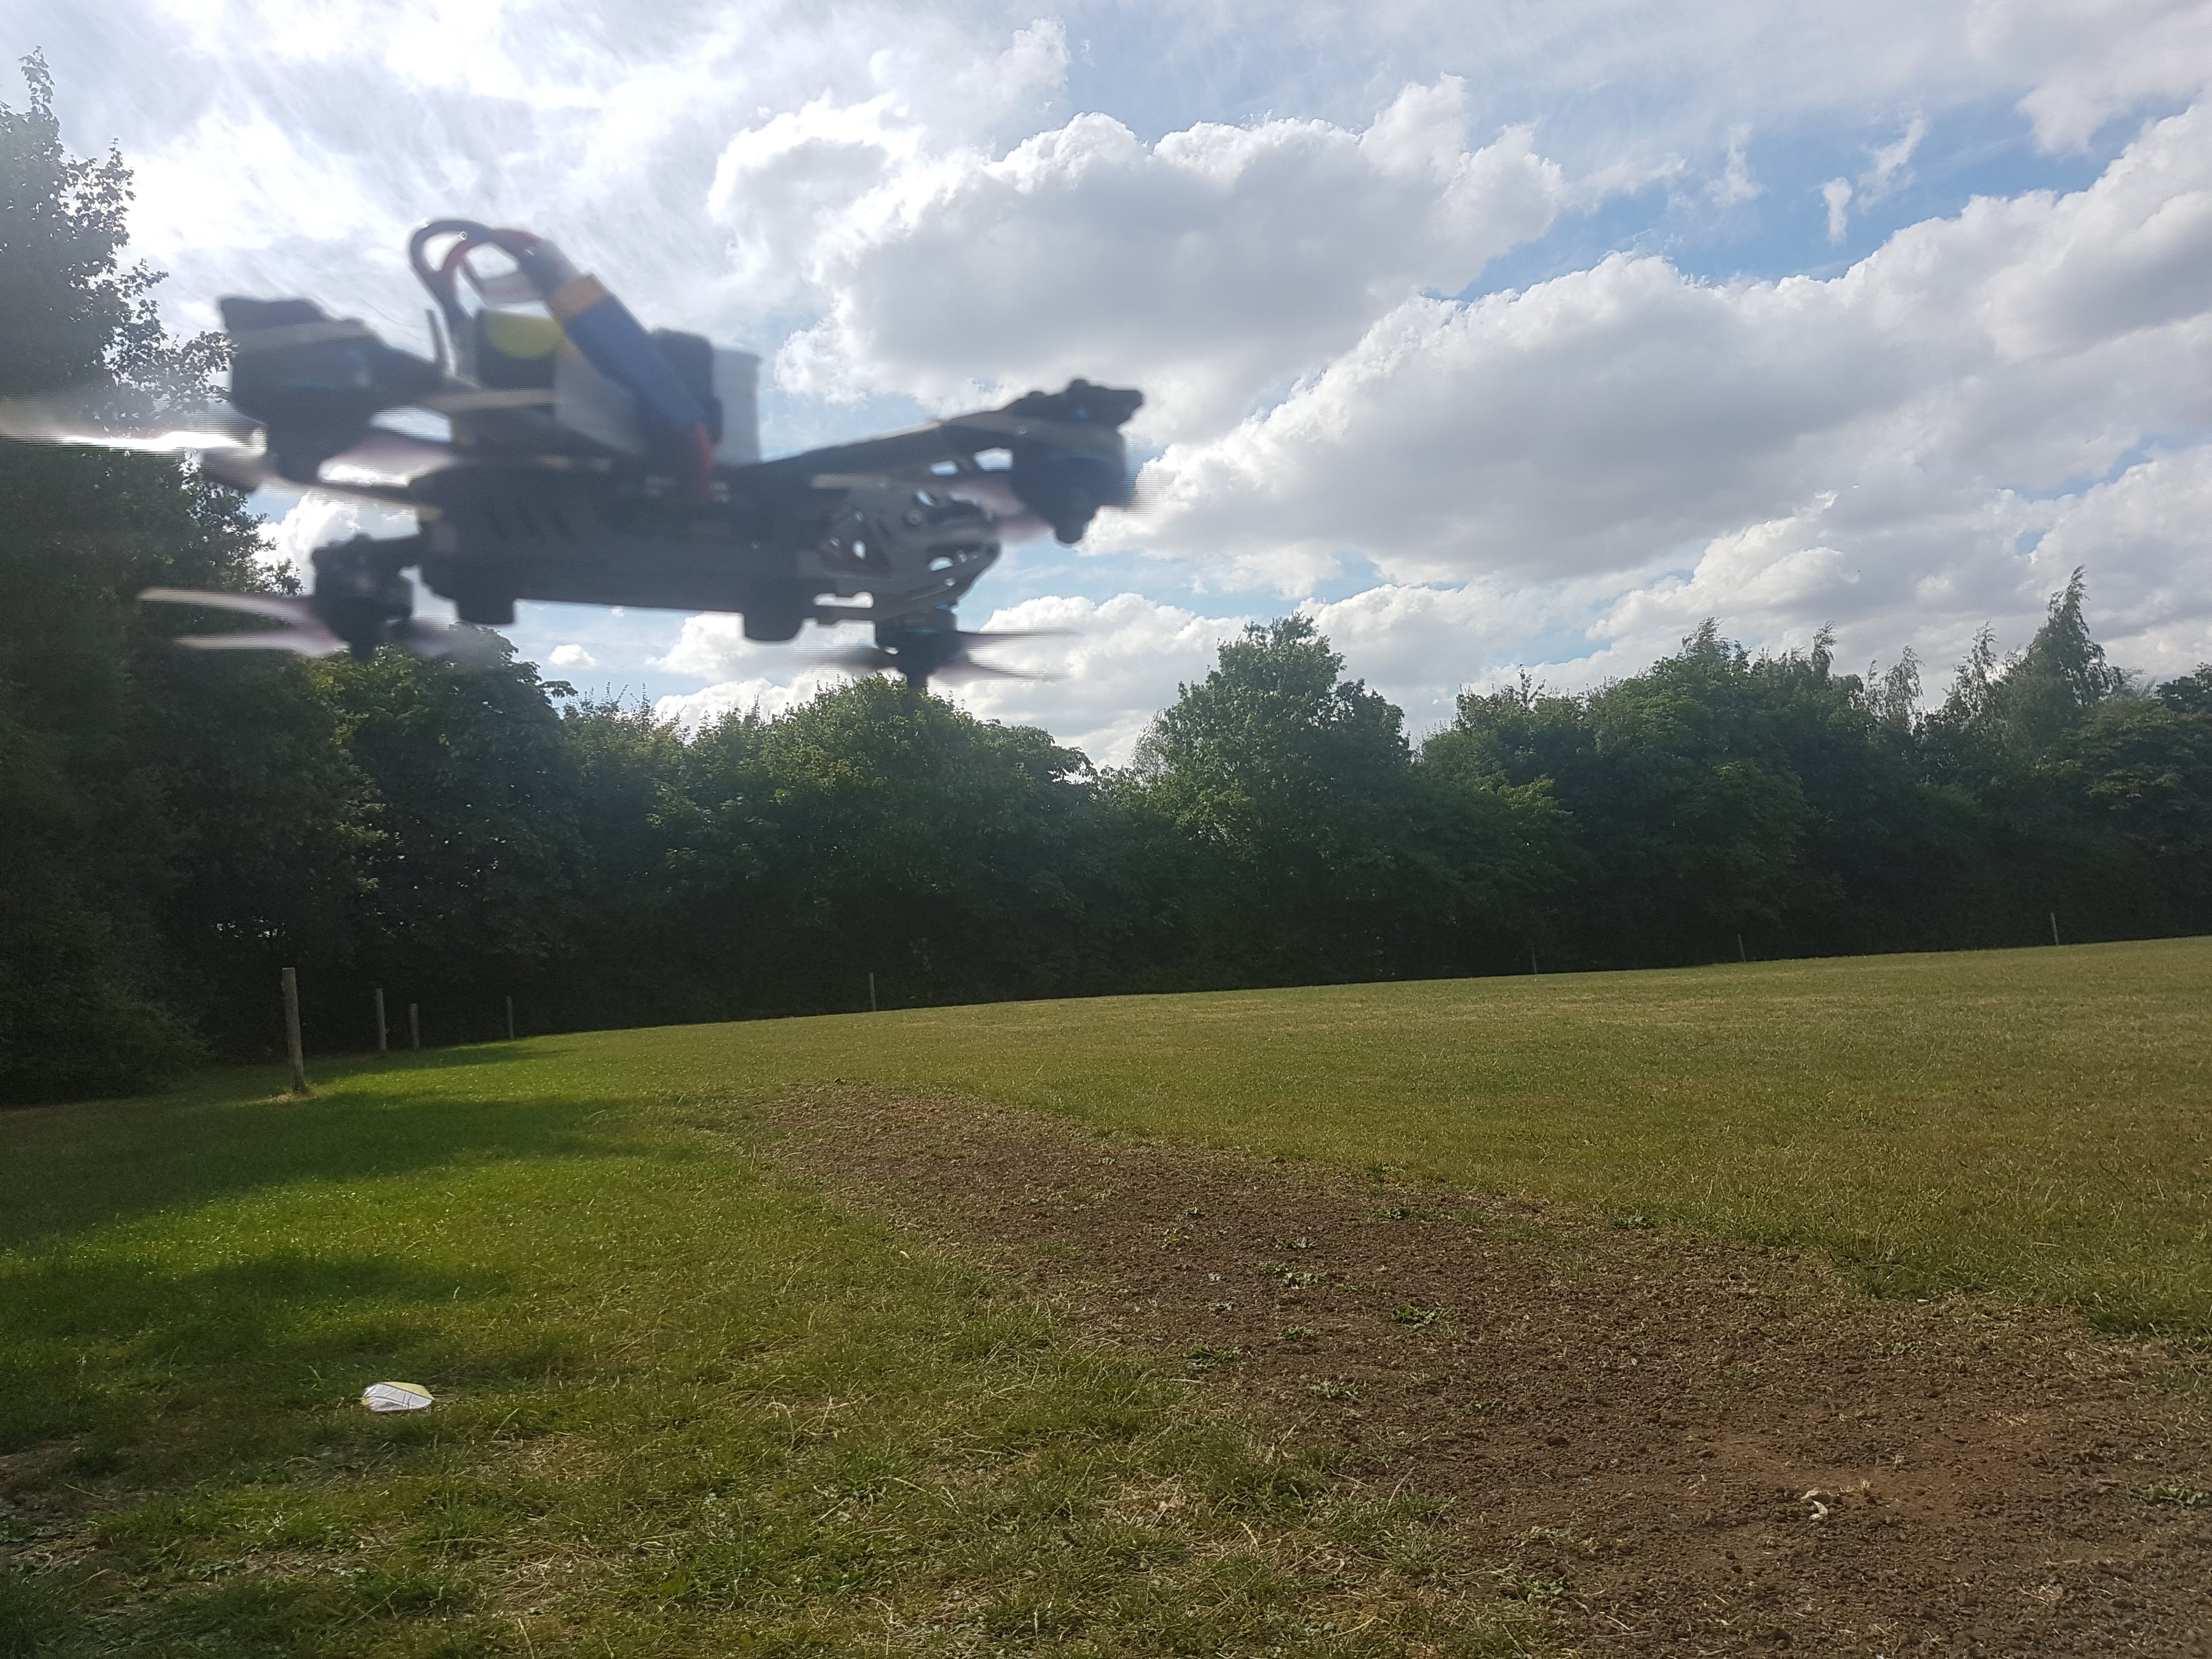
But you want to see it fly, of course, and while I don’t have much, I can oblige a little, after Alex and I did some seriously hard work in the office by flying Bing around a local field! ![]()
First off, our favourite, a slow motion punch out over dirt!
And if you’re interested (I certainly was!) here’s how the thing punches out in regular speed:
Unfortunately there’s no footage of me just flying around (I refuse to say whether that’s because I’m a bad pilot or not ![]() ) but some might surface soon.
) but some might surface soon.
It’d certainly be interesting to see how this flies with the motors on top as usual, for comparison… Maybe I’ll try it out?
Anyway, this quad, like a lot of them on Betaflight 3.4, flies beautifully, it’s very hard to fault it. If you have any questions feel free to ask, and if you’d like this available as a kit, also let me know!
Just before I go away, the betaflight setup process was simple;
Remap the motors using the “resource” CLI commands, (as per the link here: Remapping Motors with Resource Command (3.1) · betaflight/betaflight Wiki · GitHub ) so that everything is in the right place, make a note of which spin the wrong way and correct that in BLHeli Suite.
Selecting SBUS and enabling airmode, 8k/8k in the Config Tab, and enabling Serial RX and Smartaudio in the ports tab, standard stuff. The receiver showed in the Receiver tab immediately, I had to change the mapping to TAER1234 as per usual for FrSky, and I set a deadband of 1.
My OSD is simple, it shows me the main voltage and the raft name, nice and easy, not too distracting.
After setting the modes (Arming, the DSHOT beacon/buzzer, Turtle mode or ‘crash after flip’, and an angle mode I’ll rarely use), the quad was pretty much ready to go. I also applied some of the recommended settings from here: Tuning Tips for Betaflight 3.4 · betaflight/betaflight Wiki · GitHub but nothing too crazy.
I love this quad, I like it’s quirkiness and I think it looks and flies absolutely great. It’s punchy yet controllable - all that’s left to be seen is how well it takes an impact!
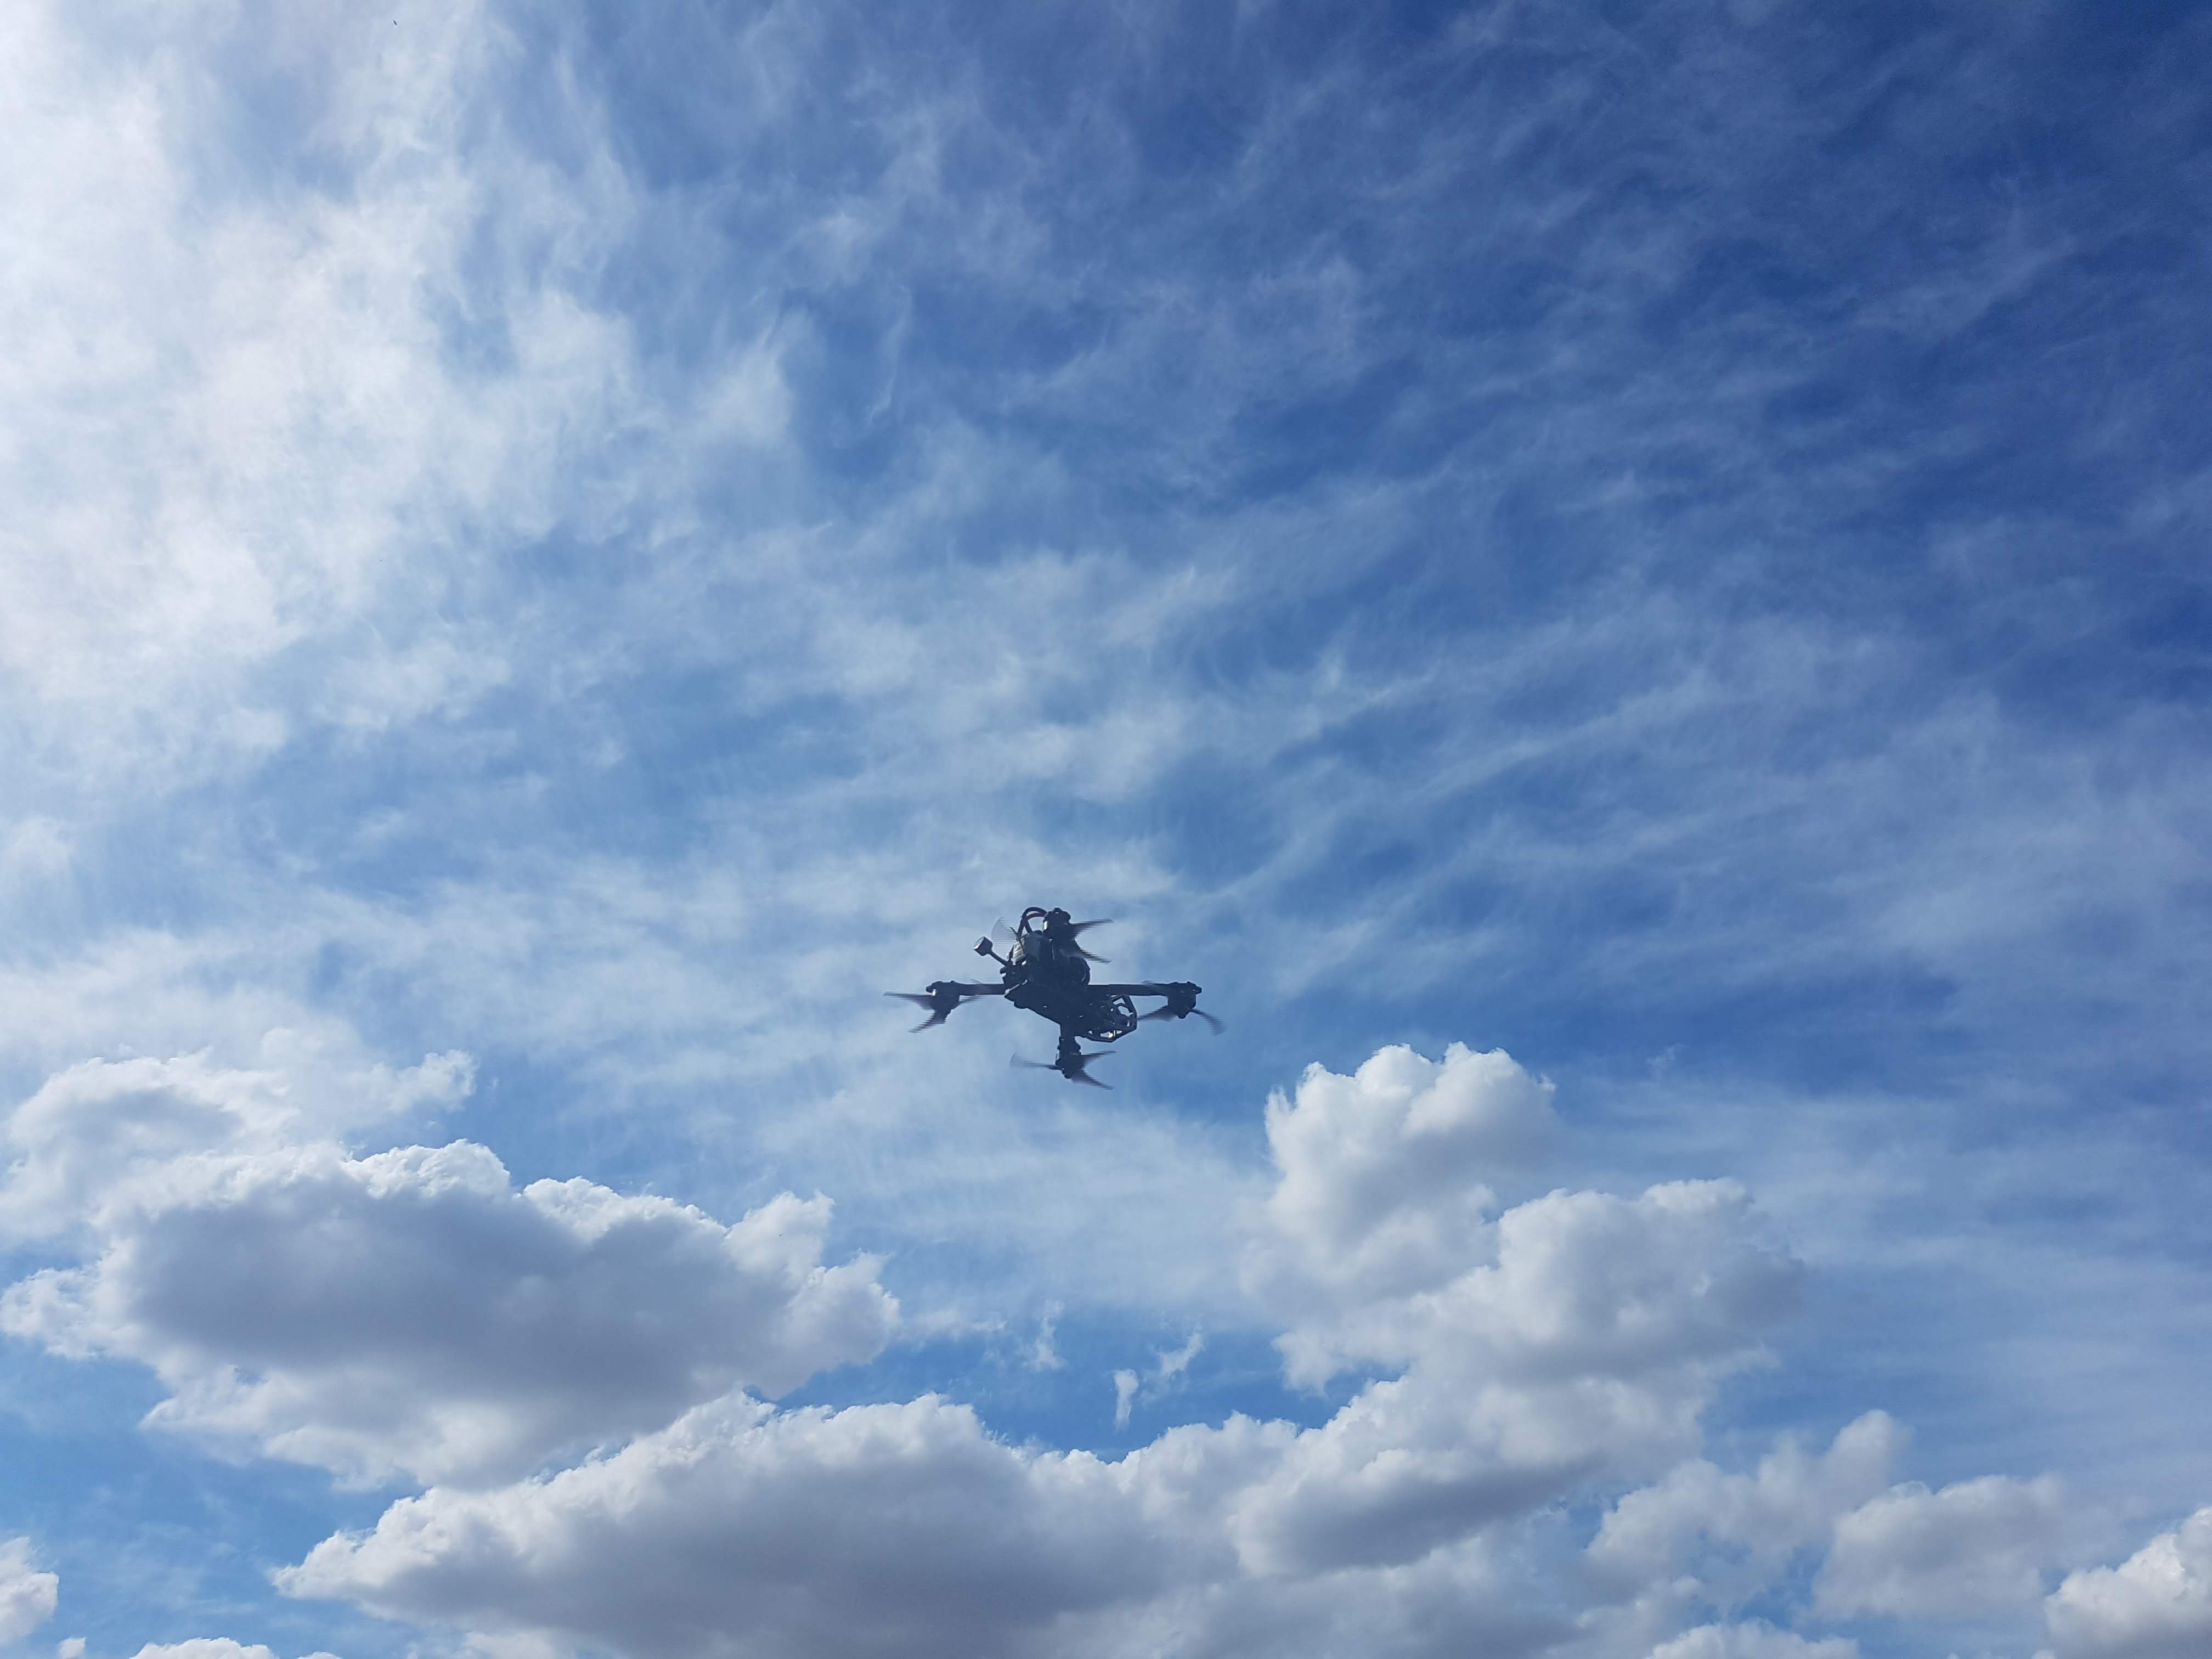
I’ll leave you all with these stills of Bing in the air, just to prove that it actually can fly:
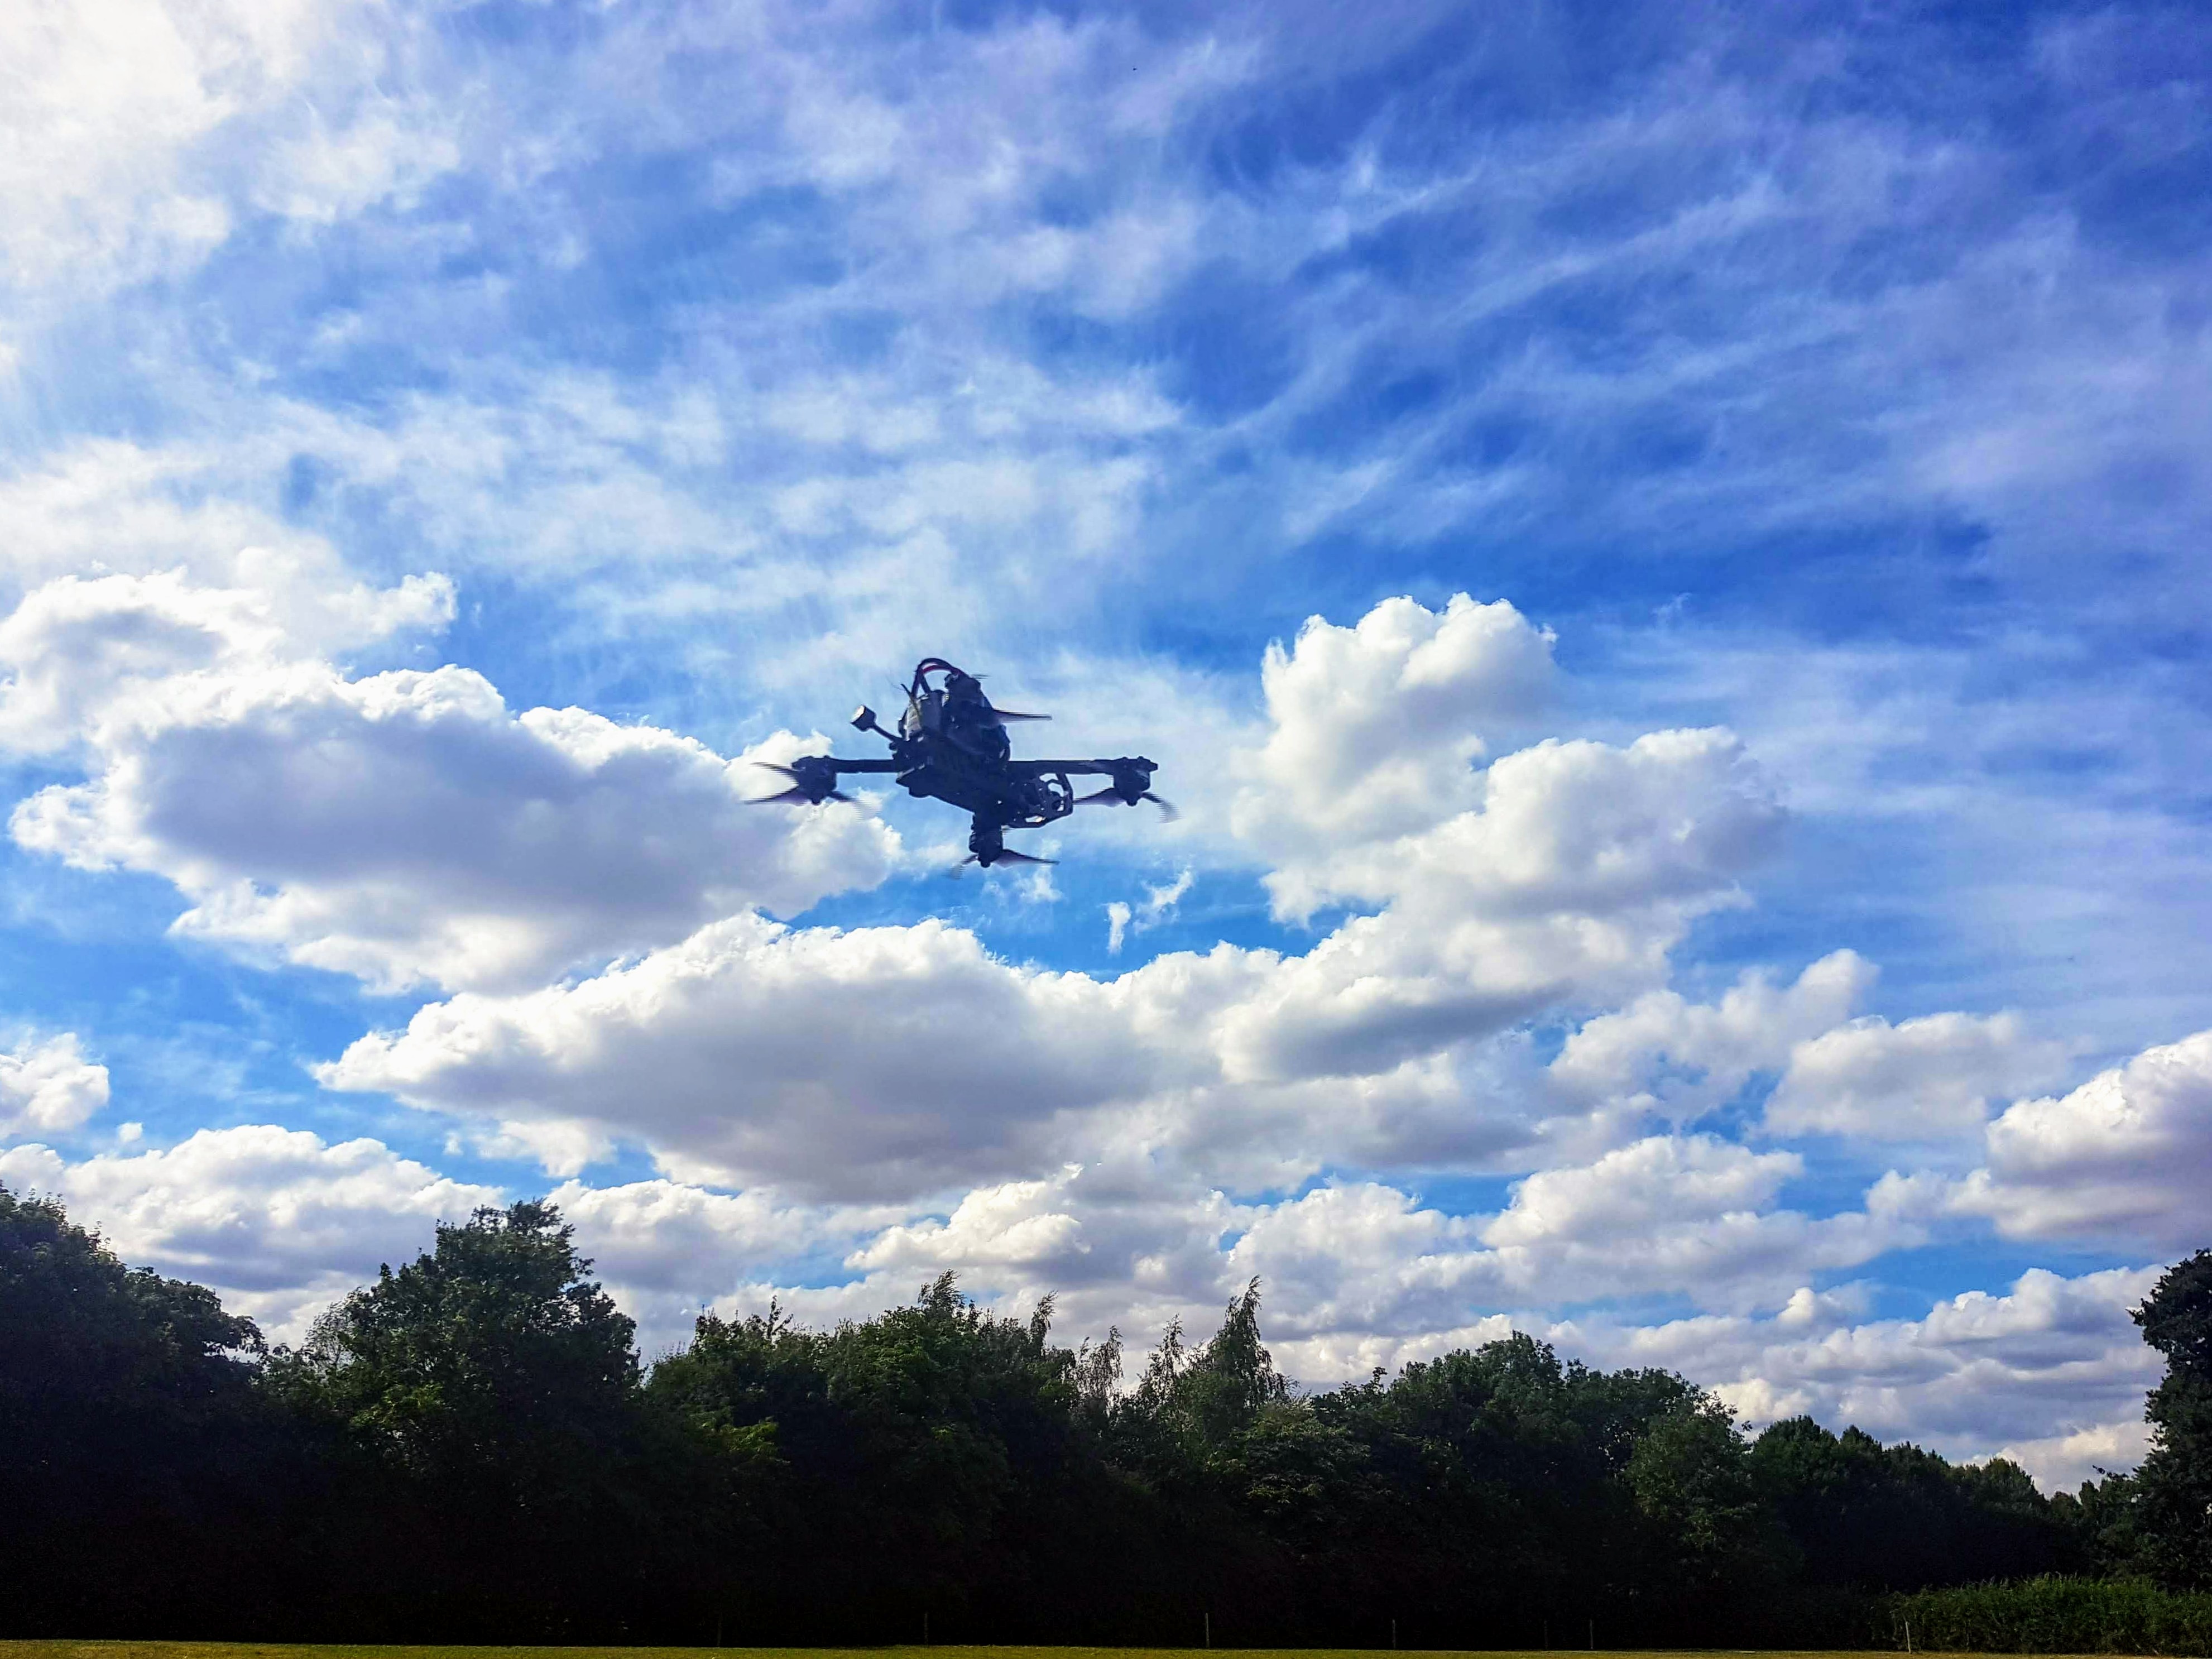
Happy flying all!
I’m loving this sunshine ![]()
– Cam <3
 I thought it was a nice change from the norm! The battery is just covered in white electrical tape - nothing spectacular I’m afraid. The heatshrink around it kept sliding off so it was a quick fix and it looked okay so I just wrapped the whole thing - it looks a bit worse for wear now though. I don’t know if it’s worth doing to be honest, the extra protection it gives isn’t much, but it’s up to you, it’s not caused any harm as far as I can tell either!


