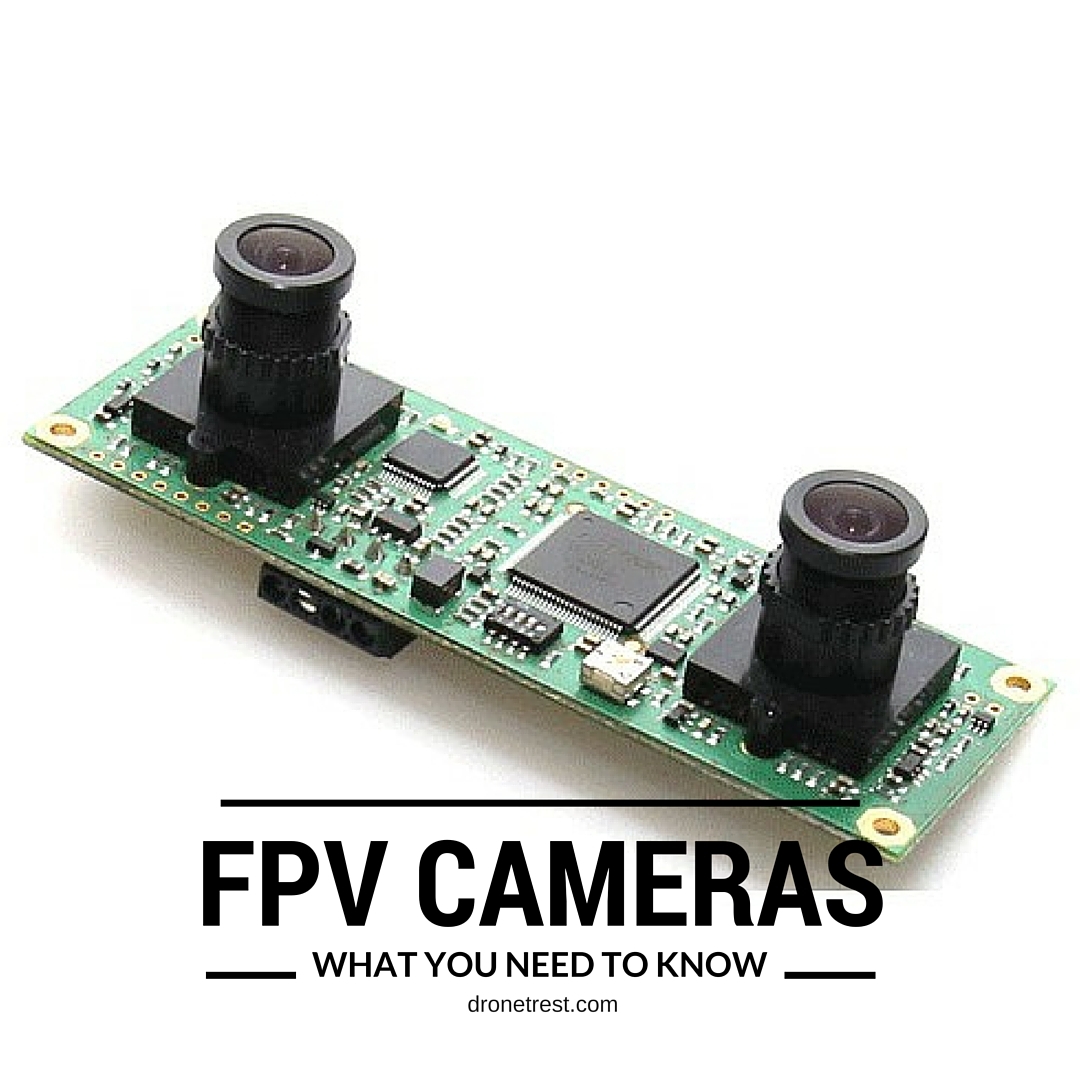
FPV cameras are small, lightweight and cheap, and are mounted onto your aircraft to send real time video back down to you via a video transmitter. In this guide I will discuss all the things you need to care about when choosing, and using a FPV camera with your drone.
Why use a dedicated FPV camera?
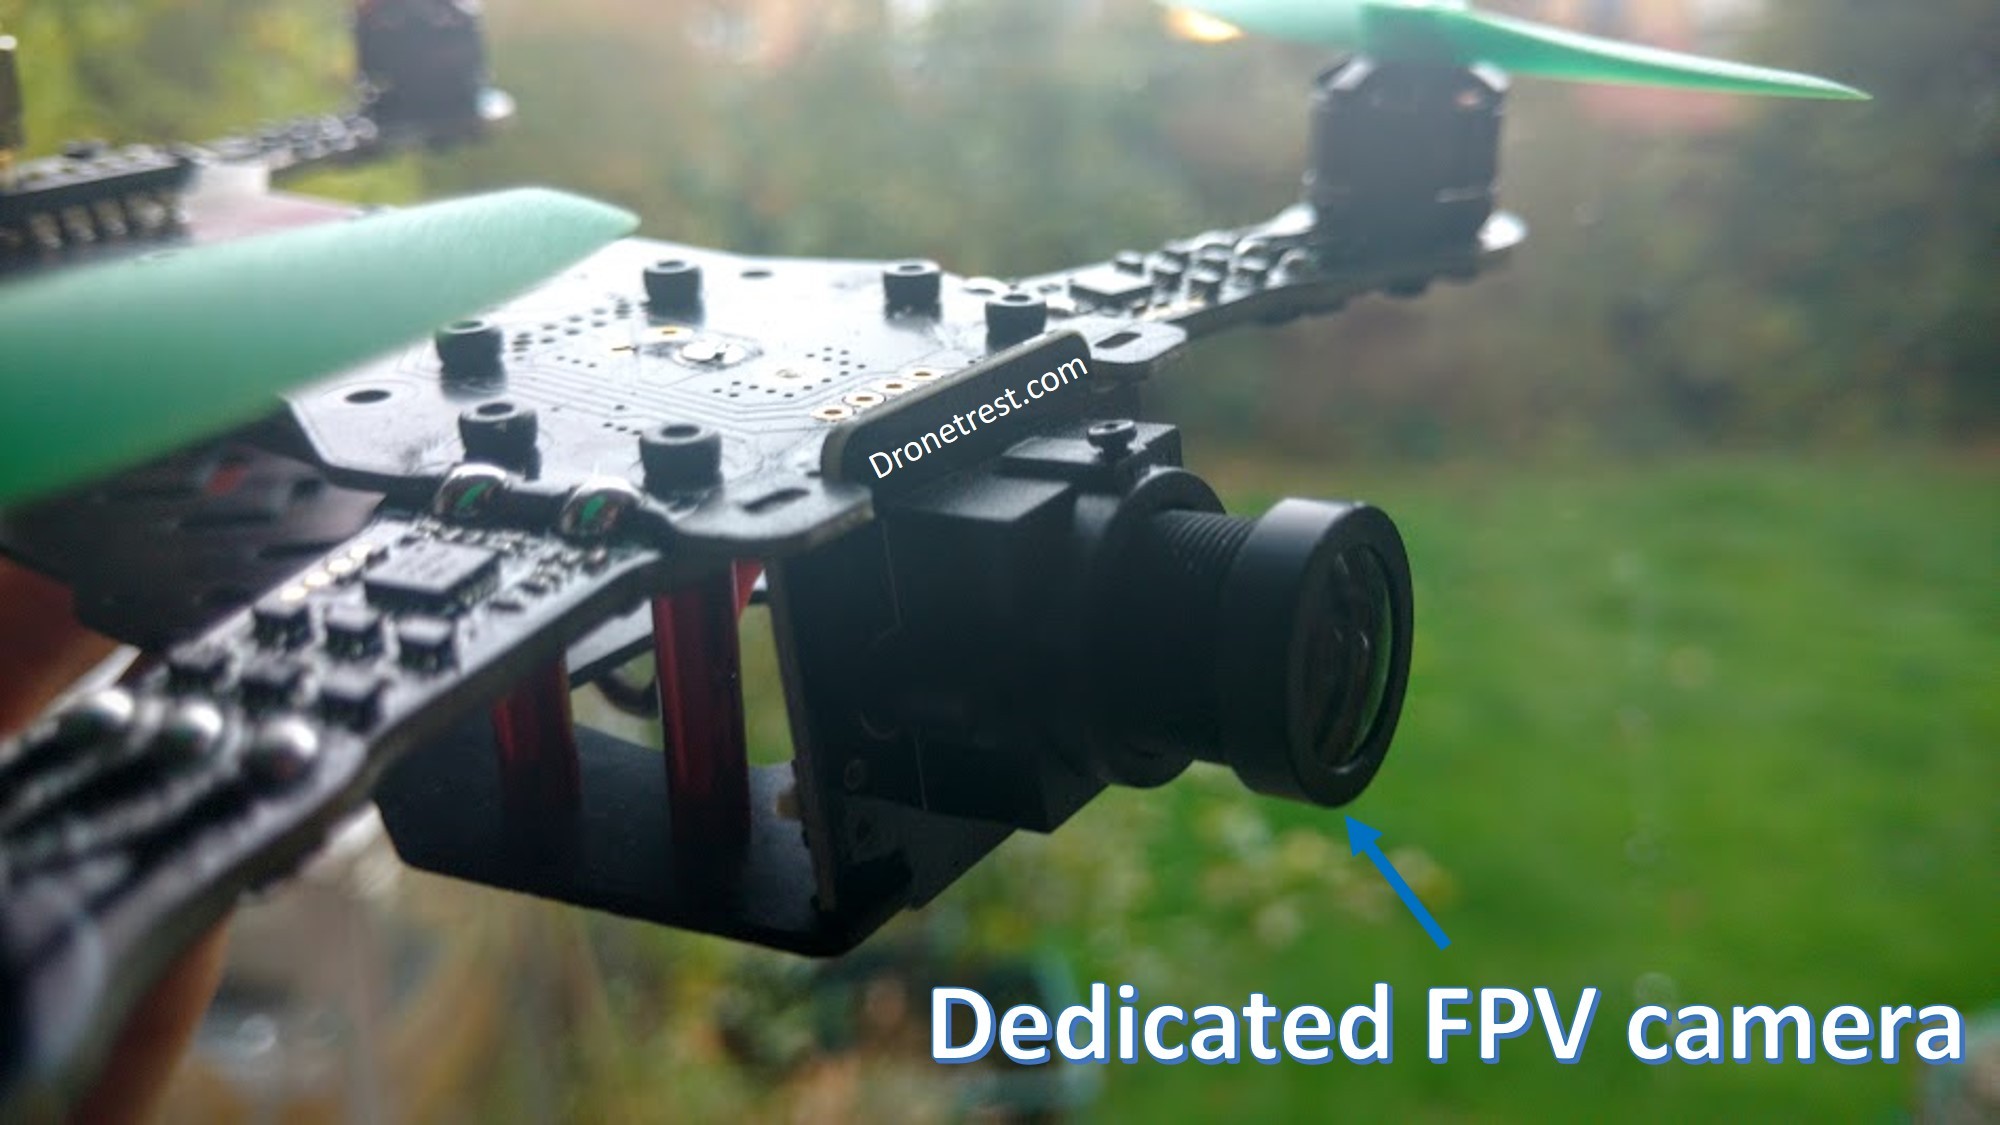
If you are already using another HD camera on your drone such as a gopro, foxeer legend, or runcam HD you can just connect your video transmitter directly to these cameras to get a live video feed. This is fairly common for most aerial photography drones as it lets you see what is in frame of your camera before you record or take the photo. However the downside of using your action camera for FPV is that they all have latency issues. Although their latency typically around 100-200ms is hardly noticeable with general flying, this is speed is too slow for FPV racing drones. When flying at 50mph (a typical speed for an experienced FPV racer), a 100ms delay can mean your drone will travel about 1.7m before you receive the video, which could mean the difference in you missing an obstacle or hitting it By using dedicated FPV cameras your FPV system will have a much lower latency, with typical FPV systems having a latency of less than 40ms.
Did you know: FPV cameras are actually just CCTV cameras
In the rest of this guide we will assume that you have decided to use a dedicated FPV camera and will discuss the relevant aspects you should consider then using dedicated FPV cameras.
3D FPV Cameras
It is also worth noting that there ar some special 3D FPV cameras that are actualy units consistsing of two cameras next to eachother to allow for the illusion of 3D depth while flying which adds to the illusion of actually flying! An example of a great 3DR FPV camera is the nerdcam 3D as shown below.
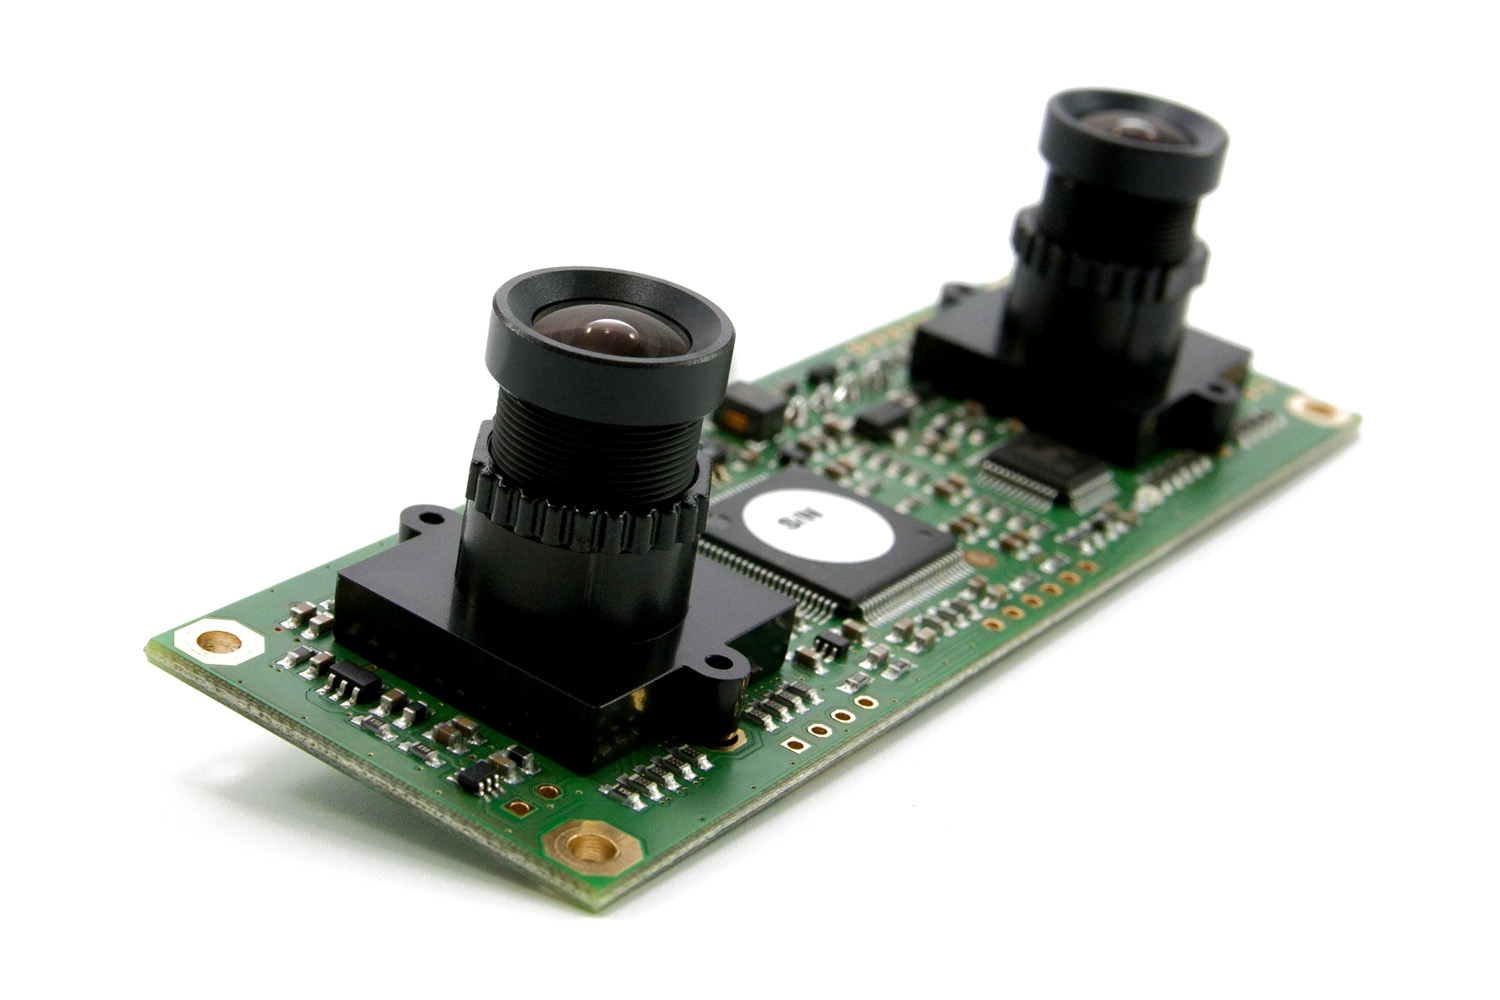
Image Sensor - CCD or CMOS
The image sensor of your FPV camera will fundamentally affect its performance. For FPV cameras CMOS and CCD sensors are used, so which is better? The short answer in terms of image quality is the CCD sensors are better. However CCD sensors are more expensive and for FPV applications the slight improvement in image quality does not always justify the extra cost.
Why CMOS Cameras are better
As mentioned the main advantage of CMOS cameras is that they are cheaper than CCD cameras and have good enough performance for FPV applications. Cost can be an important factor even if you are an ace FPV pilot as its not uncommon for you to crash your FPV racer, and since your camera is mounted in the front of your quadcopter, its usually the first thing to absorb the impact. However most decent FPV racing frames have some sort of camera protection build in to avoid this. CMOS cameras are also usually lighter and use less power than CCD which is only really important on some micro drones, but still something in their advantage. In general most drone pilots use CMOS cameras due to thier wide availability and cost. We currently recommend this 800TVL CMOS camera for FPV.
Why CCD Camera are better
CCD cameras use a global shutter which mean the entire image is captured at the same time. Compared to CMOS cameras that use a rolling shutter which captures the image pixel by pixel from top to bottom which creates a rolling effect. For FPV applications this usualy means that when you have vibrations onboard your drone it causes an unwanted jelly like effect on your videos. CCD cameras do not have this problem and usualy have a wider dynamic range which mean they perform better in very bright and very dark conditions better than CMOS cameras. If you are looking for a nice affordable CCD camera you should check out the Sony 811 CCD Camera
Latency
The latency of your FPV camera is caused by the camera processing all of the information from the image sensor. The faster the processing the lower the latency. Because action cameras like the GoPro are processing highly detailed images (up to 4K) while outputting live video to your FPV transmitter they have a lot more information to process so most HD action cameras have much higher latency values than dedicated FPV camera that run on much lower resolutions.
As discussed previously although hardly noticeable with general flying, most drone pilots prefer to use a dedicated FPV camera when flying a FPV racing drone as a 100ms delay when flying at 50 mph can mean your drone will travel about 1.7m before you receive the video.
Most FPV cameras have a latency of less than 40ms, while most action cameras will have a latency of 140ms or more.
How to measure Latency?
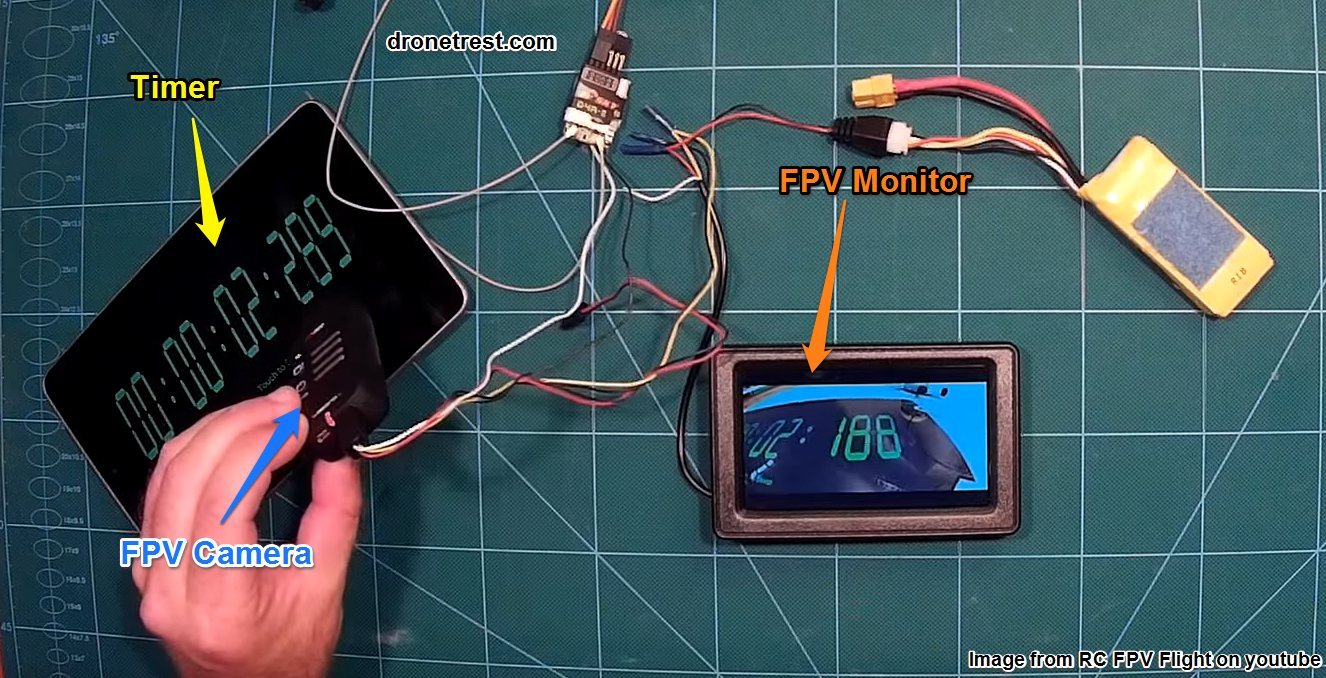
You can always measure the latency yourself of your FPV equipment. All you do is make your FPV camera face a timer/stopwatch, with its output visible on your FPV monitor. With a second camera you take a photo of both the stopwatch, and your FPV monitor in the same shot. By comparing the time visible in your photo of the timer and the FPV monitor you can see how long the signal took to travel from your FPV camera to your FPV monitor which is the latency. An example of this is shown below where the FPV camera has a latency of about 100ms.
TVL Resolution
Because most FPV cameras work on analogue video, we measure their resolution in in TV lines, or TVL rather than actual pixel counts common with digital video. TVL is a measure of the horizontal resolution of the camera. The higher the TVL resolution, the higher detail the image is that is captured by the camera. So in general its always better to get a higher TVL resolution camera if you can. That said the TVL is not only factor that dictates how good the picture is, as other things such as colour reproduction, latency, and dynamic range are also very important factors.
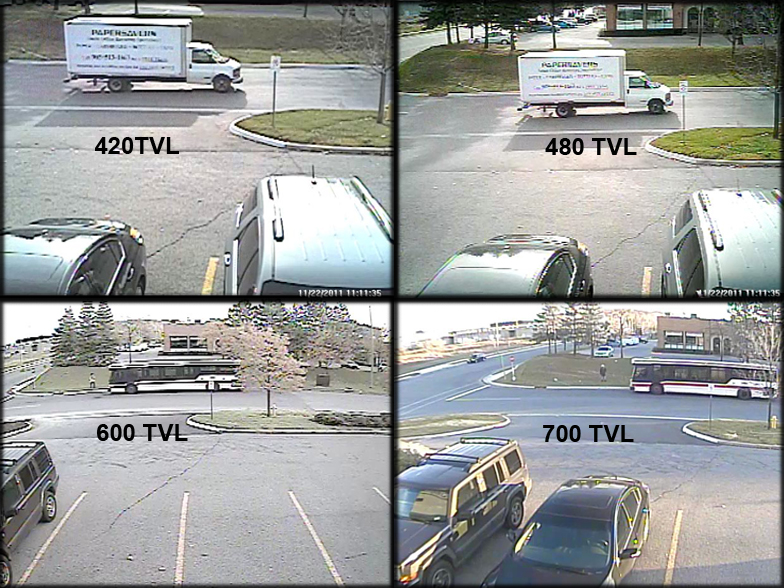
Common TVL resolutions for cameras are 420 TVL, 480 TV, 600 TVL, and 800 TVL. However there are also newer FPV cameras boasting 1000 TVL resolution.
How many TVL do I need?
There is much debate on the internet about the maximum TVL you can feed through a standard analogue FPV transmitter. However the most important factor will be the resolution of your FPV monitor/goggles. Since most FPV goggles are around VGA resolution around (800x480) once could argue there is no point getting a FPV camera above 800 TVL.
The other factor is the actual bandwidth of your FPV transmitter, where higher resolutions require more bandwidth. Since my knowledge is fairly limited in this area I am yet to find an absolute answer. But as far as I can tell, the general consensus is that the max TVL resolution you can use is 600TVL, However some people on various forums claim you can go up to 1000TVL. I cant tell the difference of resolution above 600TVL.
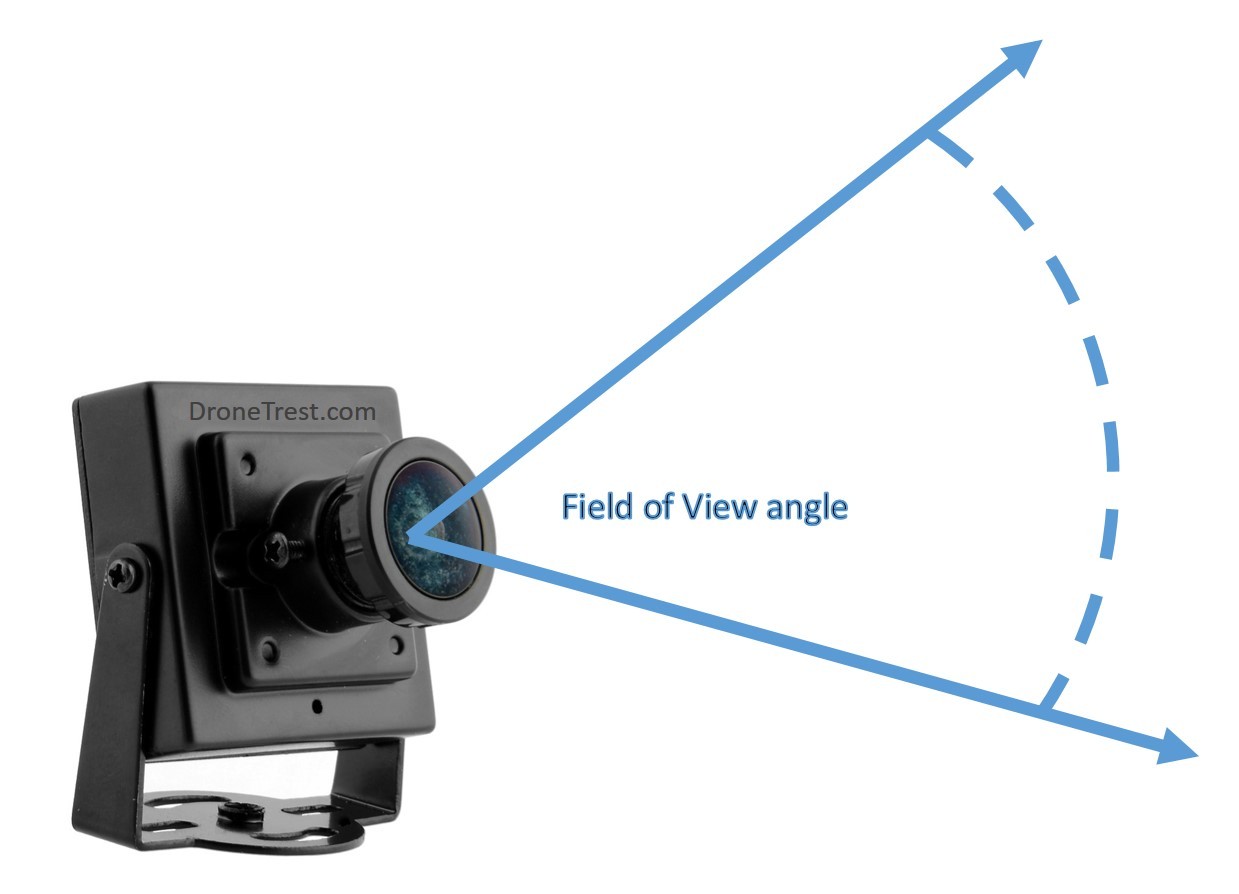
Field of View
Field of view of your camera is a measure of how much it can see around it defined by an angle as shown below.
Field of view and lenses
When buying an FPV camera sometimes they do not specify the field of view in angles, but rather by the lens focal length in millimeters. The table below can be used to see the approximate field of view for each lens. The human eye has a focal length of about 2.97 mm. However the field of few is dependant on the focal length of the lens and the camera sensor size. The table below is a rough guide, but the larger the image sensor, the smaller the field of view for a given lens.
- 1.2 mm lens has approximate 185 degree field of view
- 1.7 mm lens has approximate 170 degree field of view
- 2.1 mm lens has approximate 158 degree field of view
- 2.5 mm lens has approximate 147 degree field of view
- 2.8 mm lens has approximate 130 degree field of view
- 3.0 mm lens has approximate 127 degree field of view
- 3.6 mm lens has approximate 92 degree field of view
- 4.0 mm lens has approximate 88 degree field of view
- 6.0 mm lens has approximate 78 degree field of view
Usually for FPV applications having a higher field of view is better as it allows you to see more around you however this can sometimes distort things and the horizon is often curved. As shown below.
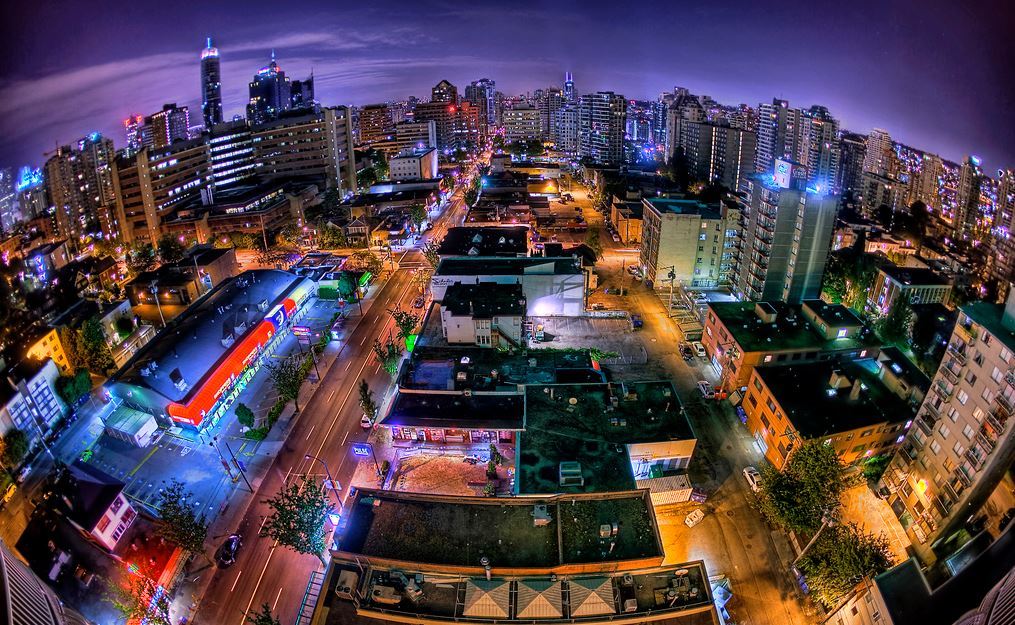
Image from Darren Stone
What Field of view should I use?
Some pilots prefer to use narrow field of view, while others prefer to use wider field of views. At the end of the day my preference is wider field of view but its best to play around as some FPV cameras allow you to swap out the lens to adjust the field of view.
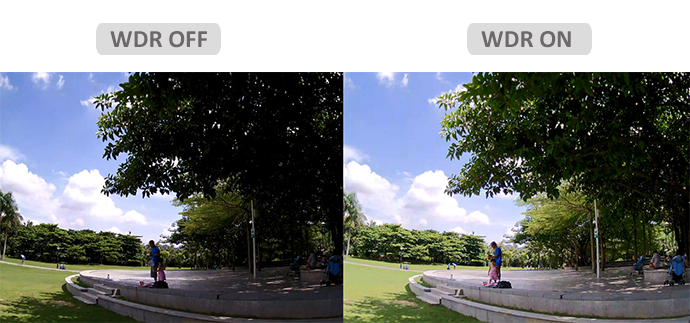
Dynamic Range
The dynamic range of your FPV camera dictates how well your camera can record the details in very dark and very bright areas of an image. An example of this is shown below, when wide dynamic range is off the shadow areas show little detail compared to when WDR is enabled.
This is important and very noticeable for FPV flying as you will usually be looking at the horizon. If your camera has low dynamic range it will focus above the horizon making the ground black, not letting you see any details. A simple solution to this is to just tilt your camera slightly downwards so you always see more ground so the camera will adjust the exposure to make the ground visible with the sky a little washed out.
The dynamic range of a camera is generally not published, but nowadays most FPV cameras are set to have wide dynamic range enabled out of the box, but its best to ask the shop or see the reviews of a specific FPV camera before buying it.
If you have any questions just ask them below and I will try my best to answer you. Otherwise check out our FPV gear guide for more about all the other components in your FPV setup.
IR Cut / IR Sensitive FPV cameras
In general most cameras you by, be it for FPV, or for general recording have an IR cut filter built into them. An IR cut filter block out any infrared light from reaching the camera sensor as IR light can cause the video to look abit washed out. By adding an IR cut filter to the camera the vidoes have much brighter and vivid colours and its almost always better to get a FPV camera with an IR cut filter (chances are if the product does not mention this its because it has one built in as its an industry standard.
One a side note, some specialist mapping cameras have IR sensitive filters to help survey crops (called NVDI analysis), just in case you wanted to know
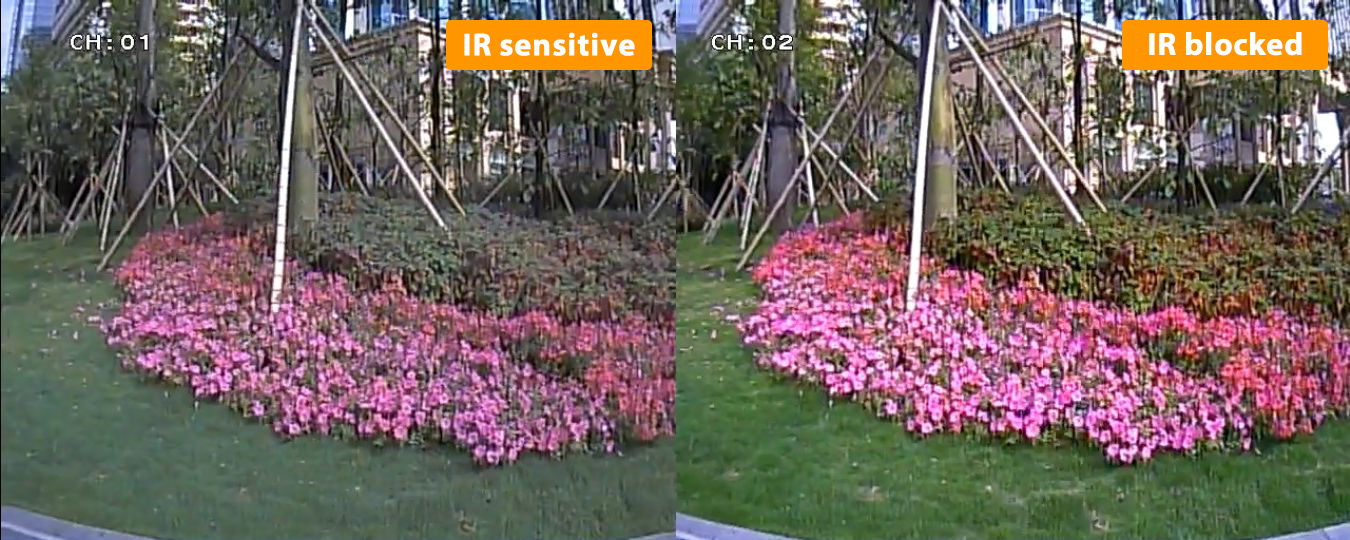
That said there are some special situations when you want to have an IR sensitive camera, particularity at low light. IR sensitive cameras allow you to see better during dusk and dawn situations as they allow more light into the camera, however this is at the comprimise of poorer colour quality. A comparison between the two are shown below where you can see the IR blocked camera has much more vivid colours.
A great FPV camera that lets you choose between IR cut and IR sensitive versions is the runcam swift.
Night/Starlight Cameras
As discussed, when using cameras in low light, having an IR senstive filter can improve things. So you can also get a few specialist cameras that are designed to work in darker conditions allowing you to fly during sunset/sunrise when its darker. In many countries it is not legal to fly at night, but it is possible. There are two options here. The first is to use a starlight FPV camera which has a very low lux sensitivity enabling it to work in very low lighting conditions. The other option is to use a camera with no IR filter and use some IR LED lights to illuminate in-front of your FPV aircraft, however this only world well when flying low to the ground close to other objects that the IR light can bounce off on.
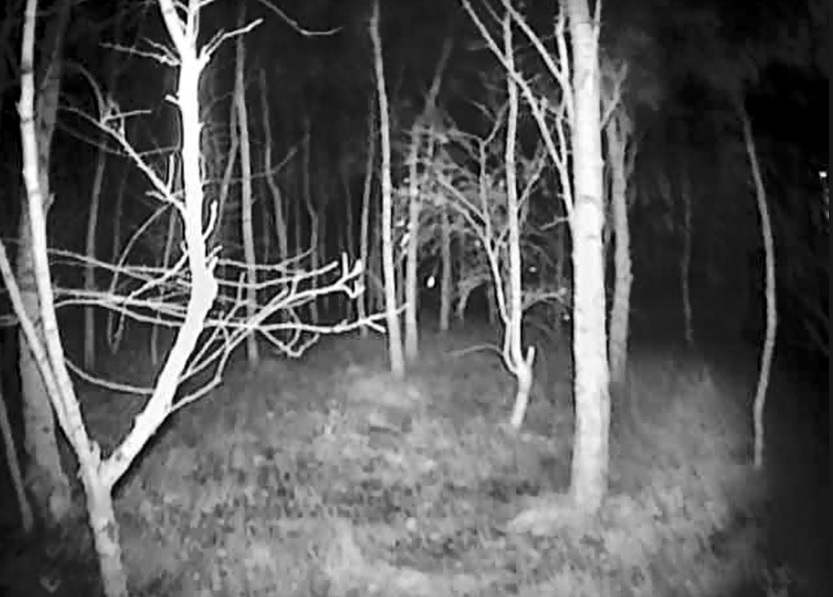
As shown above you can still see at night when using an IR LED as a torch, the image is black and white but the IR light reflects off most surfaces making them visible. Lets just hope nothing jumps out of the shadows!
Have any questions?
So that covers just about everything you need to know about FPV cameras, if you have any questions or feel I did not explain something well, or you have some of your own advice to add please let me know!
To learn more about FPV, check out some of our other FPV guides such as ourFPV transmitter guide, or our FPV gear guide